Skip to content

Getting Started with AWS on Prowler Cloud

Set up your AWS account to enable security scanning using Prowler Cloud.

Requirements

To configure your AWS account, you’ll need:

  1. Access to Prowler Cloud
  2. Properly configured AWS credentials (either static or via an assumed IAM role)

Step 1: Get Your AWS Account ID

  1. Log in to the AWS Console
  2. Locate your AWS account ID in the top-right dropdown menu

Account ID detail


Step 2: Access Prowler Cloud

  1. Navigate to Prowler Cloud
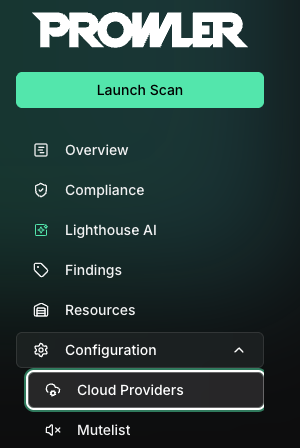
  2. Go to Configuration > Cloud Providers

    Cloud Providers Page

  3. Click Add Cloud Provider

    Add a Cloud Provider

  4. Select Amazon Web Services

    Select AWS Provider

  5. Enter your AWS Account ID and optionally provide a friendly alias

    Add account ID

  6. Choose your preferred authentication method (next step)

    Select auth method


Step 3: Set Up AWS Authentication

Before proceeding, choose your preferred authentication mode:

Credentials

  • Quick scan as current user ✅
  • No extra setup ✅
  • Credentials time out ❌

Assumed Role

  • Preferred Setup ✅
  • Permanent Credentials ✅
  • Requires access to create role ❌

Assume Role Overview

This method grants permanent access and is the recommended setup for production environments.
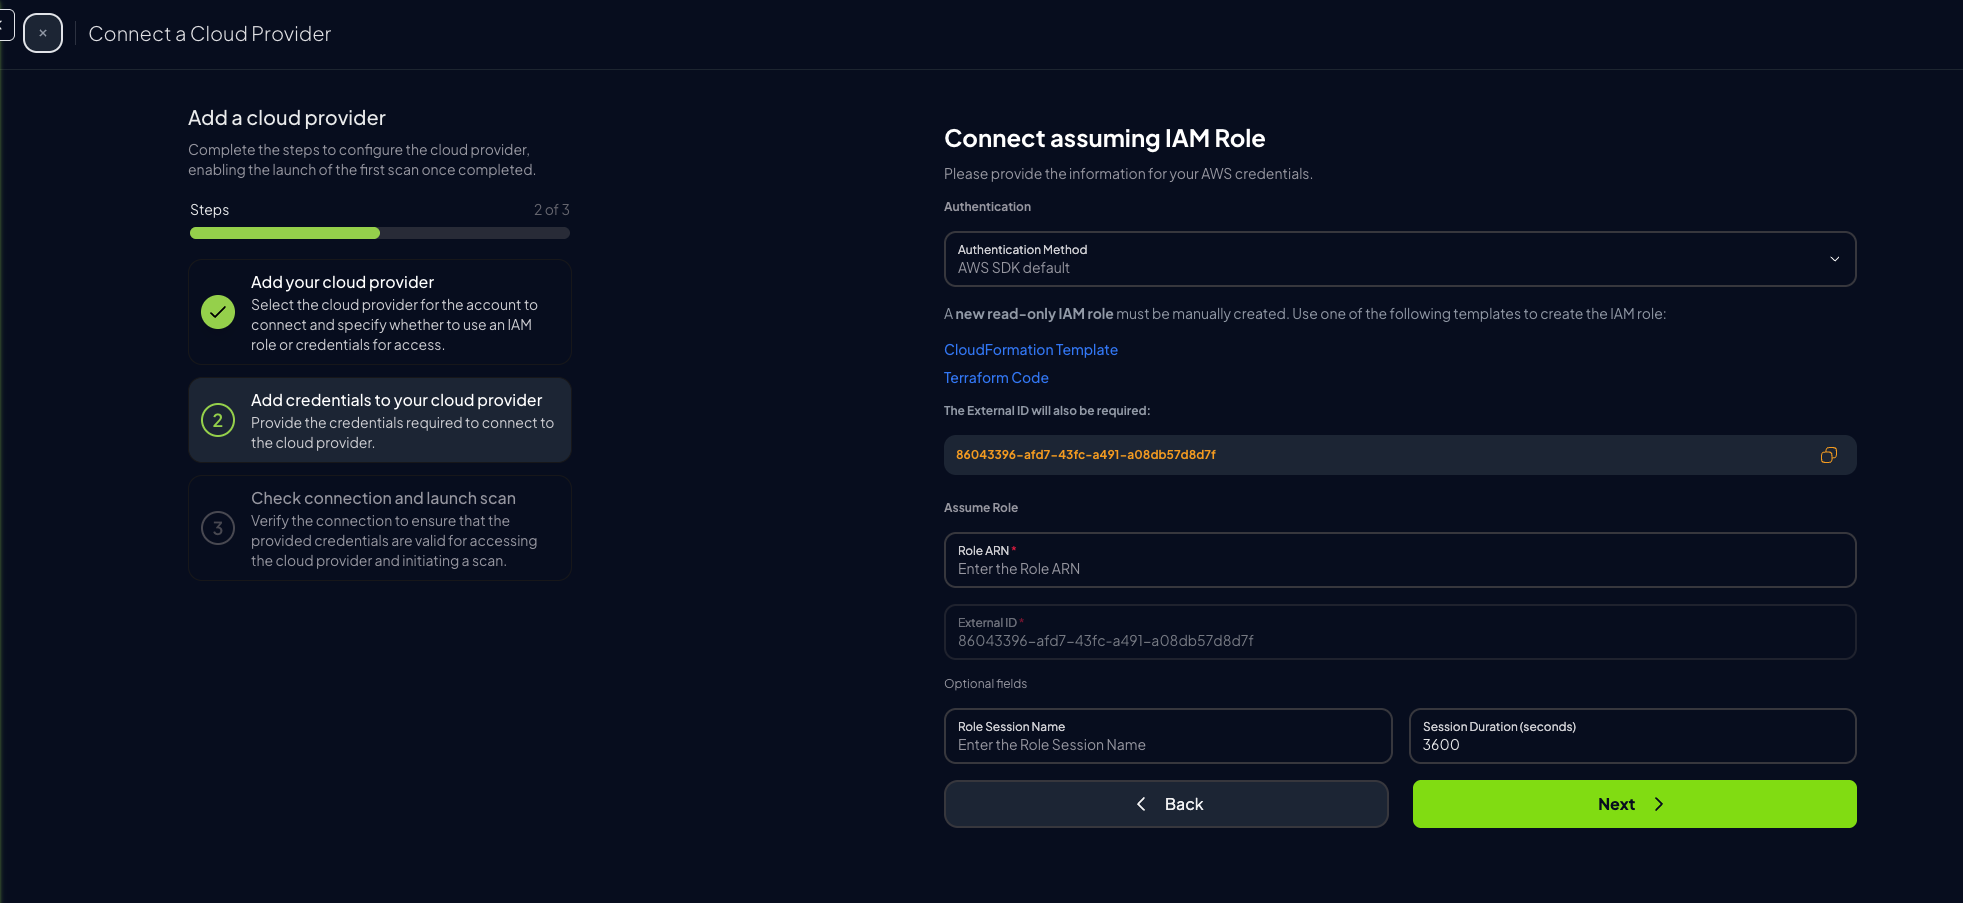
  1. Download the Prowler Scan Role Template

    Prowler Scan Role Template

    Download Role Template

  2. Open the AWS Console, search for CloudFormation

    CloudFormation Search

  3. Go to Stacks and click Create stack > With new resources (standard)

    Create Stack

  4. In Specify Template, choose Upload a template file and select the downloaded file

    Upload a template file Upload file from downloads

  5. Click Next, provide a stack name and the External ID shown in the Prowler Cloud setup screen

    External ID Stack Data

  6. Acknowledge the IAM resource creation warning and proceed

    Stack Creation Second Step

  7. Click Submit to deploy the stack

    Click on submit

To provision the scan role using Terraform:

  1. Run the following commands:

    terraform init
    terraform plan
    terraform apply
    
  2. During plan and apply, you will be prompted for the External ID, which is available in the Prowler Cloud UI:

    Get External ID

💡 Note: Terraform will use the AWS credentials of your default profile.


Finish Setup with Assume Role

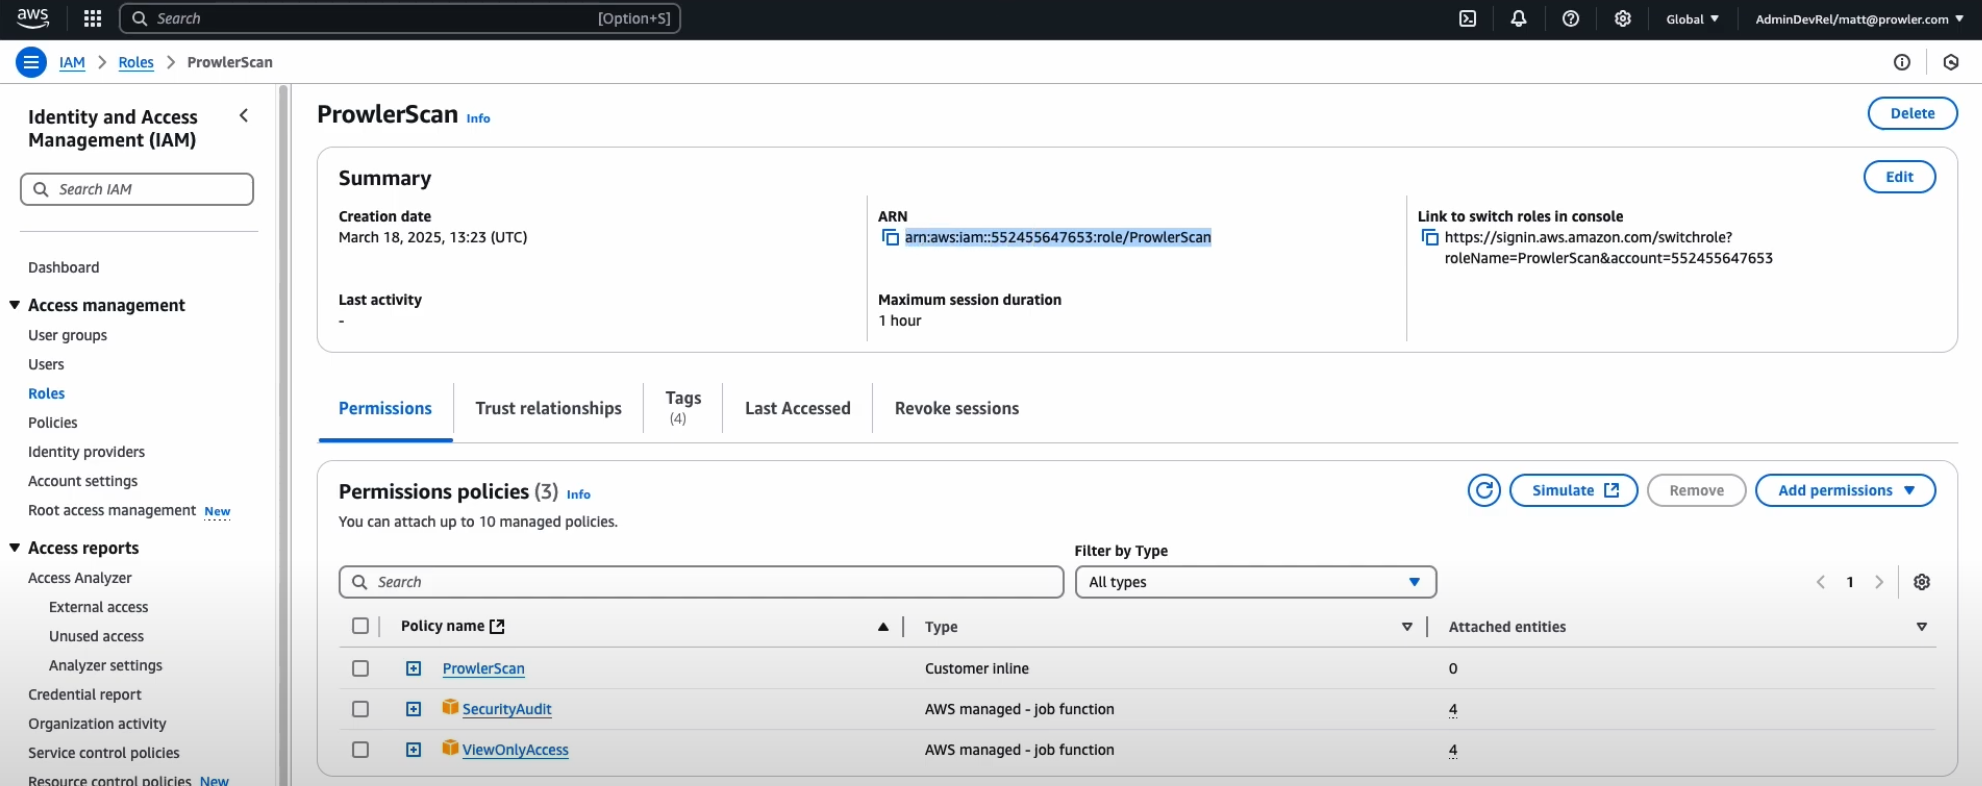
  1. Once the role is created, go to the IAM Console, click on the ProwlerScan role to open its details:

    ProwlerScan role info

  2. Copy the Role ARN

    New Role Info

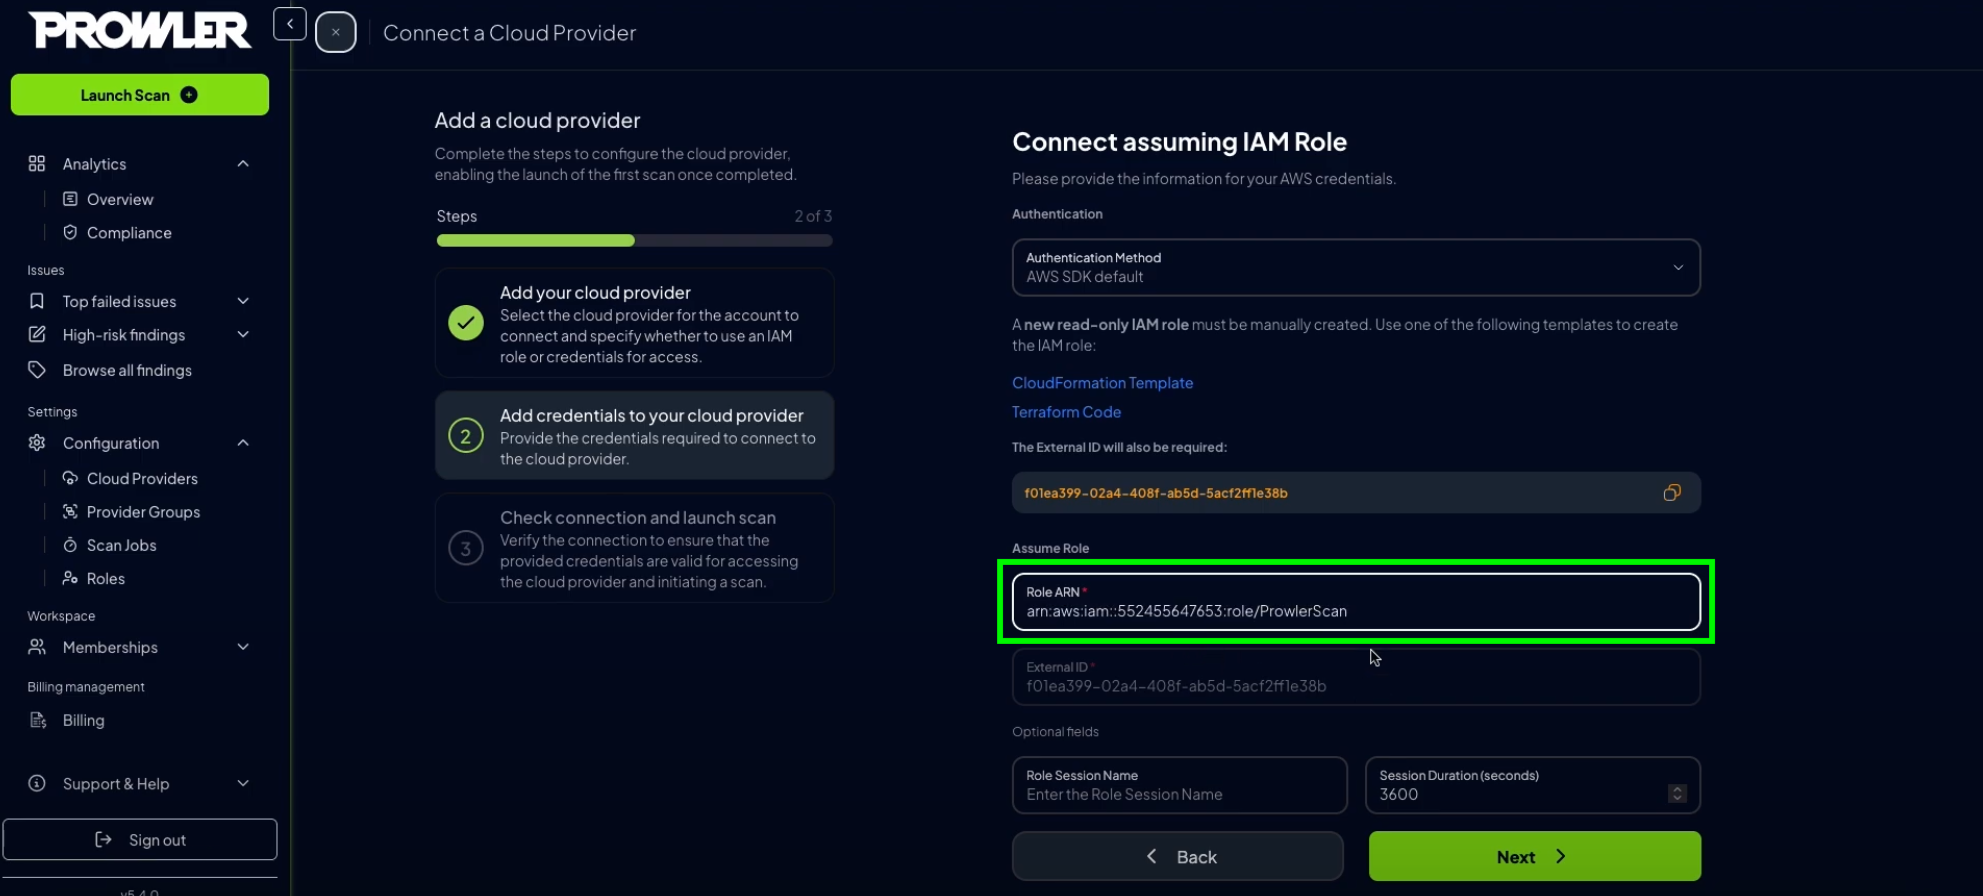
  3. Paste the ARN into the corresponding field in Prowler Cloud

    Input the Role ARN

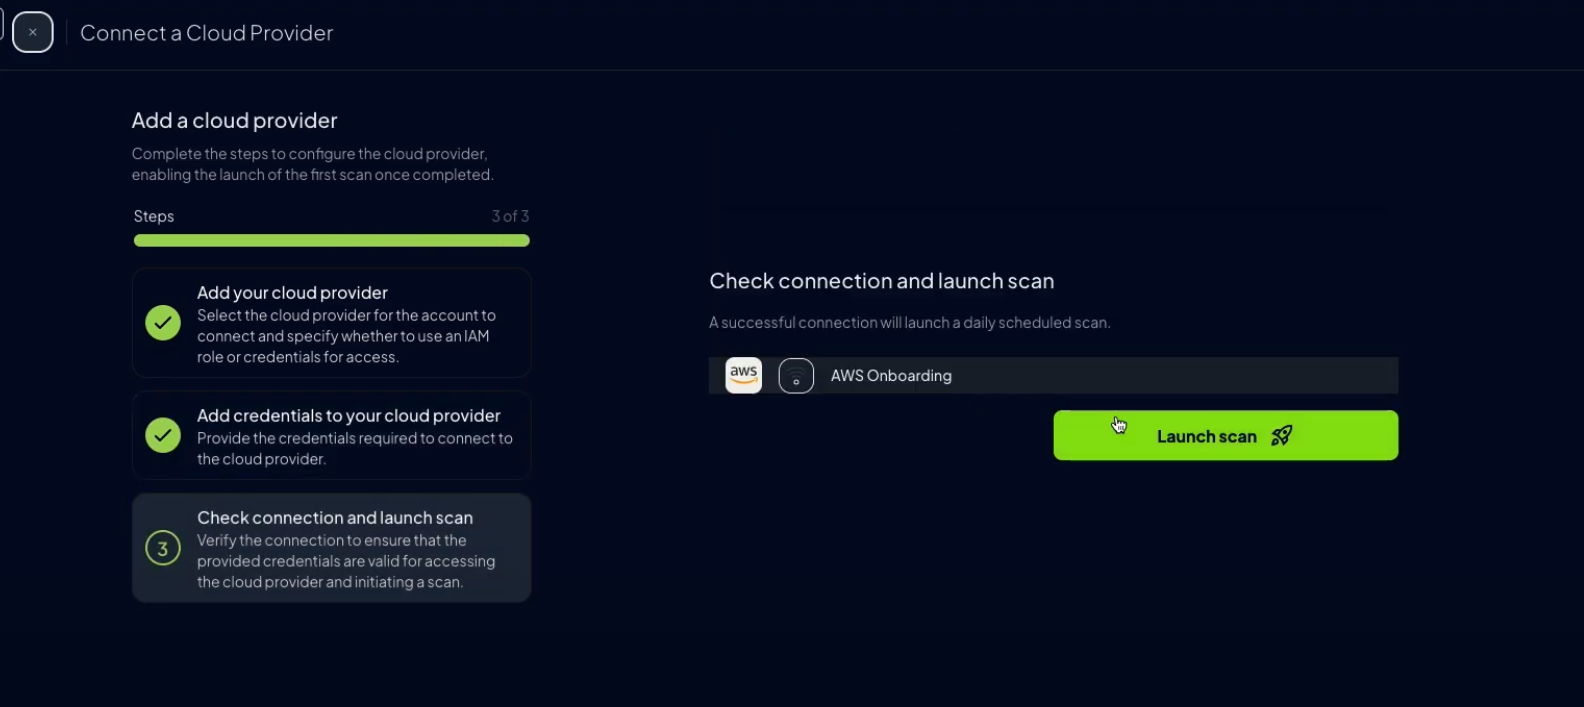
  4. Click Next, then Launch Scan

    Next button in Prowler Cloud Launch Scan


🔑 Credentials (Static Access Keys)

You can also configure your AWS account using static credentials (not recommended for long-term use):
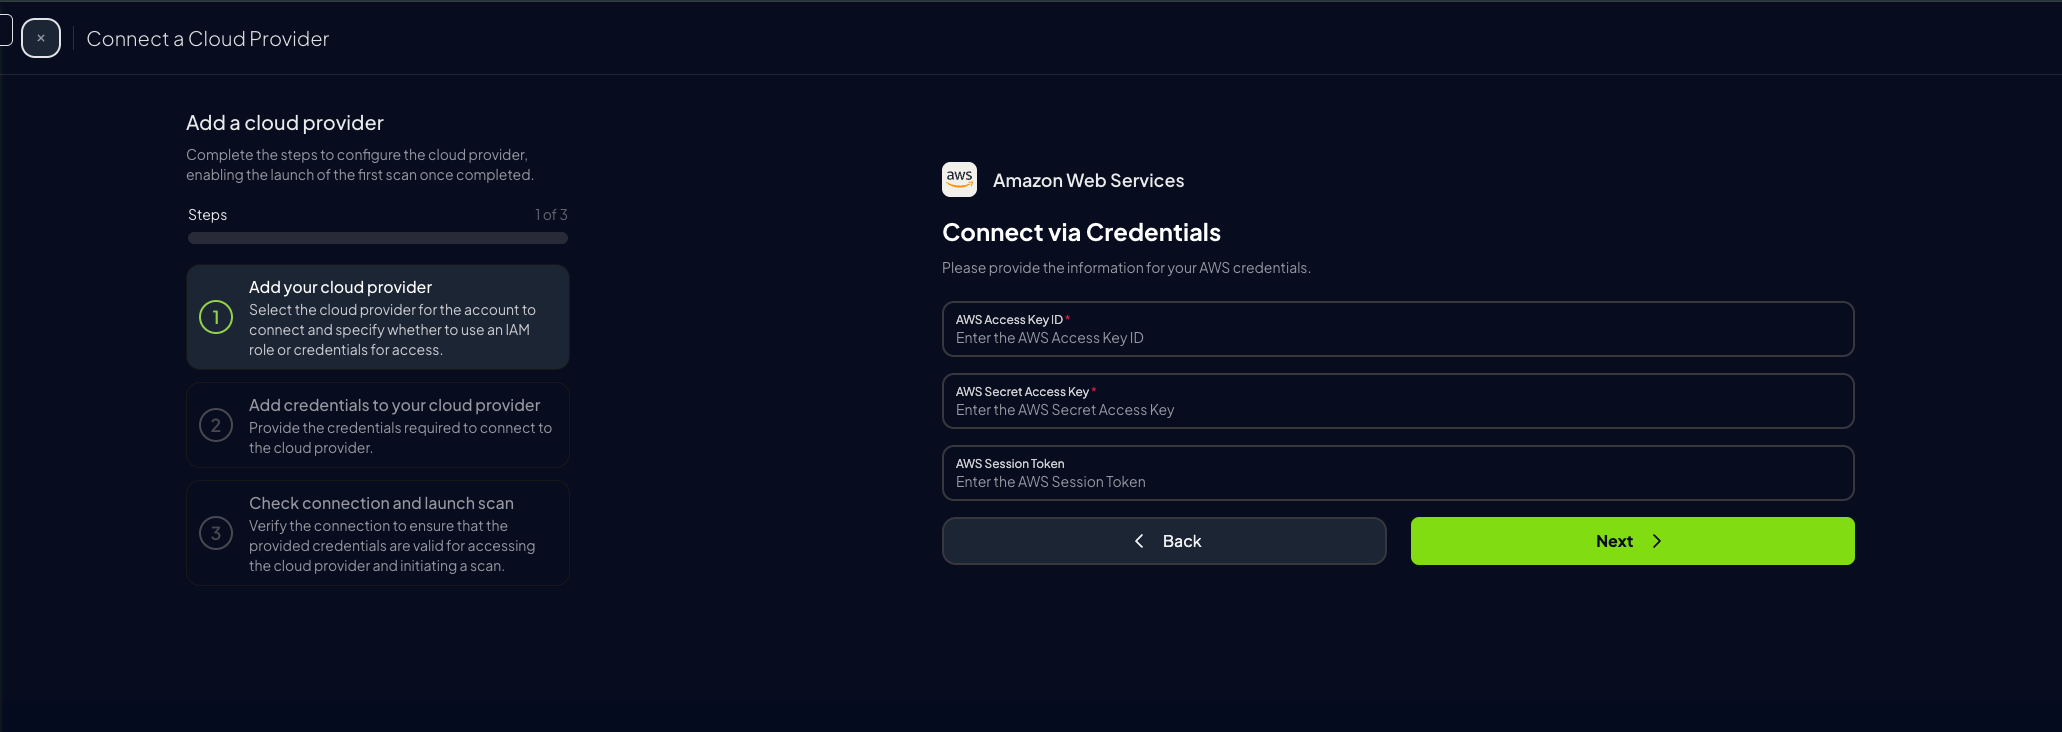
Connect via credentials

  1. Go to the AWS Console, open CloudShell

    AWS CloudShell

  2. Run:

    aws iam create-access-key
    
  3. Copy the output containing:

    • AccessKeyId
    • SecretAccessKey

    CloudShell Output

⚠️ Save these credentials securely and paste them into the Prowler Cloud setup screen.

You can use your AWS Access Portal or the CLI:

  1. Retrieve short-term credentials for the IAM identity using this command:

    aws sts get-session-token --duration-seconds 900
    
    Note

    Check the aws documentation here

  2. Copy the output containing:

    • AccessKeyId
    • SecretAccessKey

    Sample output:

    {
        "Credentials": {
            "AccessKeyId": "ASIAIOSFODNN7EXAMPLE",
            "SecretAccessKey": "wJalrXUtnFEMI/K7MDENG/bPxRfiCYzEXAMPLEKEY",
            "SessionToken": "AQoEXAMPLEH4aoAH0gNCAPyJxz4BlCFFxWNE1OPTgk5TthT+FvwqnKwRcOIfrRh3c/LTo6UDdyJwOOvEVPvLXCrrrUtdnniCEXAMPLE/IvU1dYUg2RVAJBanLiHb4IgRmpRV3zrkuWJOgQs8IZZaIv2BXIa2R4OlgkBN9bkUDNCJiBeb/AXlzBBko7b15fjrBs2+cTQtpZ3CYWFXG8C5zqx37wnOE49mRl/+OtkIKGO7fAE",
            "Expiration": "2020-05-19T18:06:10+00:00"
        }
    }
    

⚠️ Save these credentials securely and paste them into the Prowler Cloud setup screen.

Complete the form in Prowler Cloud and click Next

Filled credentials page

Click Launch Scan

Launch Scan