 About Us
Prowler Cloud
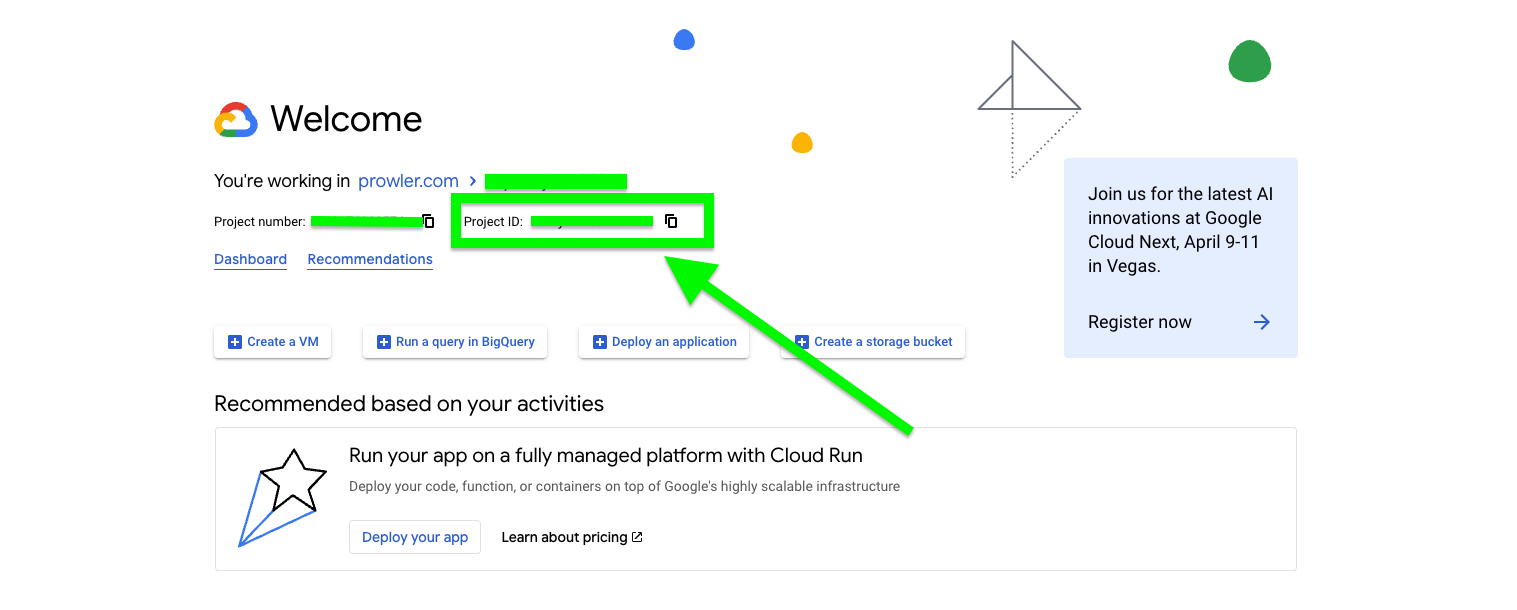
Step 1: Get the GCP Project ID
- Go to the GCP Console
- Locate the Project ID on the welcome screen
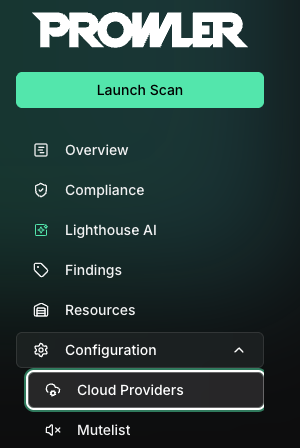
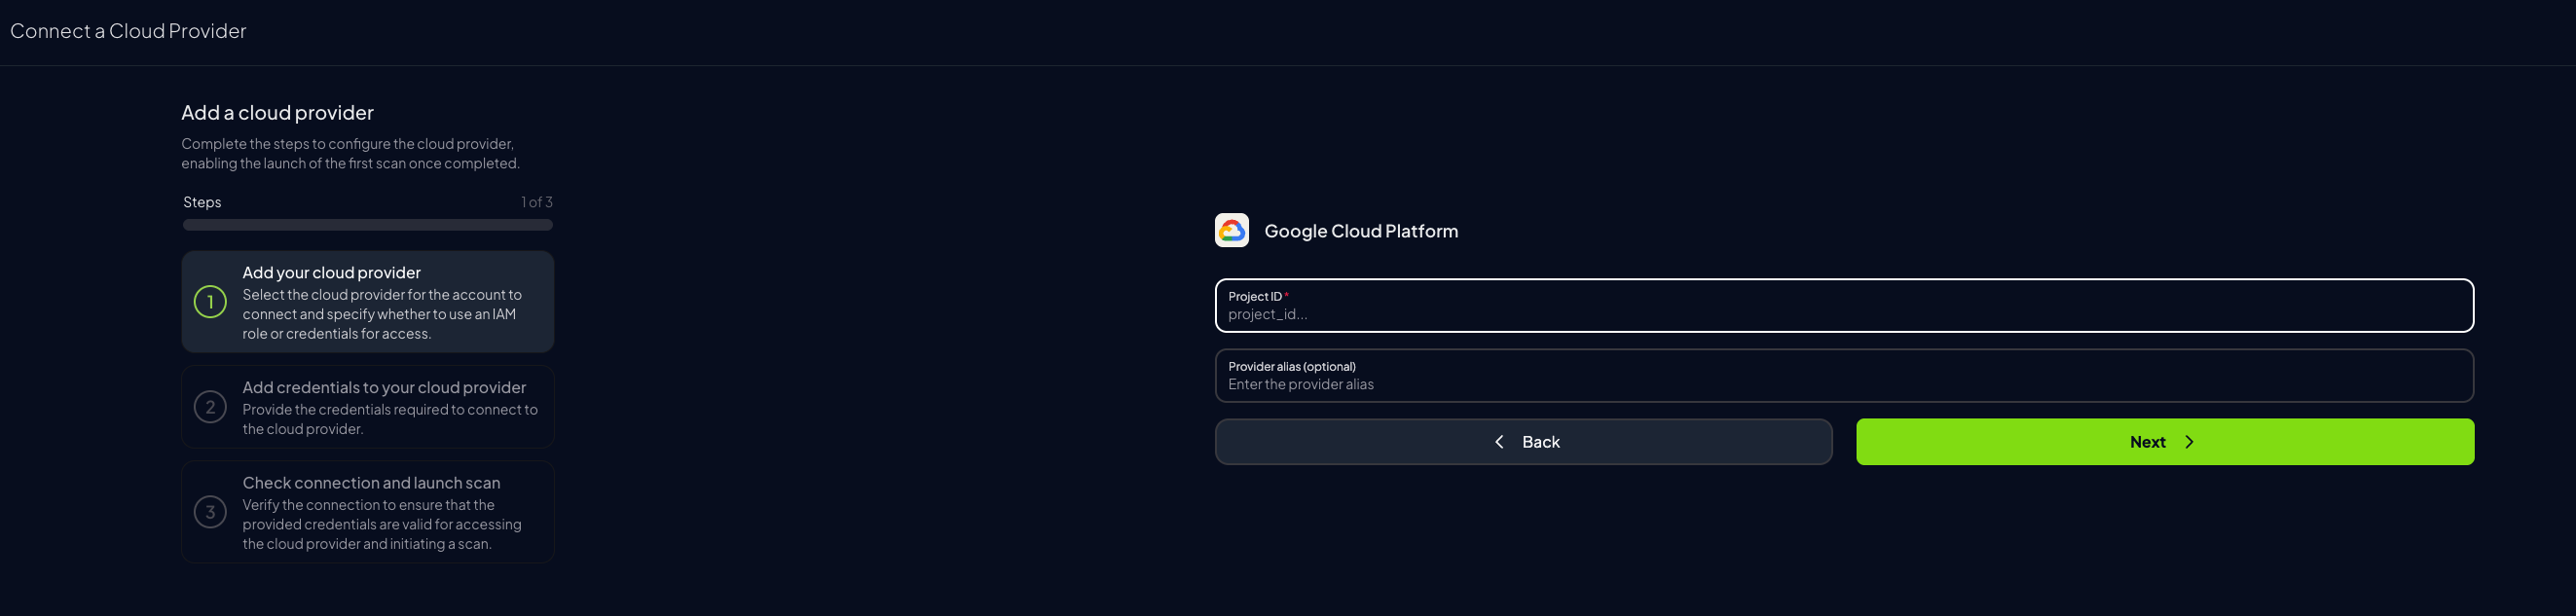
Step 2: Access Prowler Cloud
- Navigate to Prowler Cloud or launch Prowler App
-
Go to “Configuration” > “Providers”
-
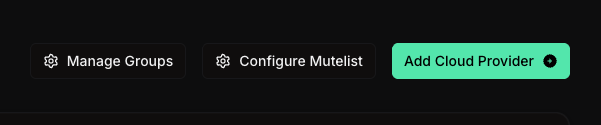
Click “Add Provider”
-
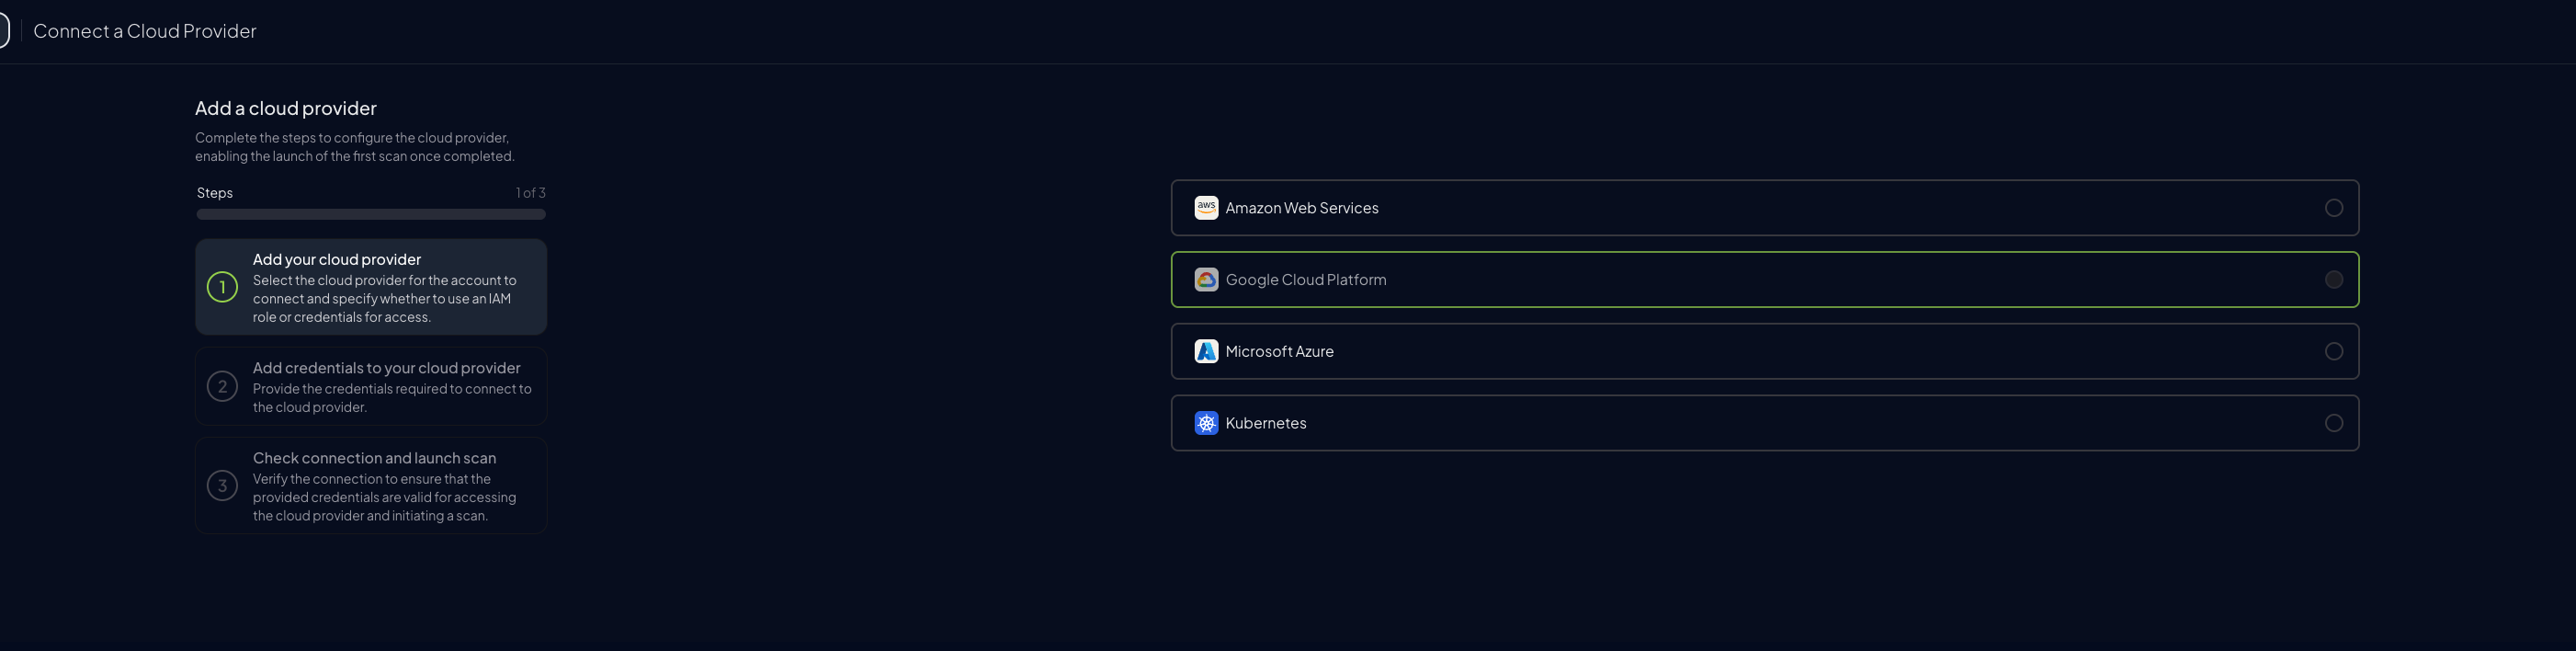
Select “Google Cloud Platform”
-
Add the Project ID and optionally provide a provider alias, then click “Next”
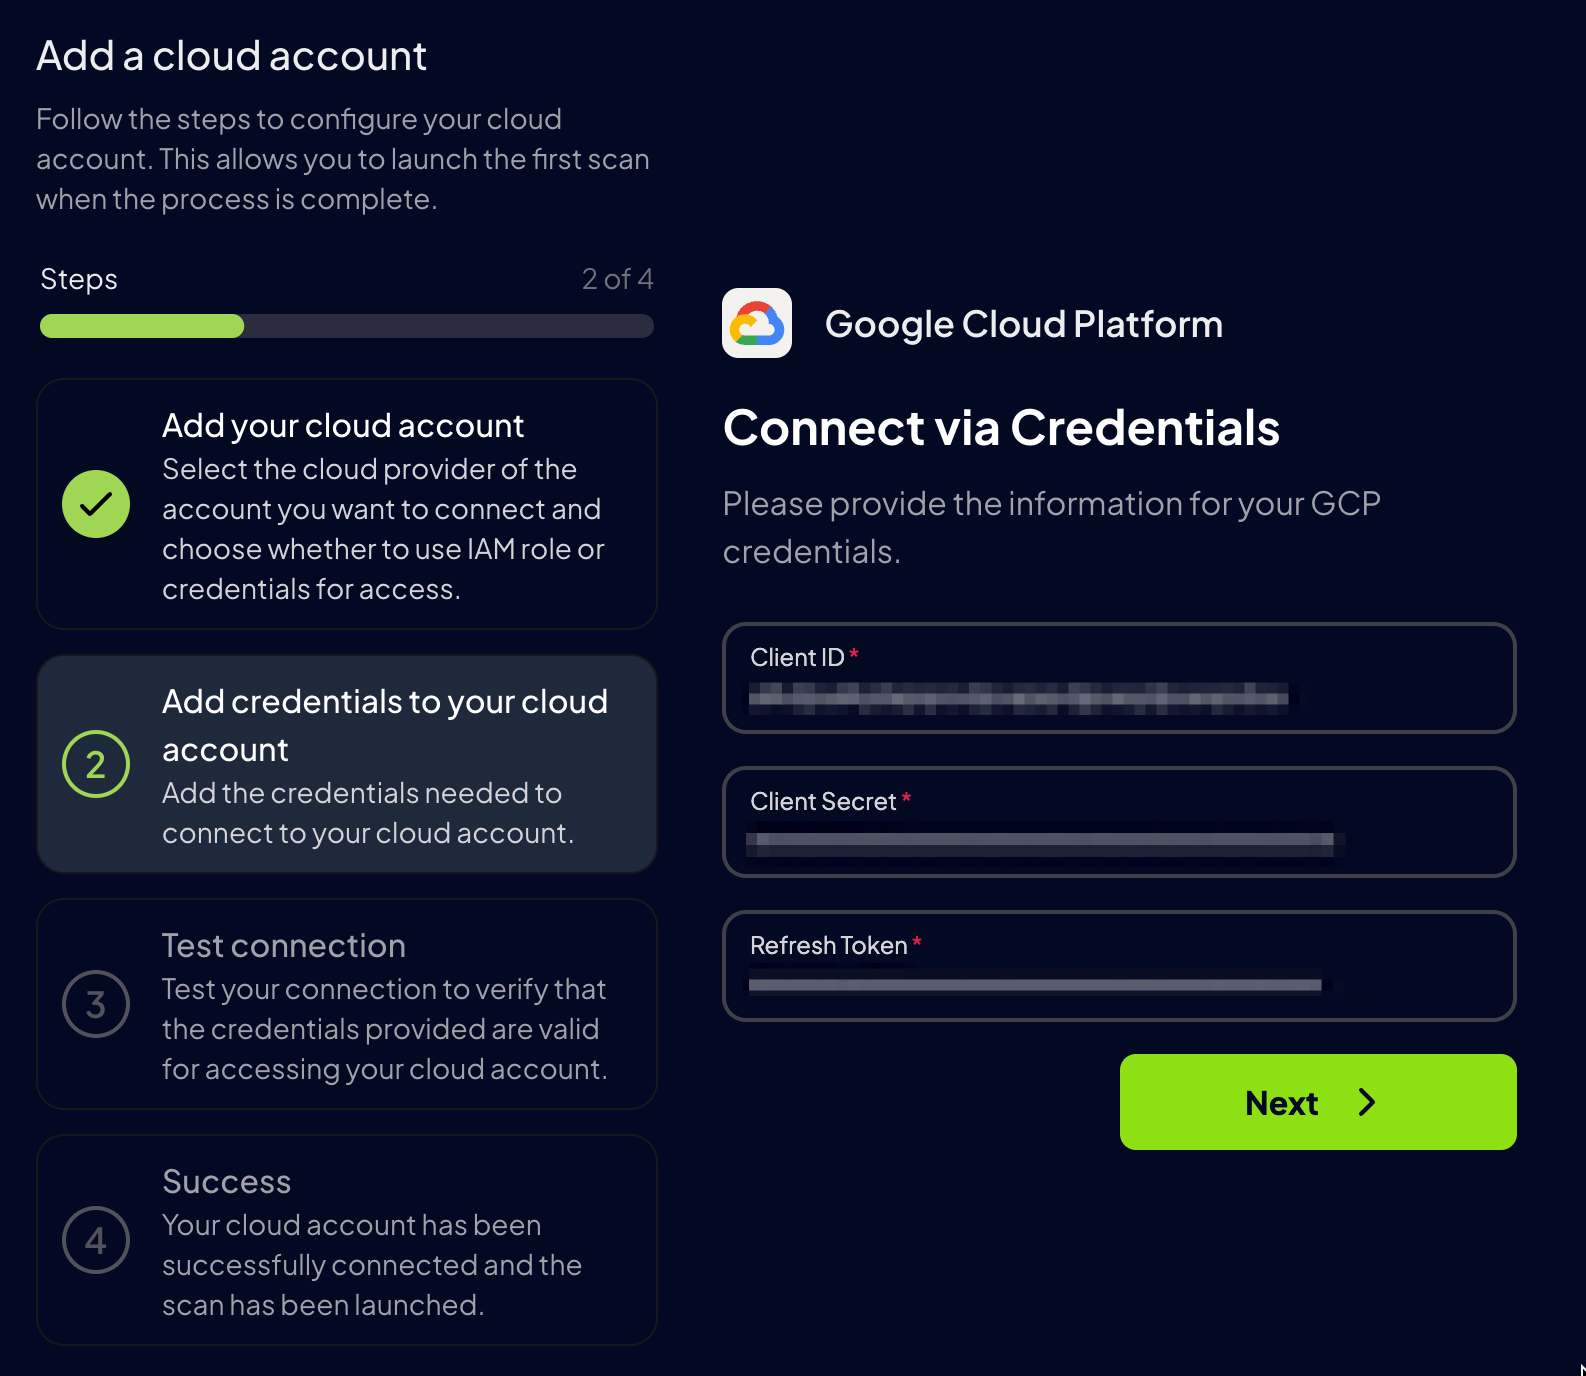
Step 3: Set Up GCP Authentication
For Google Cloud, first enter yourGCP Project ID and then select the authentication method you want to use:
- Service Account Authentication (Recommended)
- Authenticates as a service identity
- Stable and auditable
- Recommended for production
- Application Default Credentials
- Quick scan as current user
- Uses Google Cloud CLI authentication
- Credentials may time out

- Service Account Authentication
- Application Default Credentials
First of all, in the same project that you selected in the previous step, you need to create a service account and then generate a key in JSON format for it. For more information about this, you can follow the next Google Cloud documentation tutorials: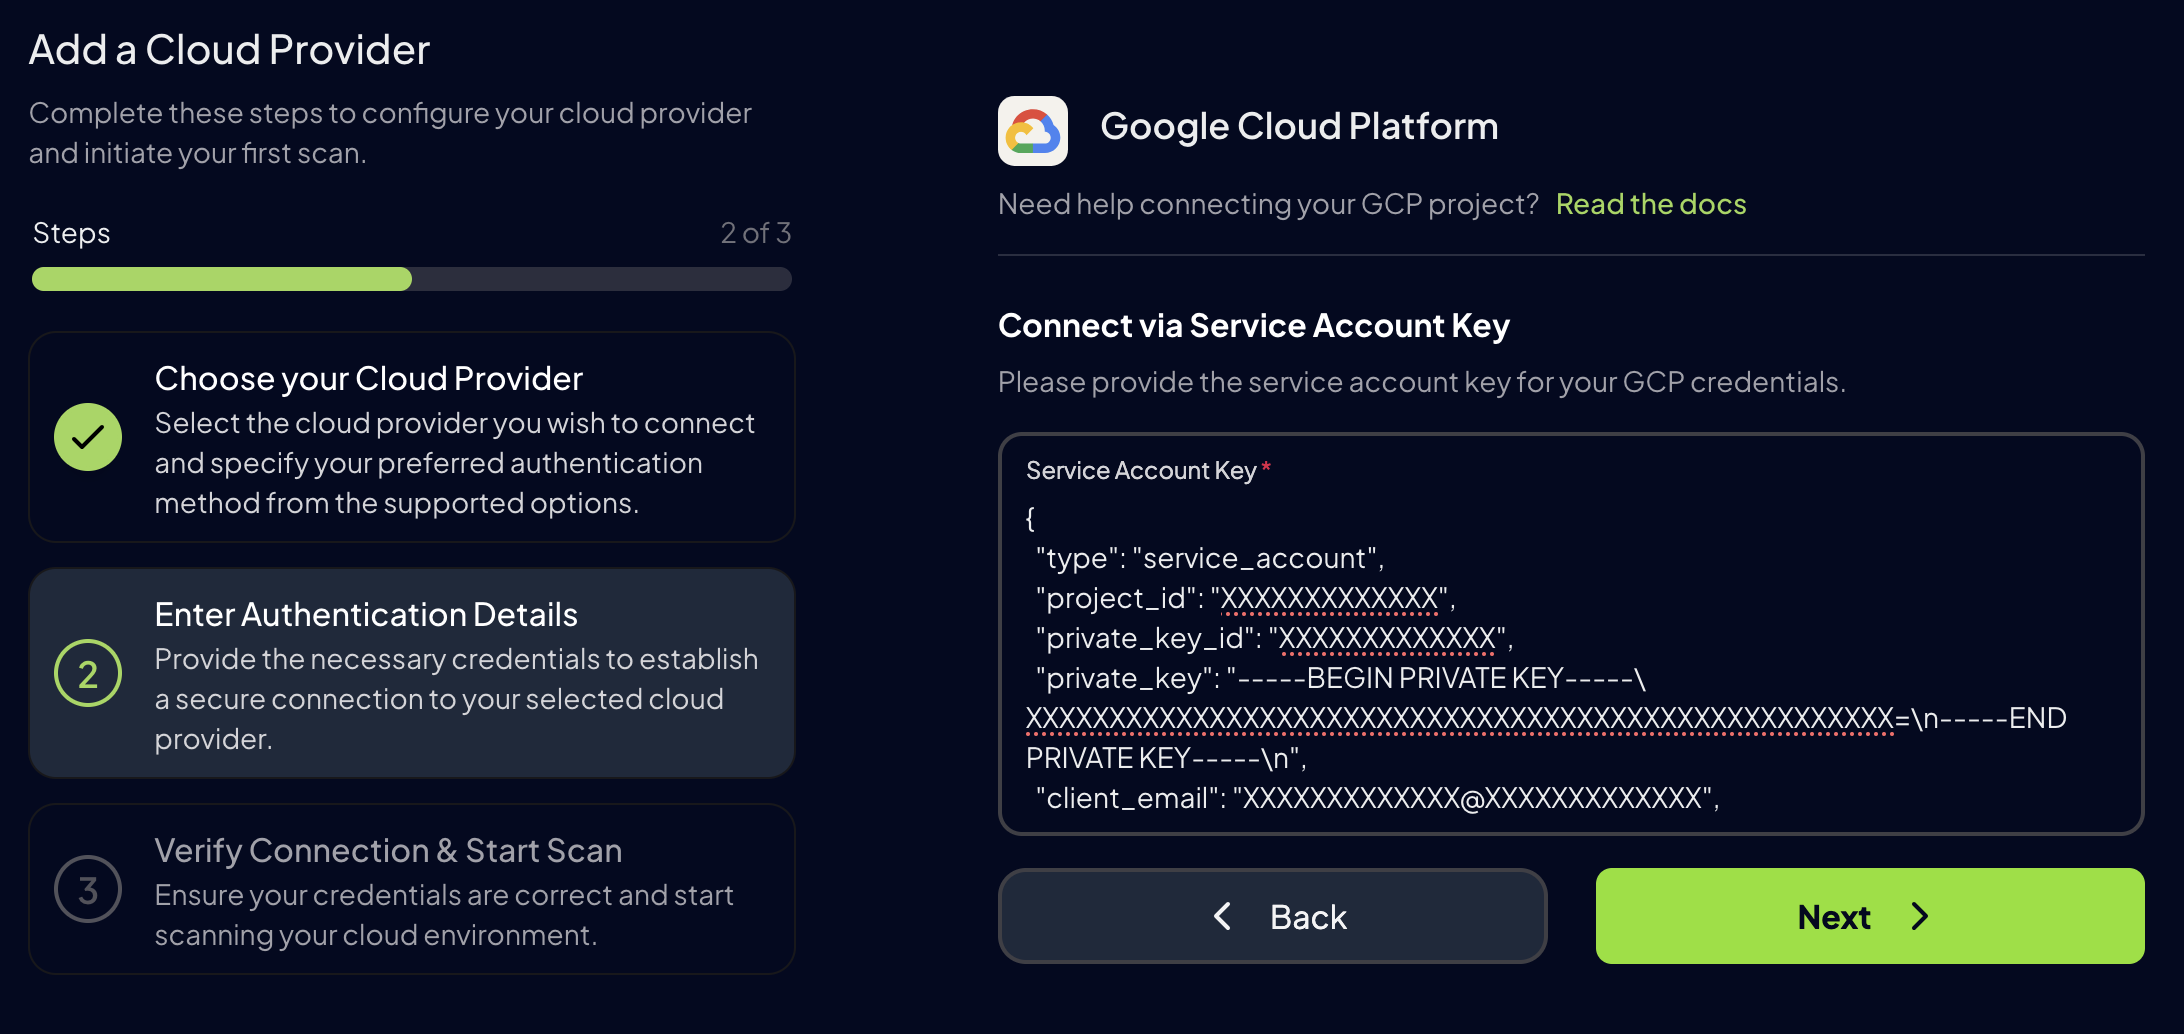
-
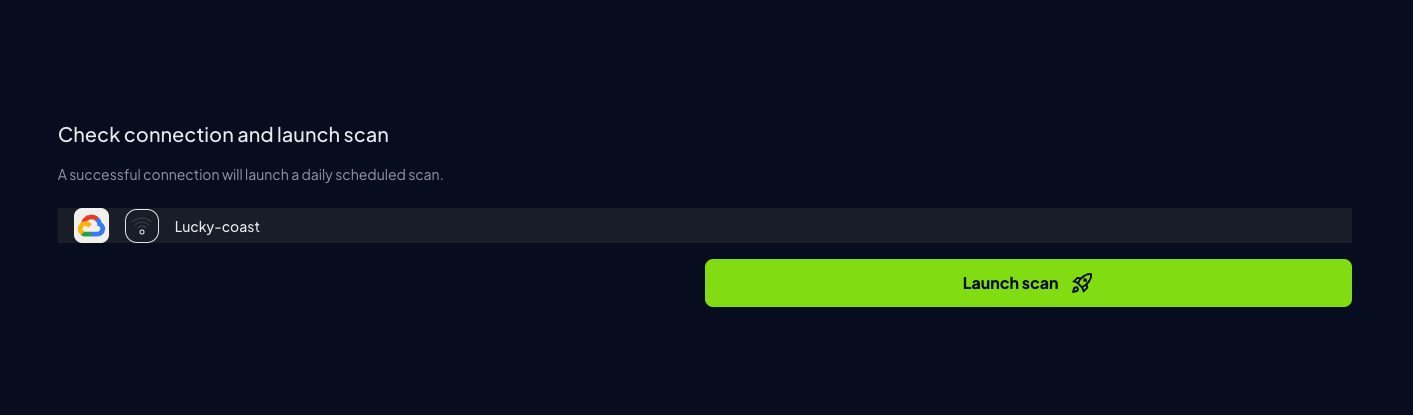
Click “Next”, then “Launch Scan”
Prowler CLI
Credentials Lookup Order
Prowler follows the same credential search process as Google authentication libraries, checking credentials in this order:GOOGLE_APPLICATION_CREDENTIALSenvironment variableCLOUDSDK_AUTH_ACCESS_TOKEN+ optionalGOOGLE_CLOUD_PROJECT- User credentials set up by using the Google Cloud CLI
- Attached service account (e.g., Cloud Run, GCE, Cloud Functions)
The credentials must belong to a user or service account with the necessary permissions.
For detailed instructions on how to set the permissions, see Authentication > Required Permissions.
Prowler will use the enabled Google Cloud APIs to get the information needed to perform the checks.
Configure GCP Credentials
To authenticate with GCP, use one of the following methods:Project Specification
To scan specific projects, specify them with the following command:Service Account Impersonation
For service account impersonation, use the--impersonate-service-account flag:
Skip API Check
By default, Prowler verifies which Google Cloud APIs are enabled before running checks for each service. To skip this verification and assume all APIs are active, use the--skip-api-check flag:
This is useful when the authenticated principal lacks the
serviceusage.services.list permission but has access to individual service APIs.