 About Us
Government Cloud SupportGovernment cloud accounts or tenants (Microsoft 365 Government) are currently unsupported, but we expect to add support for them in the near future.
Prerequisites
Set up authentication for Microsoft 365 with the Microsoft 365 Authentication guide before starting either path:- Register an application in Microsoft Entra ID
- Grant the Microsoft Graph and external API permissions listed for the provider
- Generate an application certificate (recommended) or client secret
- Prepare PowerShell module permissions to enable every check
Prowler Cloud
Onboard Microsoft 365 using Prowler Cloud
Prowler CLI
Onboard Microsoft 365 using Prowler CLI
Prowler Cloud
Step 1: Locate the Domain ID
-
Open the Entra ID portal, then search for “Domain” or go to Identity > Settings > Domain Names.
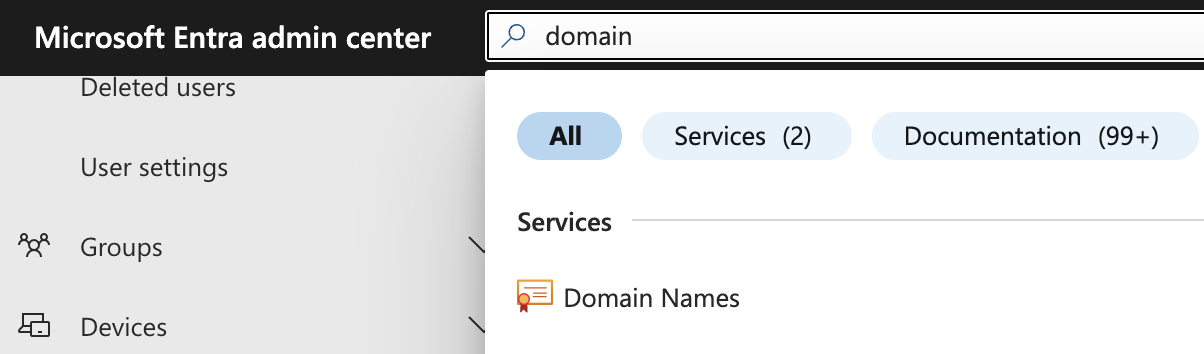
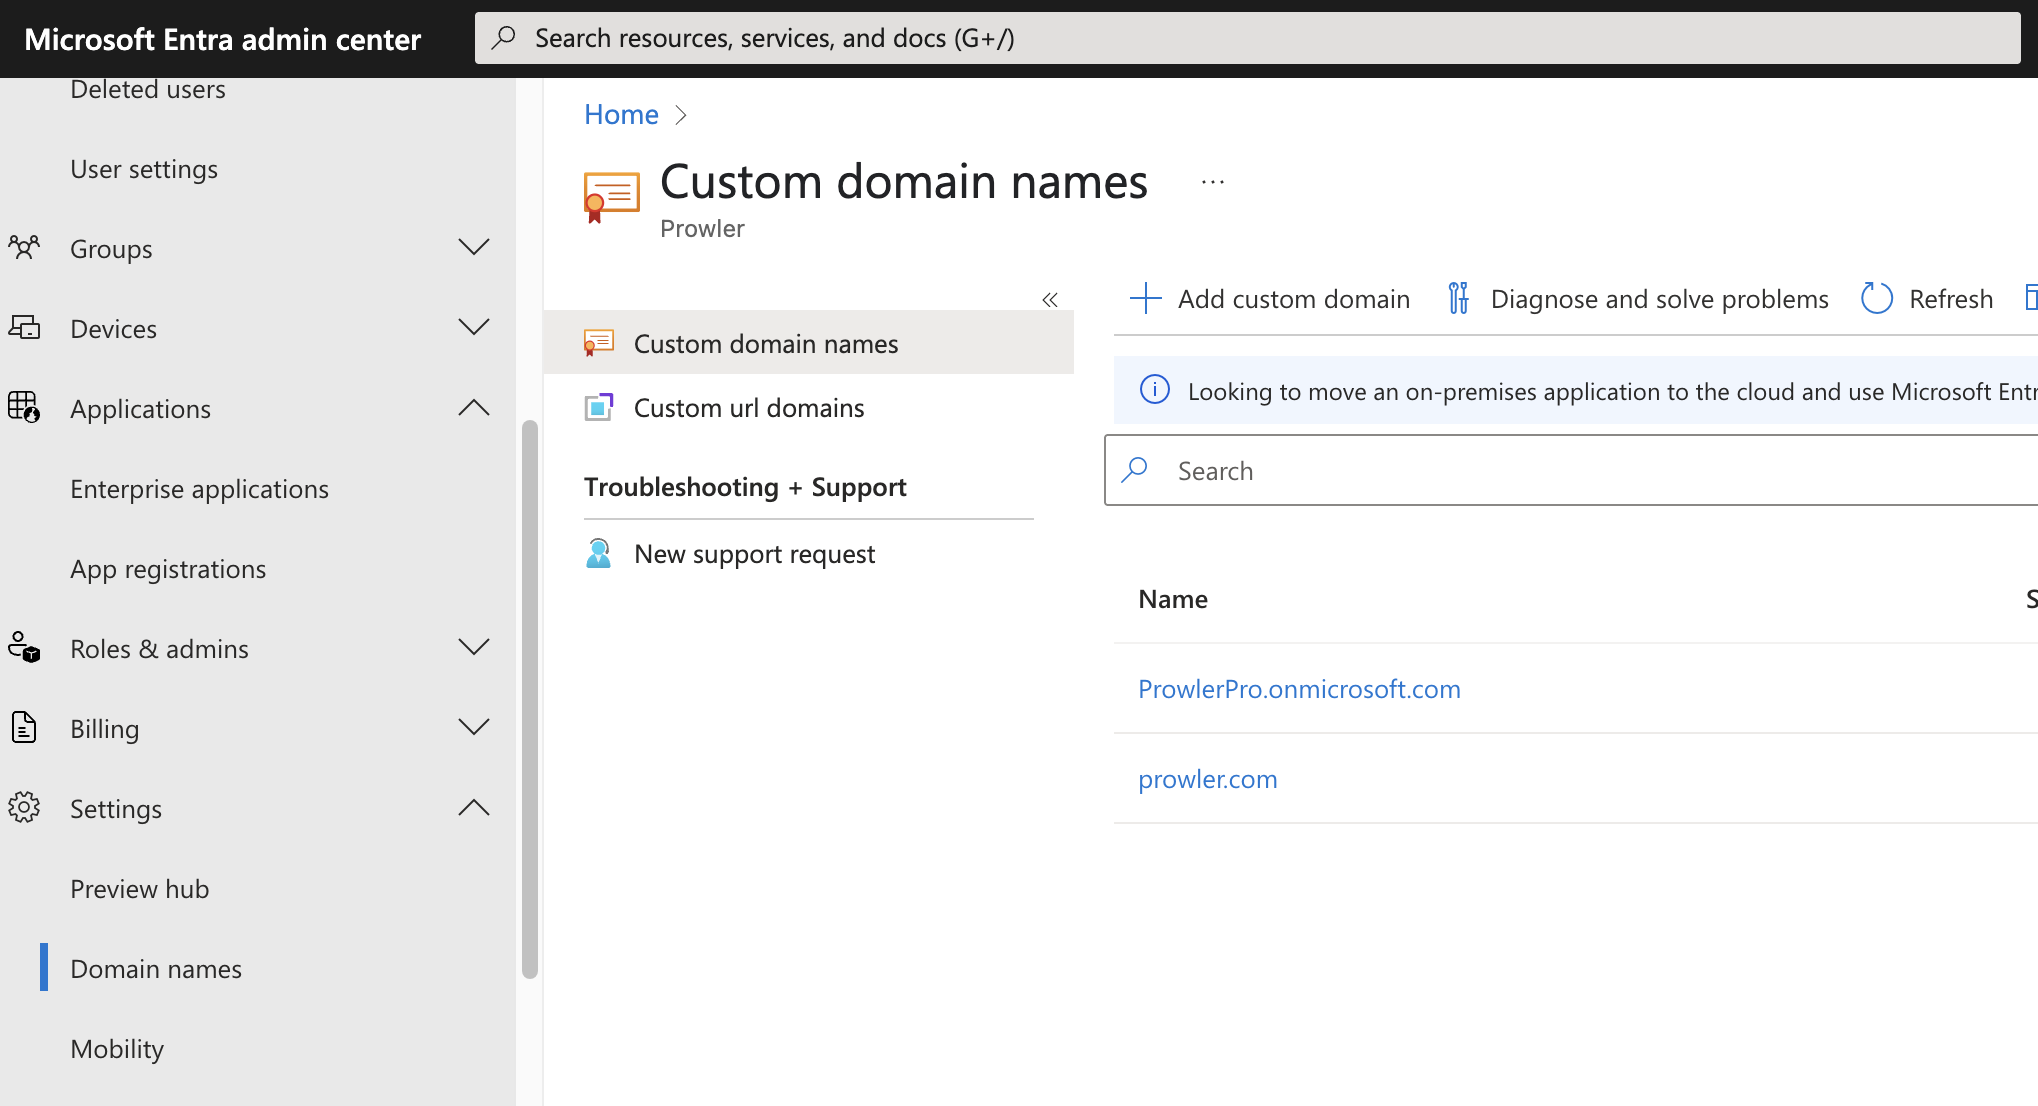
- Select the domain that acts as the unique identifier for the Microsoft 365 account in Prowler Cloud.
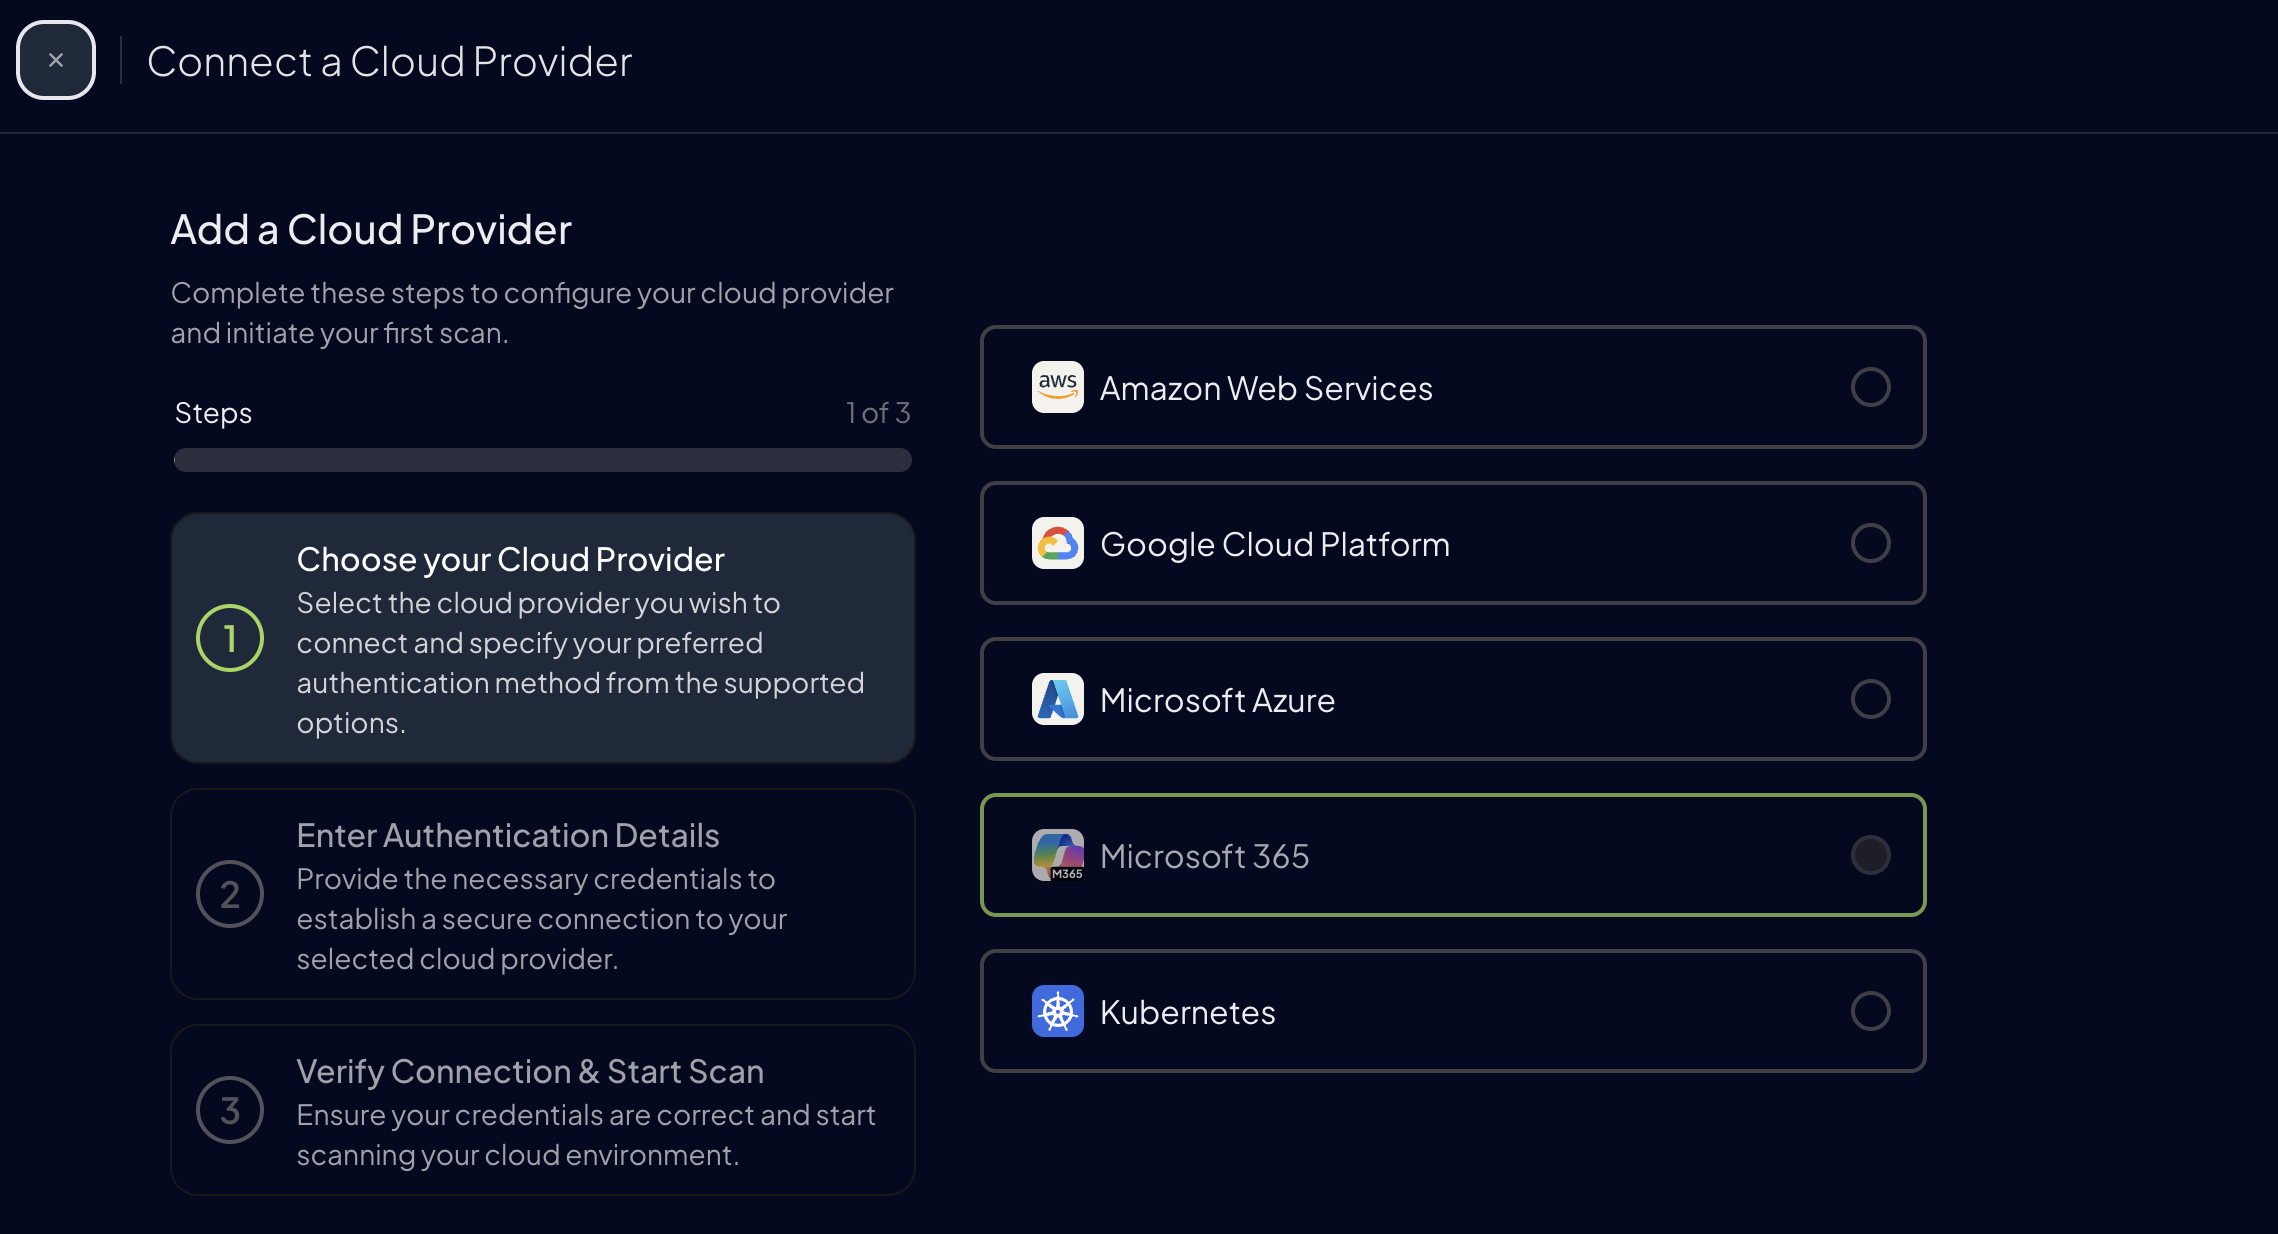
Step 2: Open Prowler Cloud
- Go to Prowler Cloud or launch Prowler App.
-
Navigate to “Configuration” > “Providers”.
-
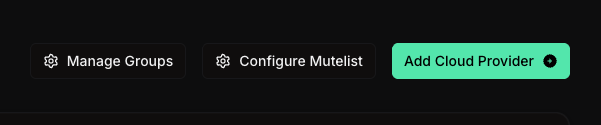
Click “Add Provider”.
-
Select “Microsoft 365”.
-
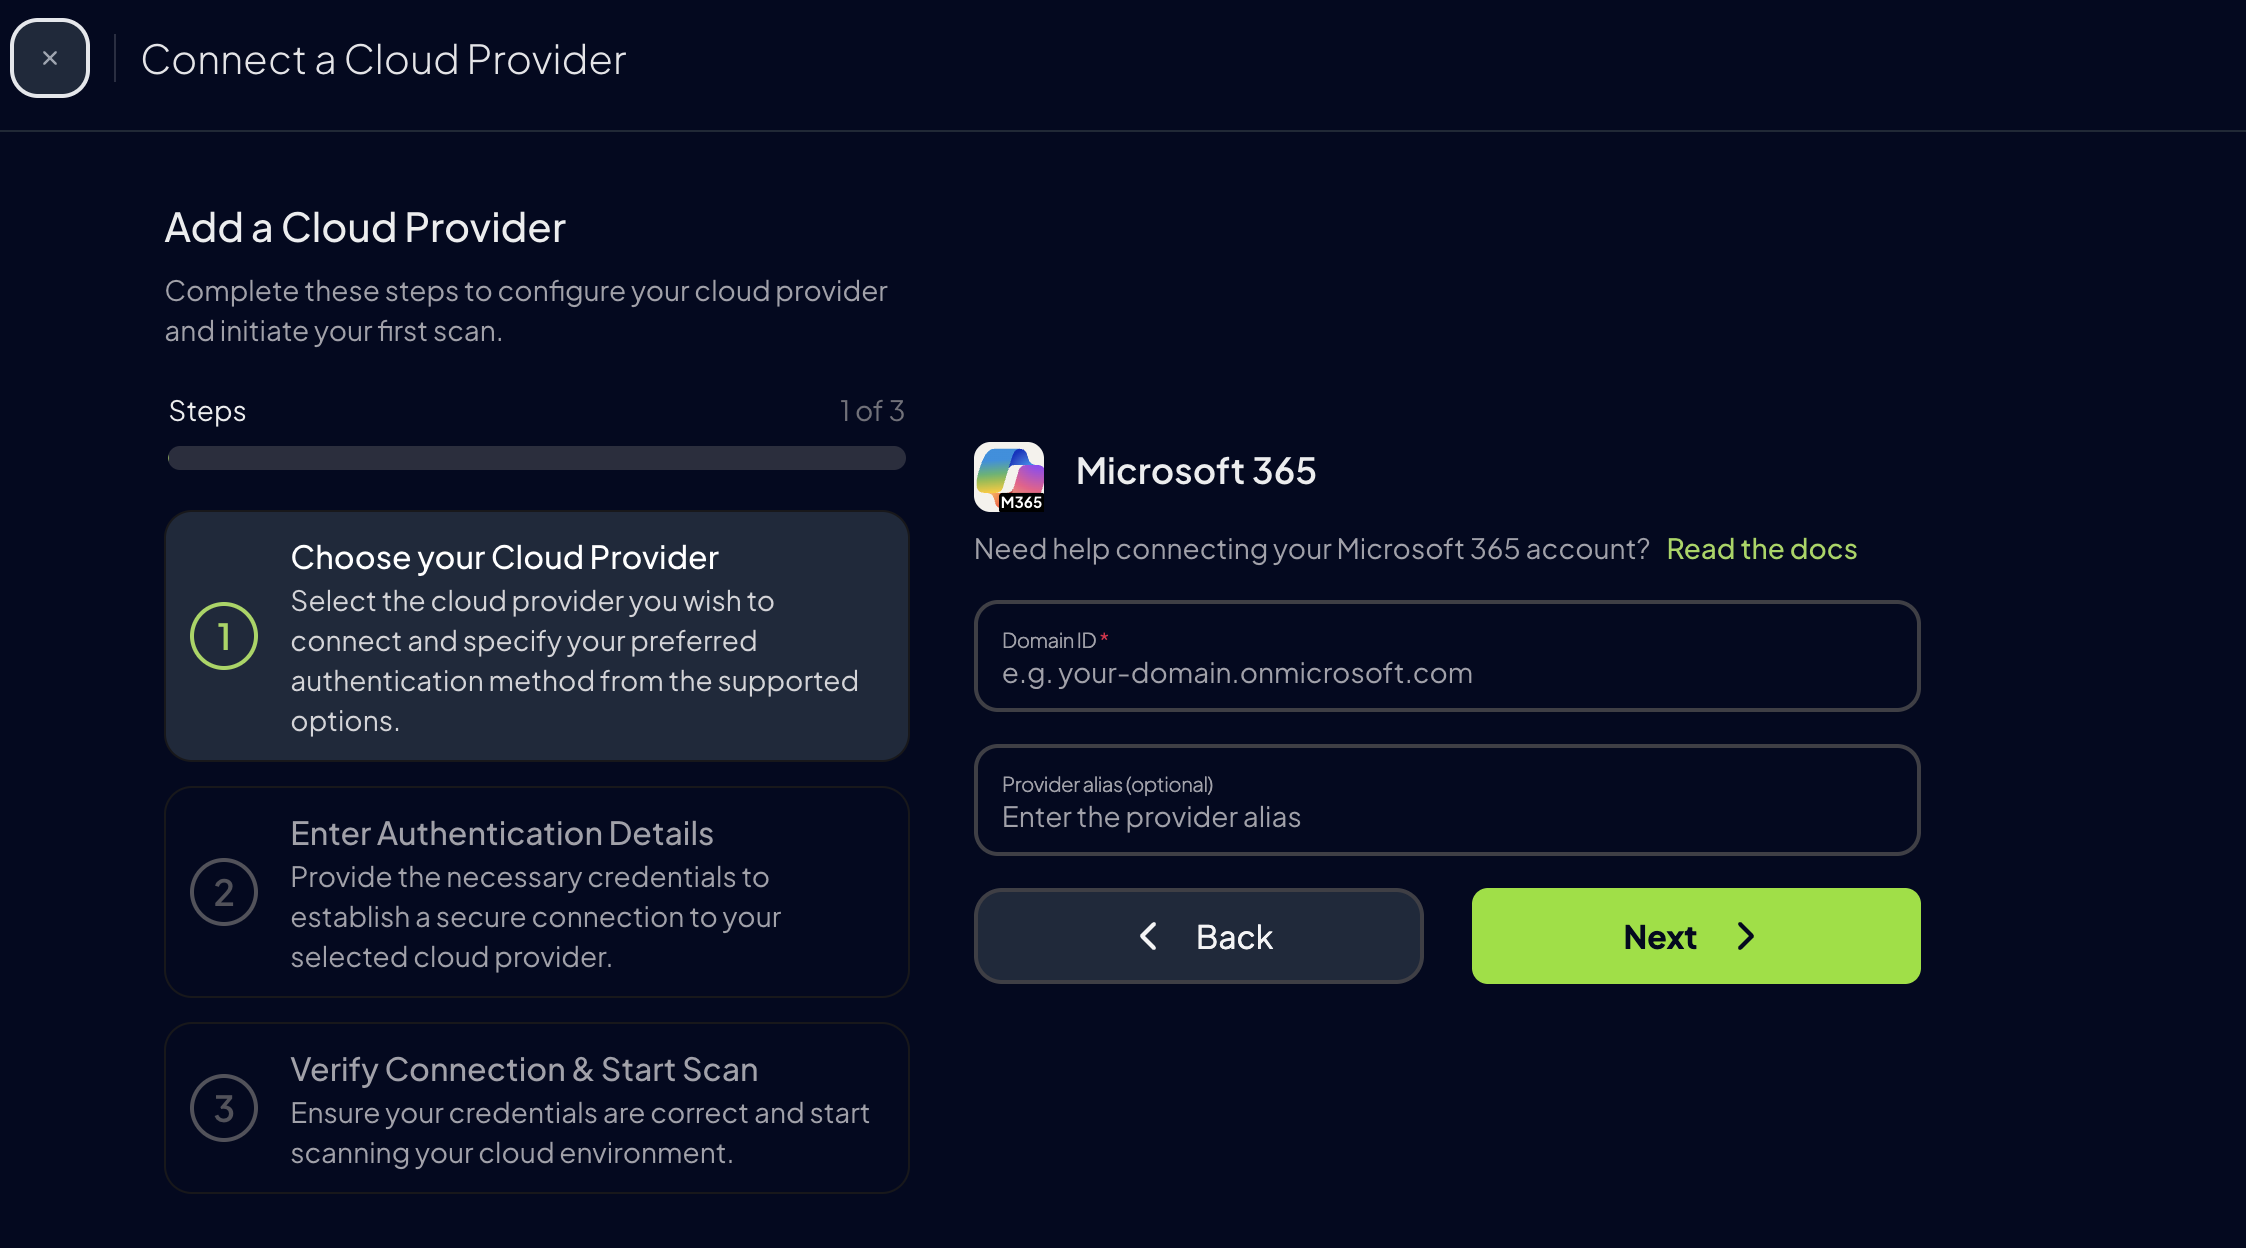
Add the Domain ID and an optional alias, then click “Next”.
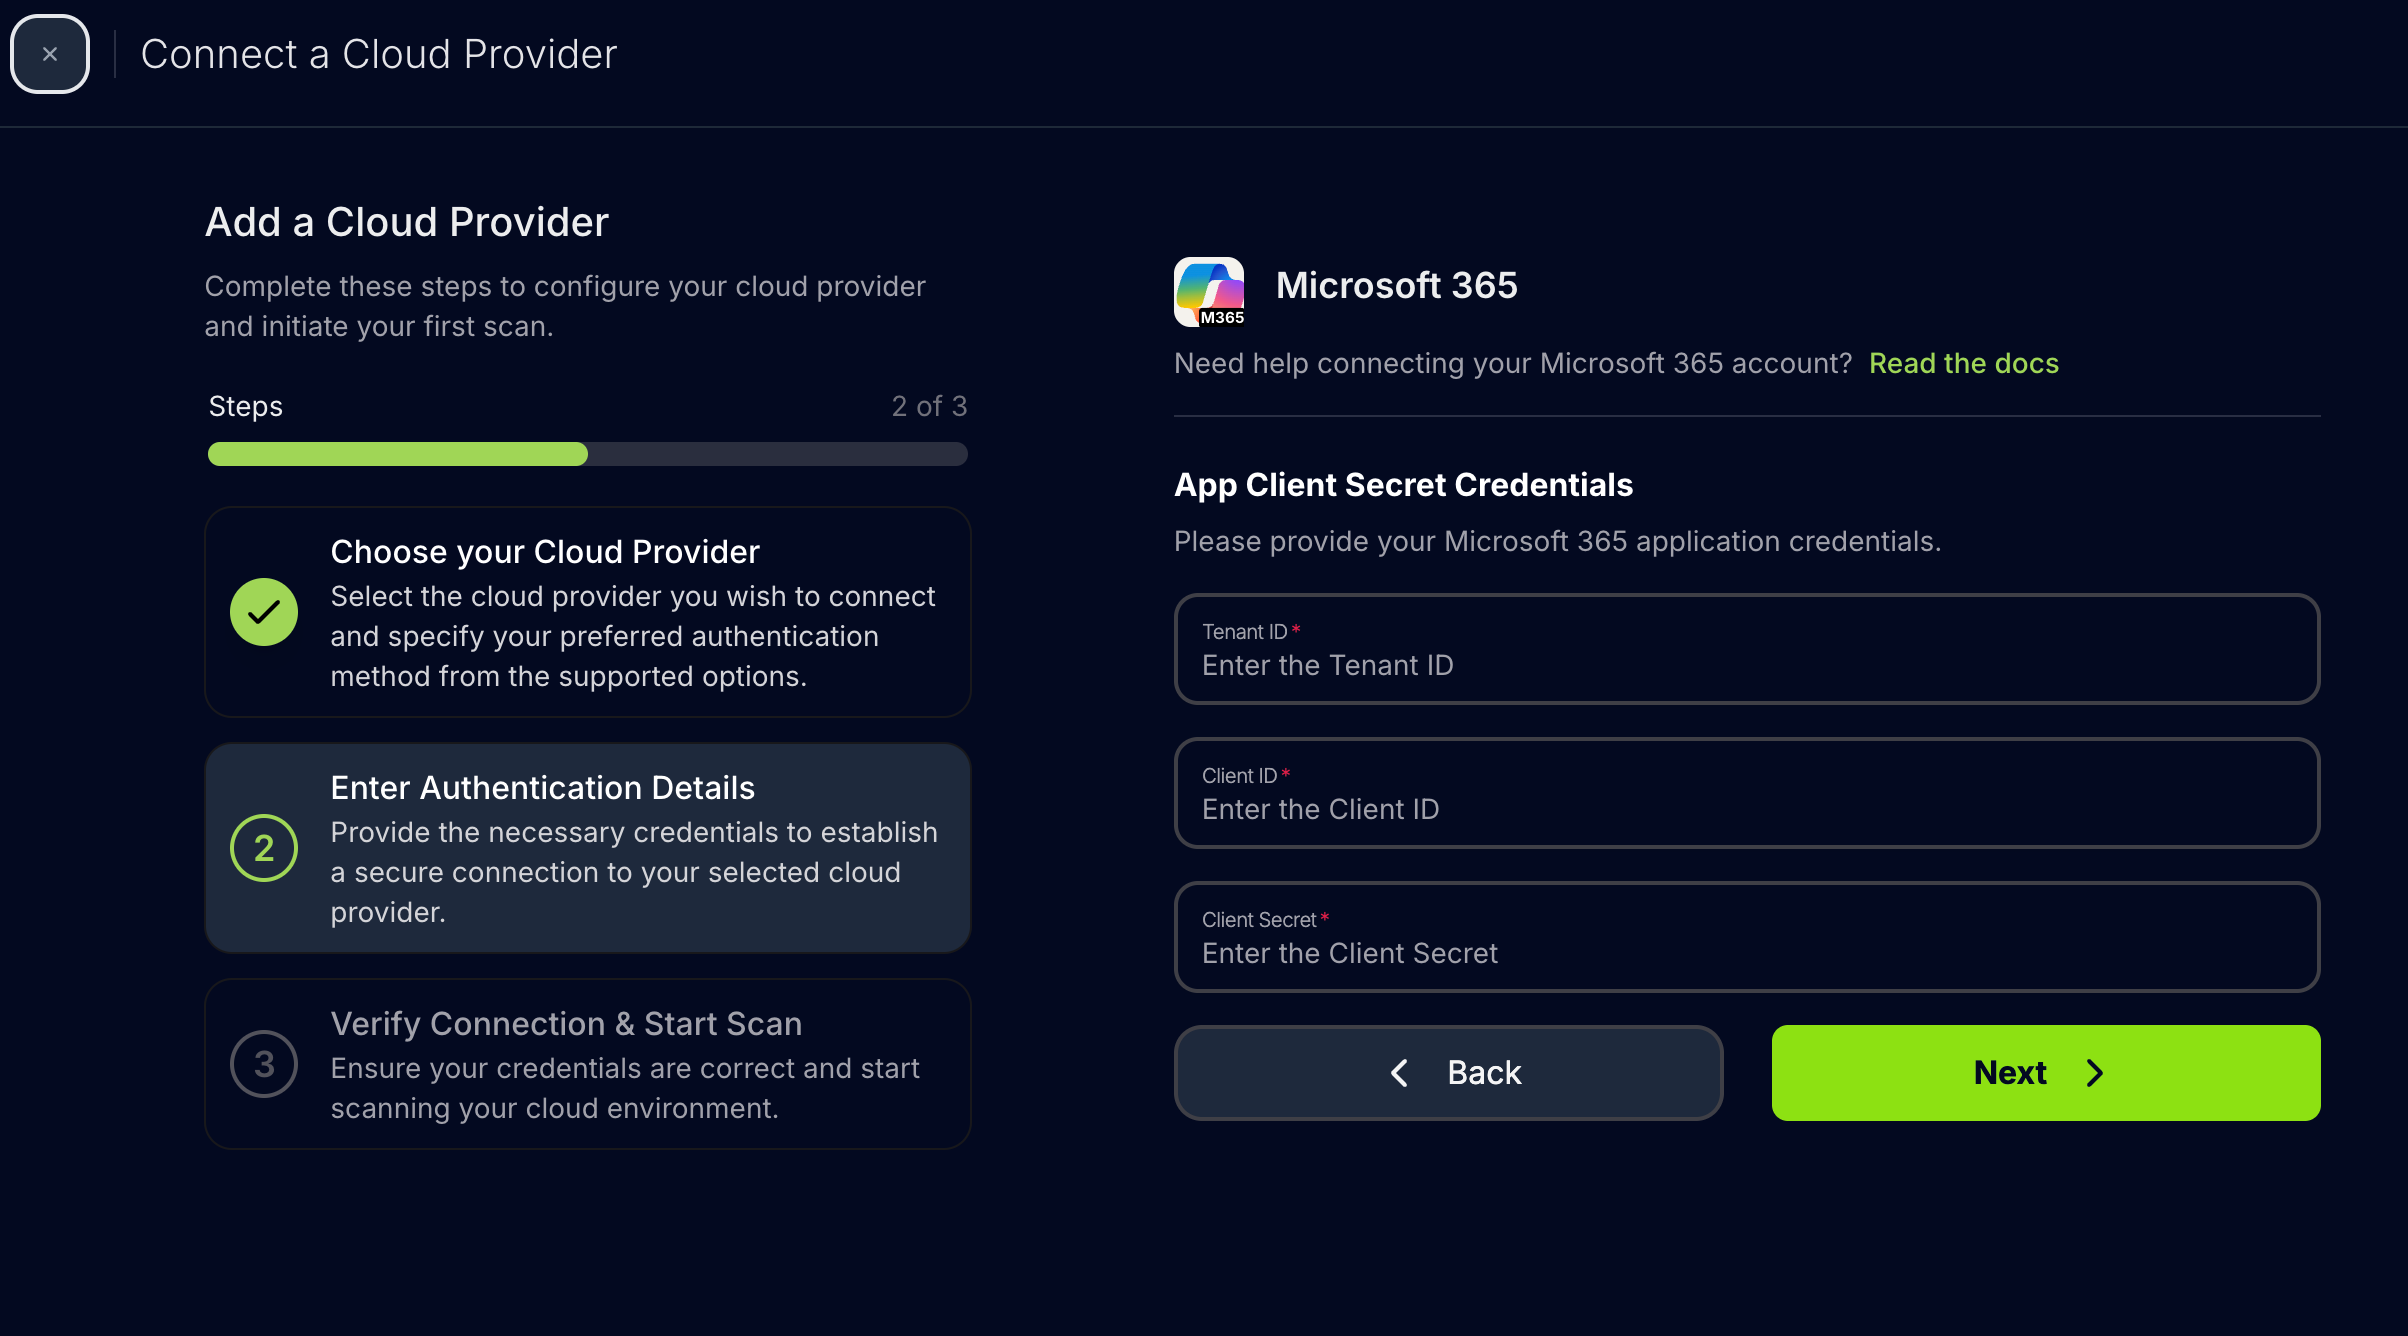
Step 3: Choose and Provide Authentication
After the Domain ID is in place, select the app-only authentication option that matches the Microsoft Entra ID setup: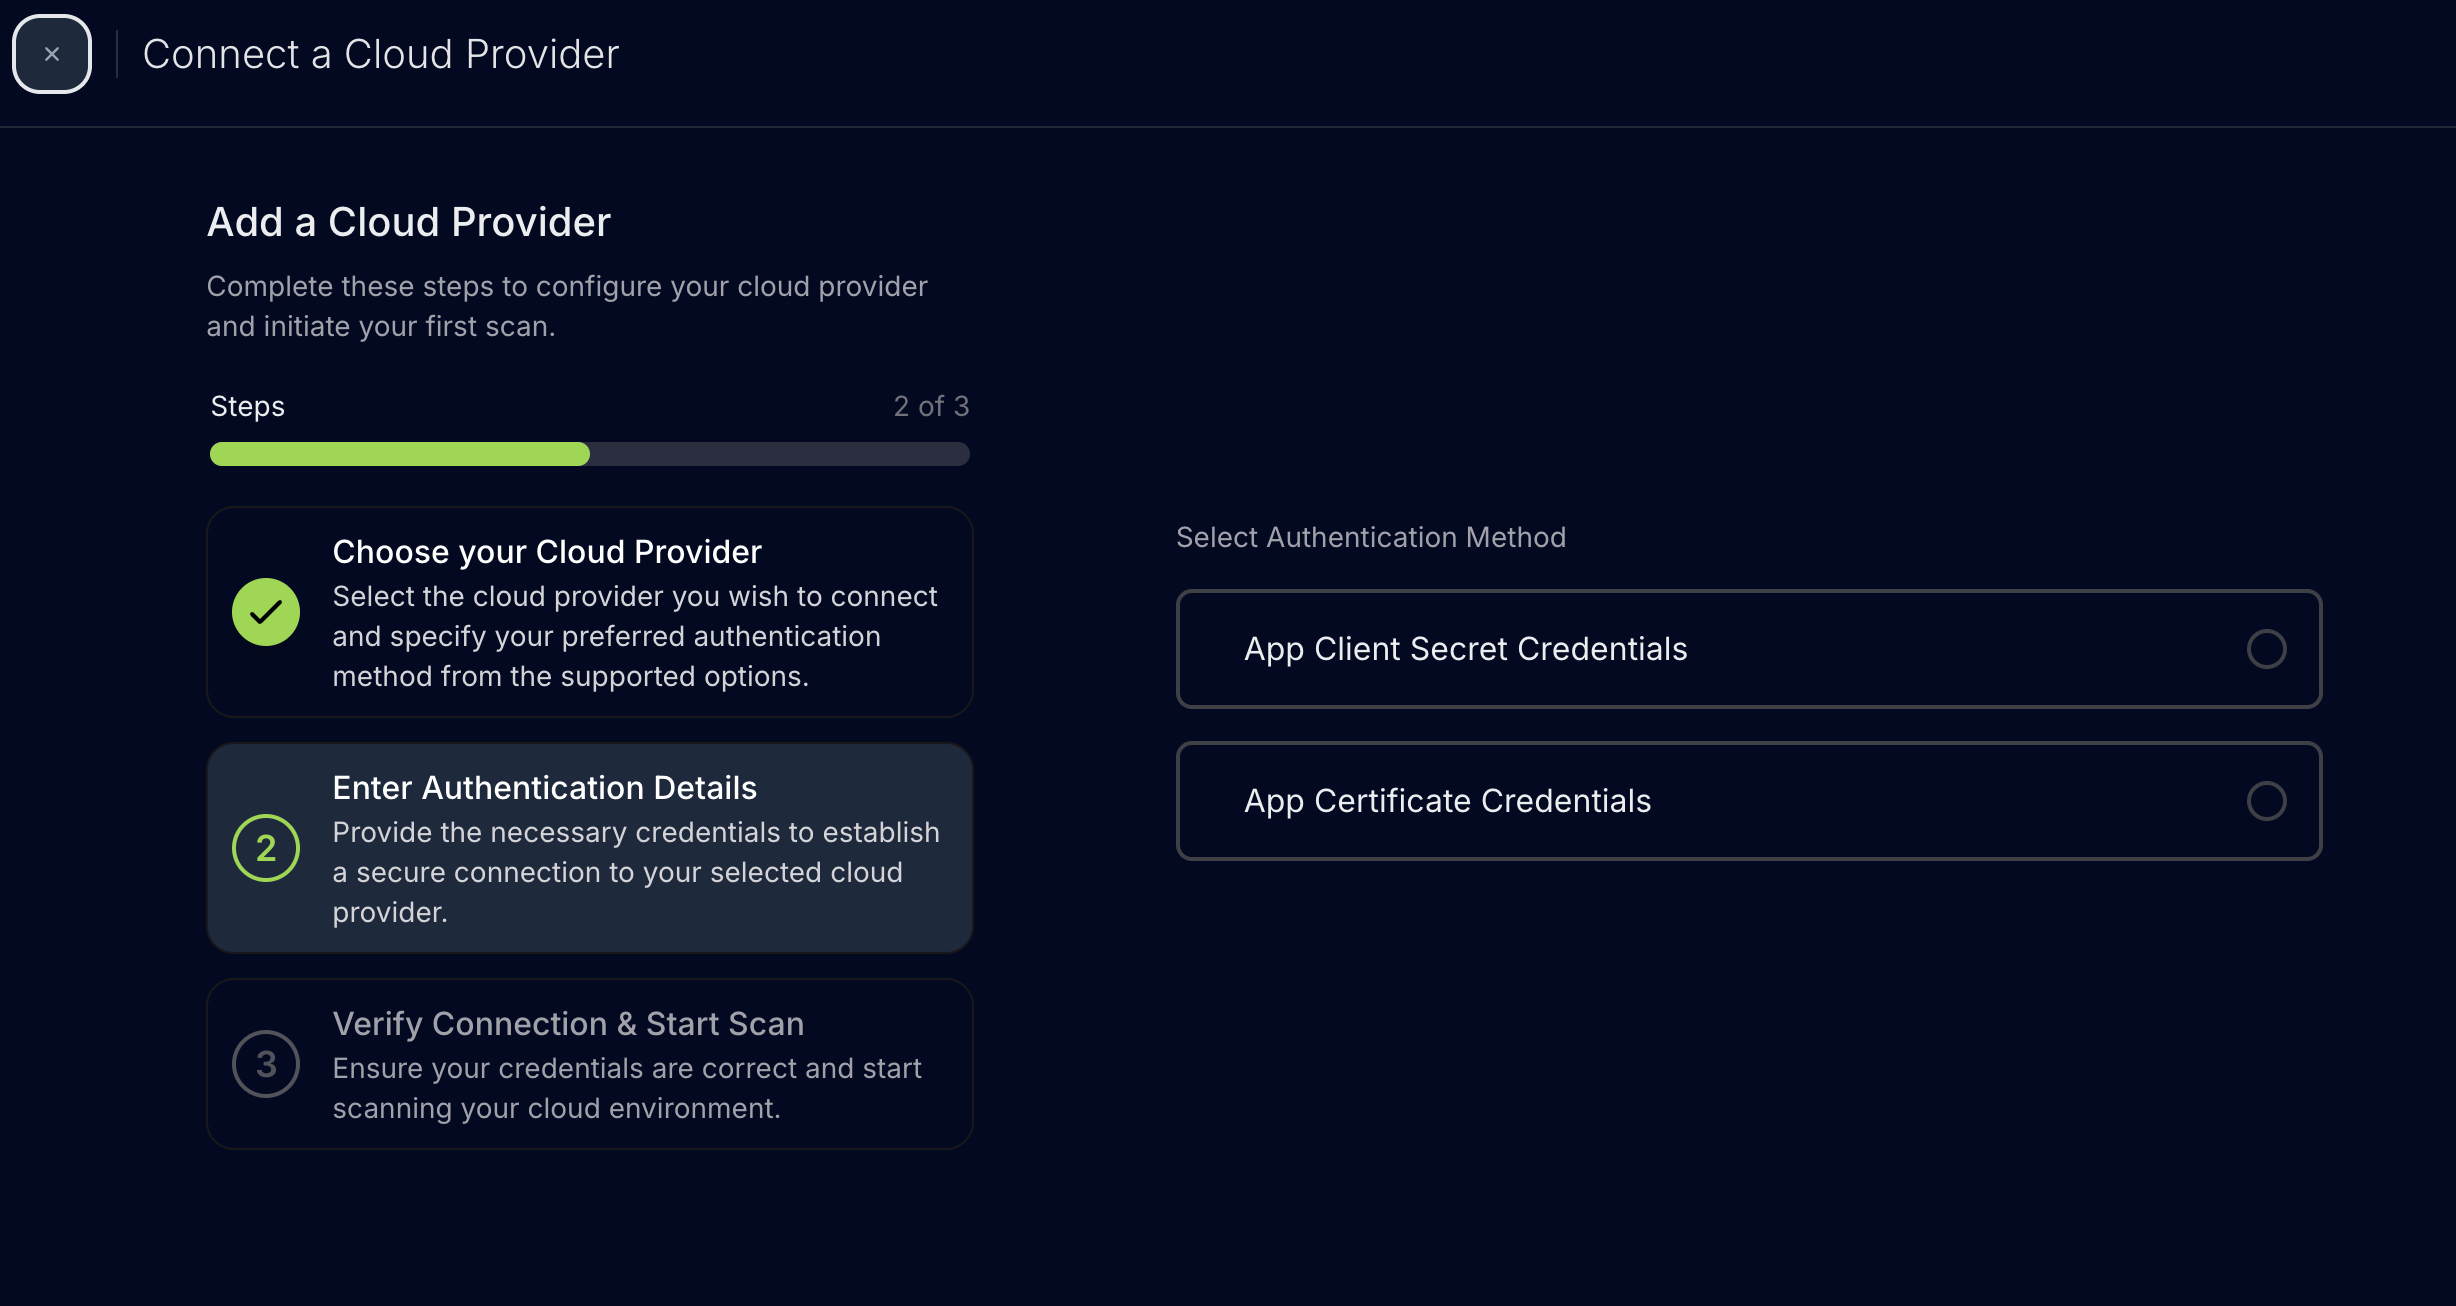
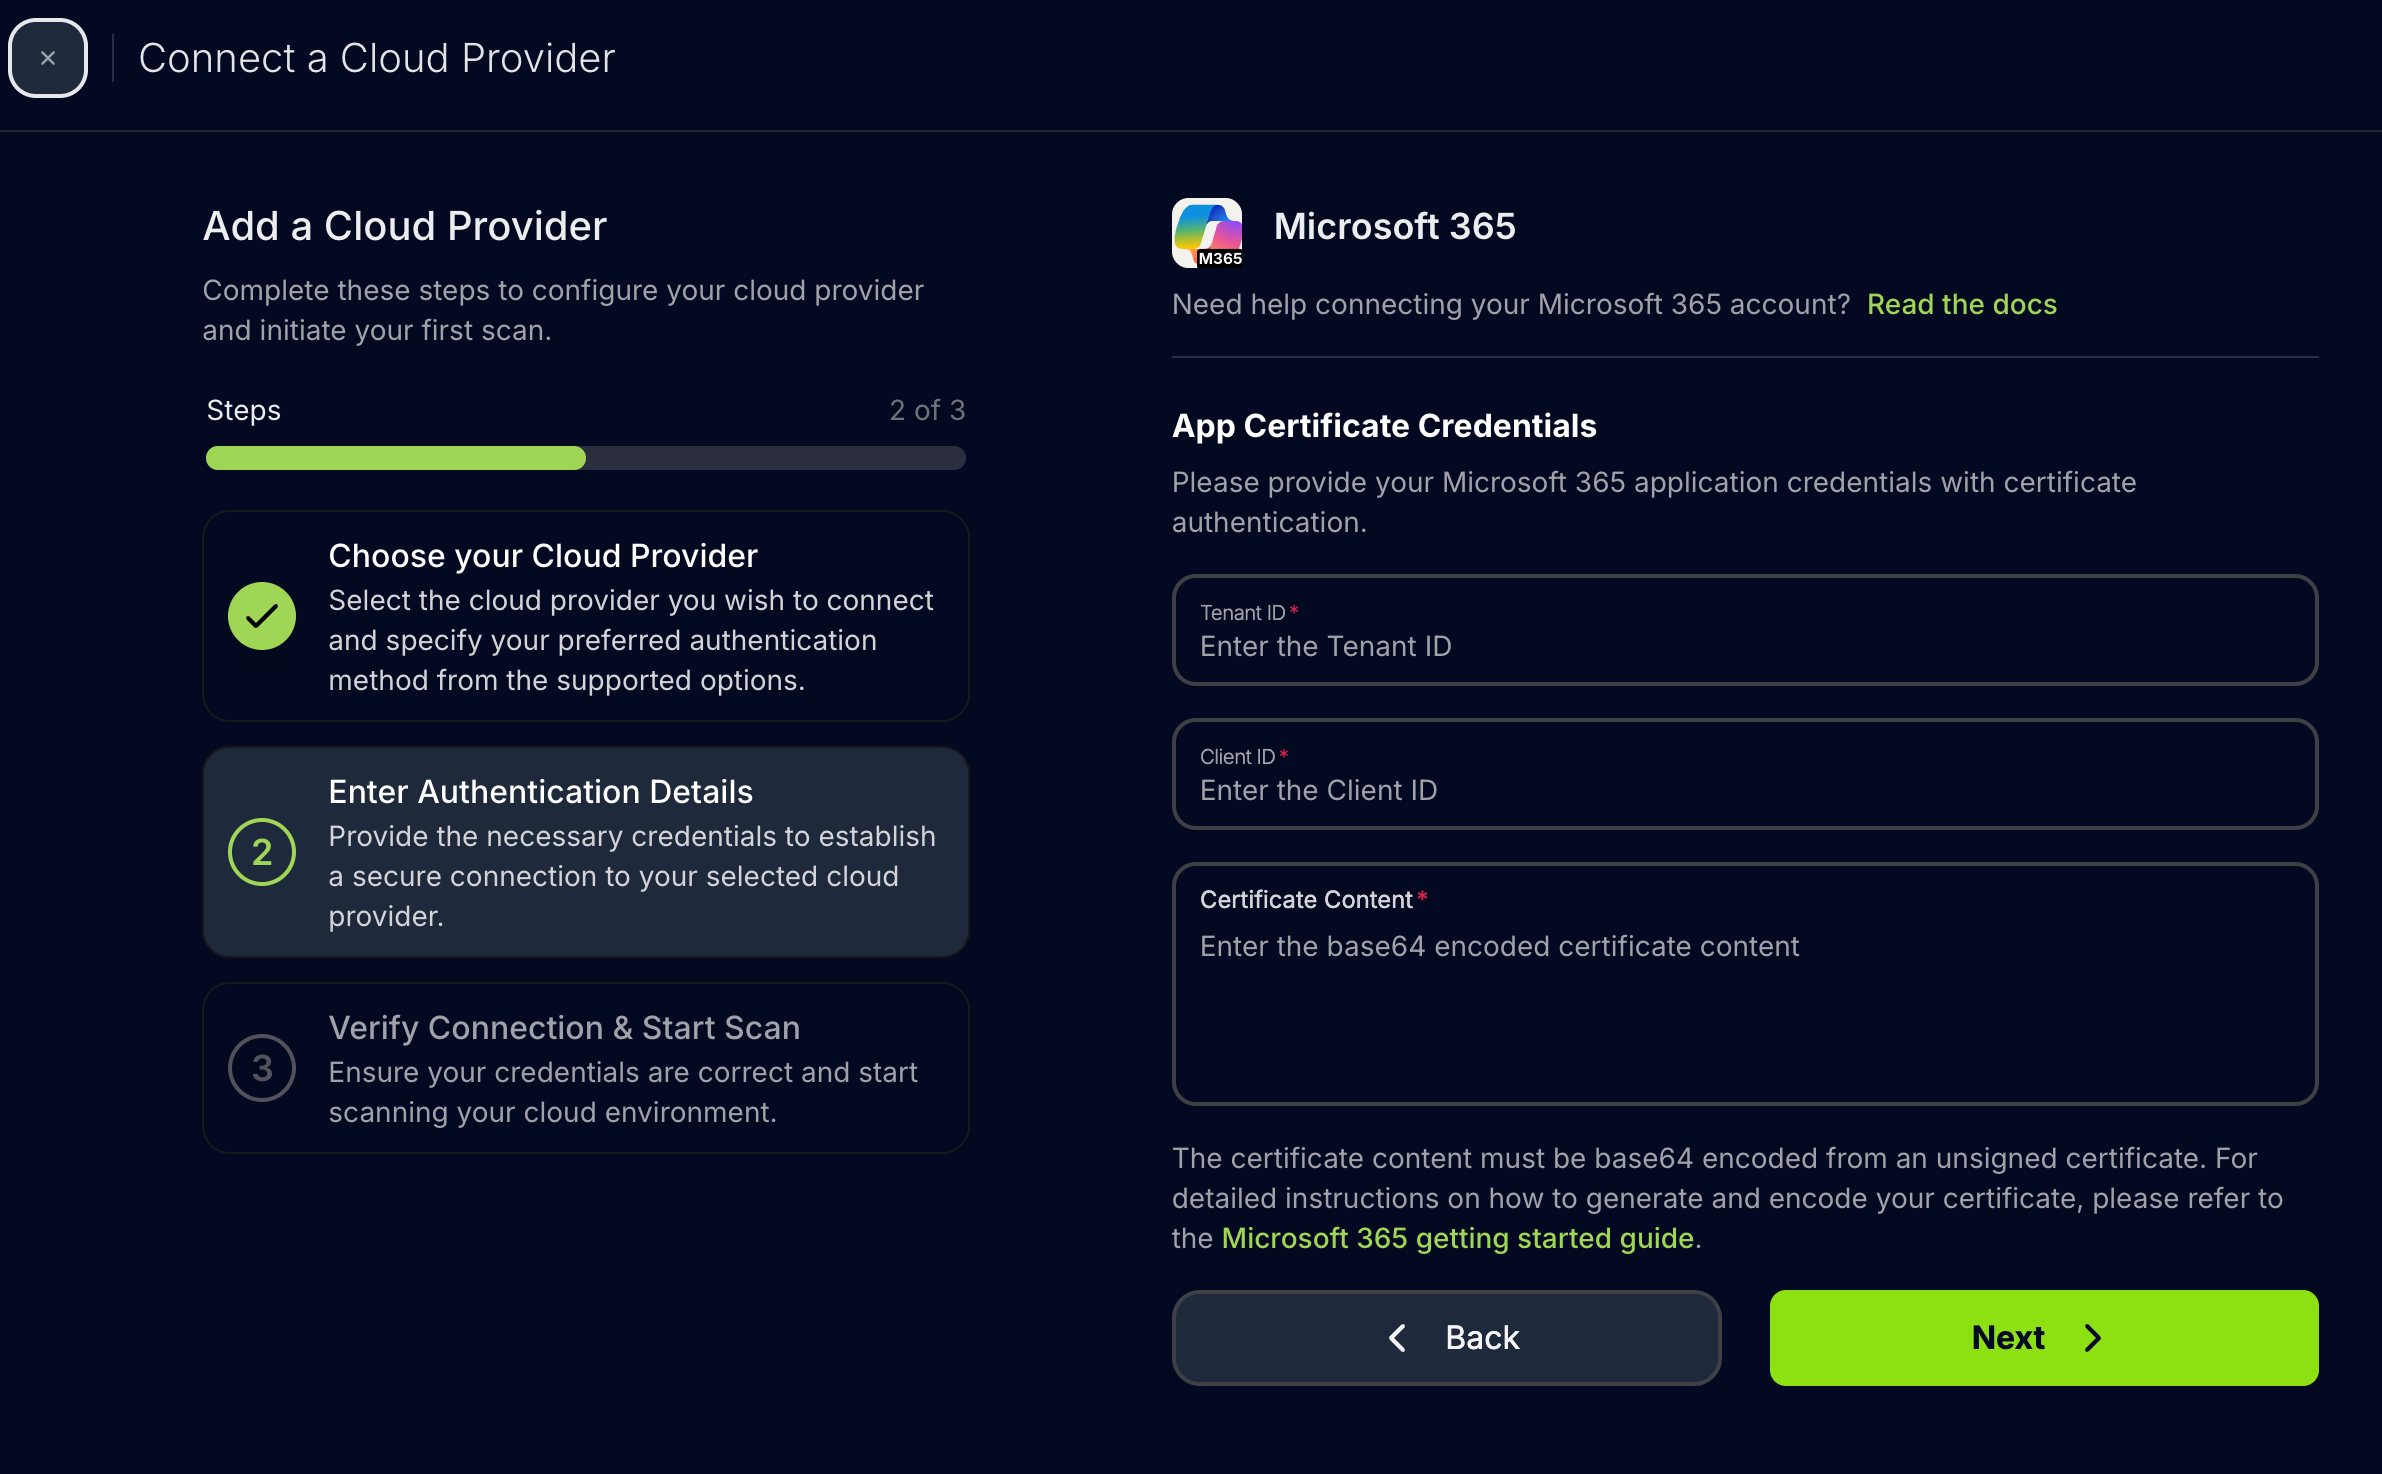
Application Certificate Authentication (Recommended)
- Enter the tenant ID, the unique identifier for the Microsoft Entra ID directory.
- Enter the application (client) ID, the identifier for the Entra application registration.
- Upload the certificate file content (Base64-encoded PFX).
Application Client Secret Authentication
- Enter the tenant ID.
- Enter the application (client) ID.
- Enter the client secret.
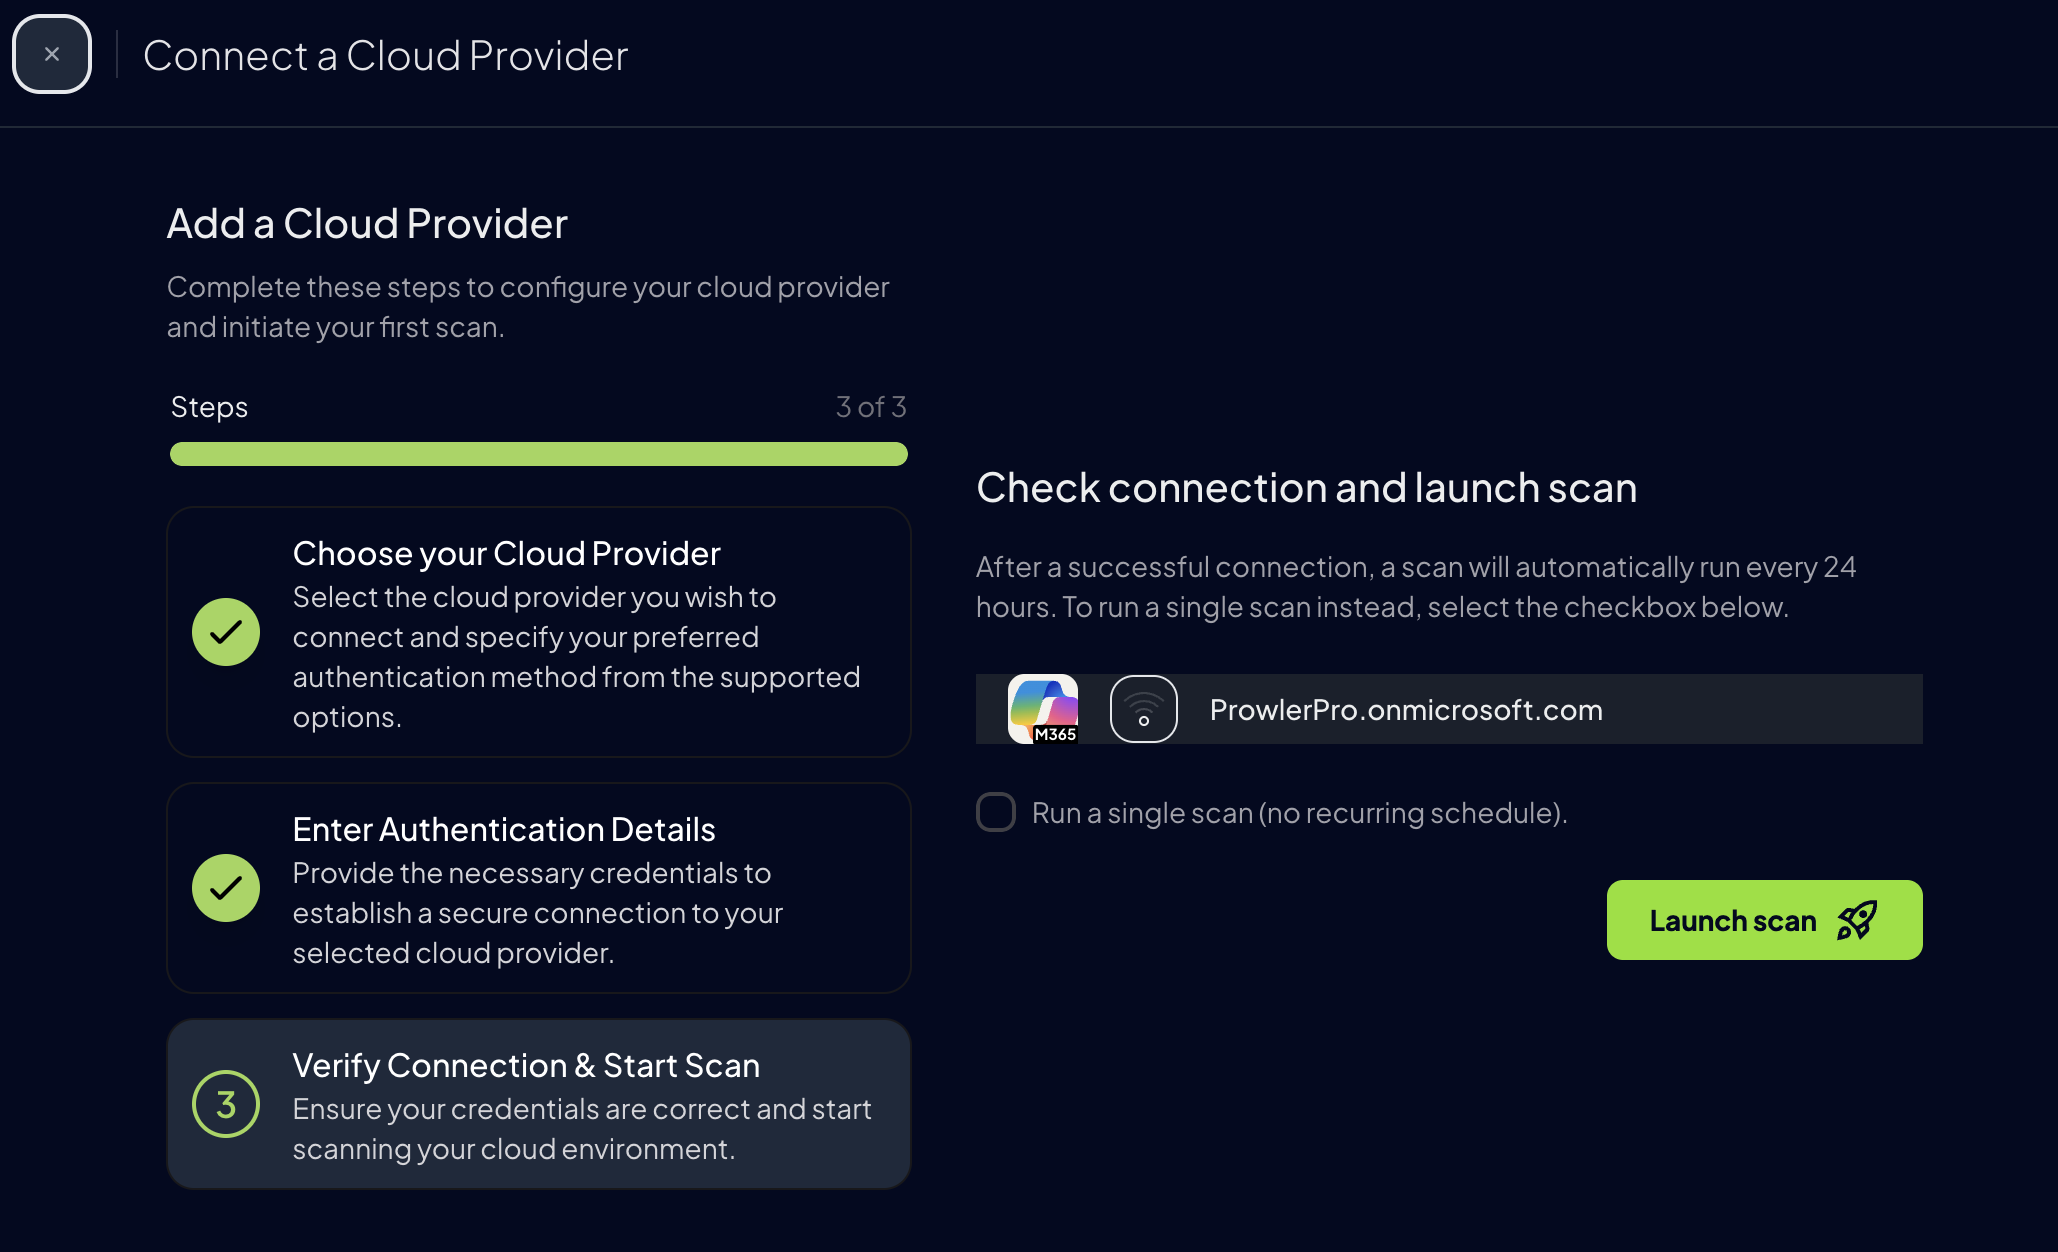
Step 4: Launch the Scan
-
Review the summary, then click Next.

-
Click Launch Scan to start auditing Microsoft 365.
Prowler CLI
Step 1: Confirm PowerShell Coverage
PowerShell 7.4+ keeps the full Microsoft 365 coverage. Installation options are listed in the Authentication guide.Step 2: Select an Authentication Method
Choose the matching flag from the Microsoft 365 Authentication guide:- Application Certificate Authentication (recommended):
--certificate-auth - Application Client Secret Authentication:
--sp-env-auth - Azure CLI Authentication:
--az-cli-auth - Interactive Browser Authentication:
--browser-auth
Step 3: Run the First Scan
Run a baseline scan after credentials are configured:Step 4: Enable Full Coverage
Include PowerShell module initialization to run every check:Region Selection
By default, Prowler connects to the global Microsoft 365 environment (M365Global). To target a different cloud environment, use the --region flag:
- M365Global (default): Standard commercial cloud
- M365China: China-operated cloud (21Vianet)
- M365USGovernment: US Government cloud (GCC High)