> ## Documentation Index
> Fetch the complete documentation index at: https://docs.prowler.com/llms.txt
> Use this file to discover all available pages before exploring further.
# Getting Started With Cloudflare on Prowler
export const VersionBadge = ({version}) => {
return
Added in:
{version}
;
};
Prowler for Cloudflare scans zones for security misconfigurations, including SSL/TLS settings, DNSSEC, HSTS, WAF rules, DNS records, and more.
## Prerequisites
Set up authentication for Cloudflare with the [Cloudflare Authentication](/user-guide/providers/cloudflare/authentication) guide before starting either path:
* Create a Cloudflare User API Token (recommended) or locate the Global API Key
* Grant the required read-only permissions (`Account Settings:Read`, `Zone:Read`, `Zone Settings:Read`, `DNS:Read`)
* Identify the Cloudflare Account ID to use as the provider identifier
**Quick Setup:** Use these pre-configured links to create a token with the required permissions already selected:
* [Create User API Token](https://dash.cloudflare.com/profile/api-tokens?permissionGroupKeys=%5B%7B%22key%22%3A%22account_settings%22%2C%22type%22%3A%22read%22%7D%2C%7B%22key%22%3A%22zone%22%2C%22type%22%3A%22read%22%7D%2C%7B%22key%22%3A%22zone_settings%22%2C%22type%22%3A%22read%22%7D%2C%7B%22key%22%3A%22dns%22%2C%22type%22%3A%22read%22%7D%5D\&accountId=%2A\&zoneId=all\&name=Prowler%20Security%20Scanner) — creates a User API Token (recommended).
* [Create Account-Owned API Token](https://dash.cloudflare.com/?to=/:account/api-tokens\&permissionGroupKeys=%5B%7B%22key%22%3A%22account_settings%22%2C%22type%22%3A%22read%22%7D%2C%7B%22key%22%3A%22zone%22%2C%22type%22%3A%22read%22%7D%2C%7B%22key%22%3A%22zone_settings%22%2C%22type%22%3A%22read%22%7D%2C%7B%22key%22%3A%22dns%22%2C%22type%22%3A%22read%22%7D%5D\&name=Prowler%20Security%20Scanner) — creates an [account-owned token](https://developers.cloudflare.com/fundamentals/api/how-to/account-owned-token-template/), better suited for automation and CI/CD.
Both links open the Cloudflare Dashboard with the four required read-only scopes (`Account Settings`, `Zone`, `Zone Settings`, `DNS`) and the name `Prowler Security Scanner` prefilled. See [Cloudflare Authentication](/user-guide/providers/cloudflare/authentication#api-token-recommended) for the equivalent manual steps.
Onboard Cloudflare using Prowler Cloud
Onboard Cloudflare using Prowler CLI
## Prowler Cloud
### Step 1: Locate the Account ID
1. Log into the [Cloudflare Dashboard](https://dash.cloudflare.com).
2. Select any zone in the target account.
3. On the zone overview page, find the **Account ID** in the right sidebar under the "API" section.
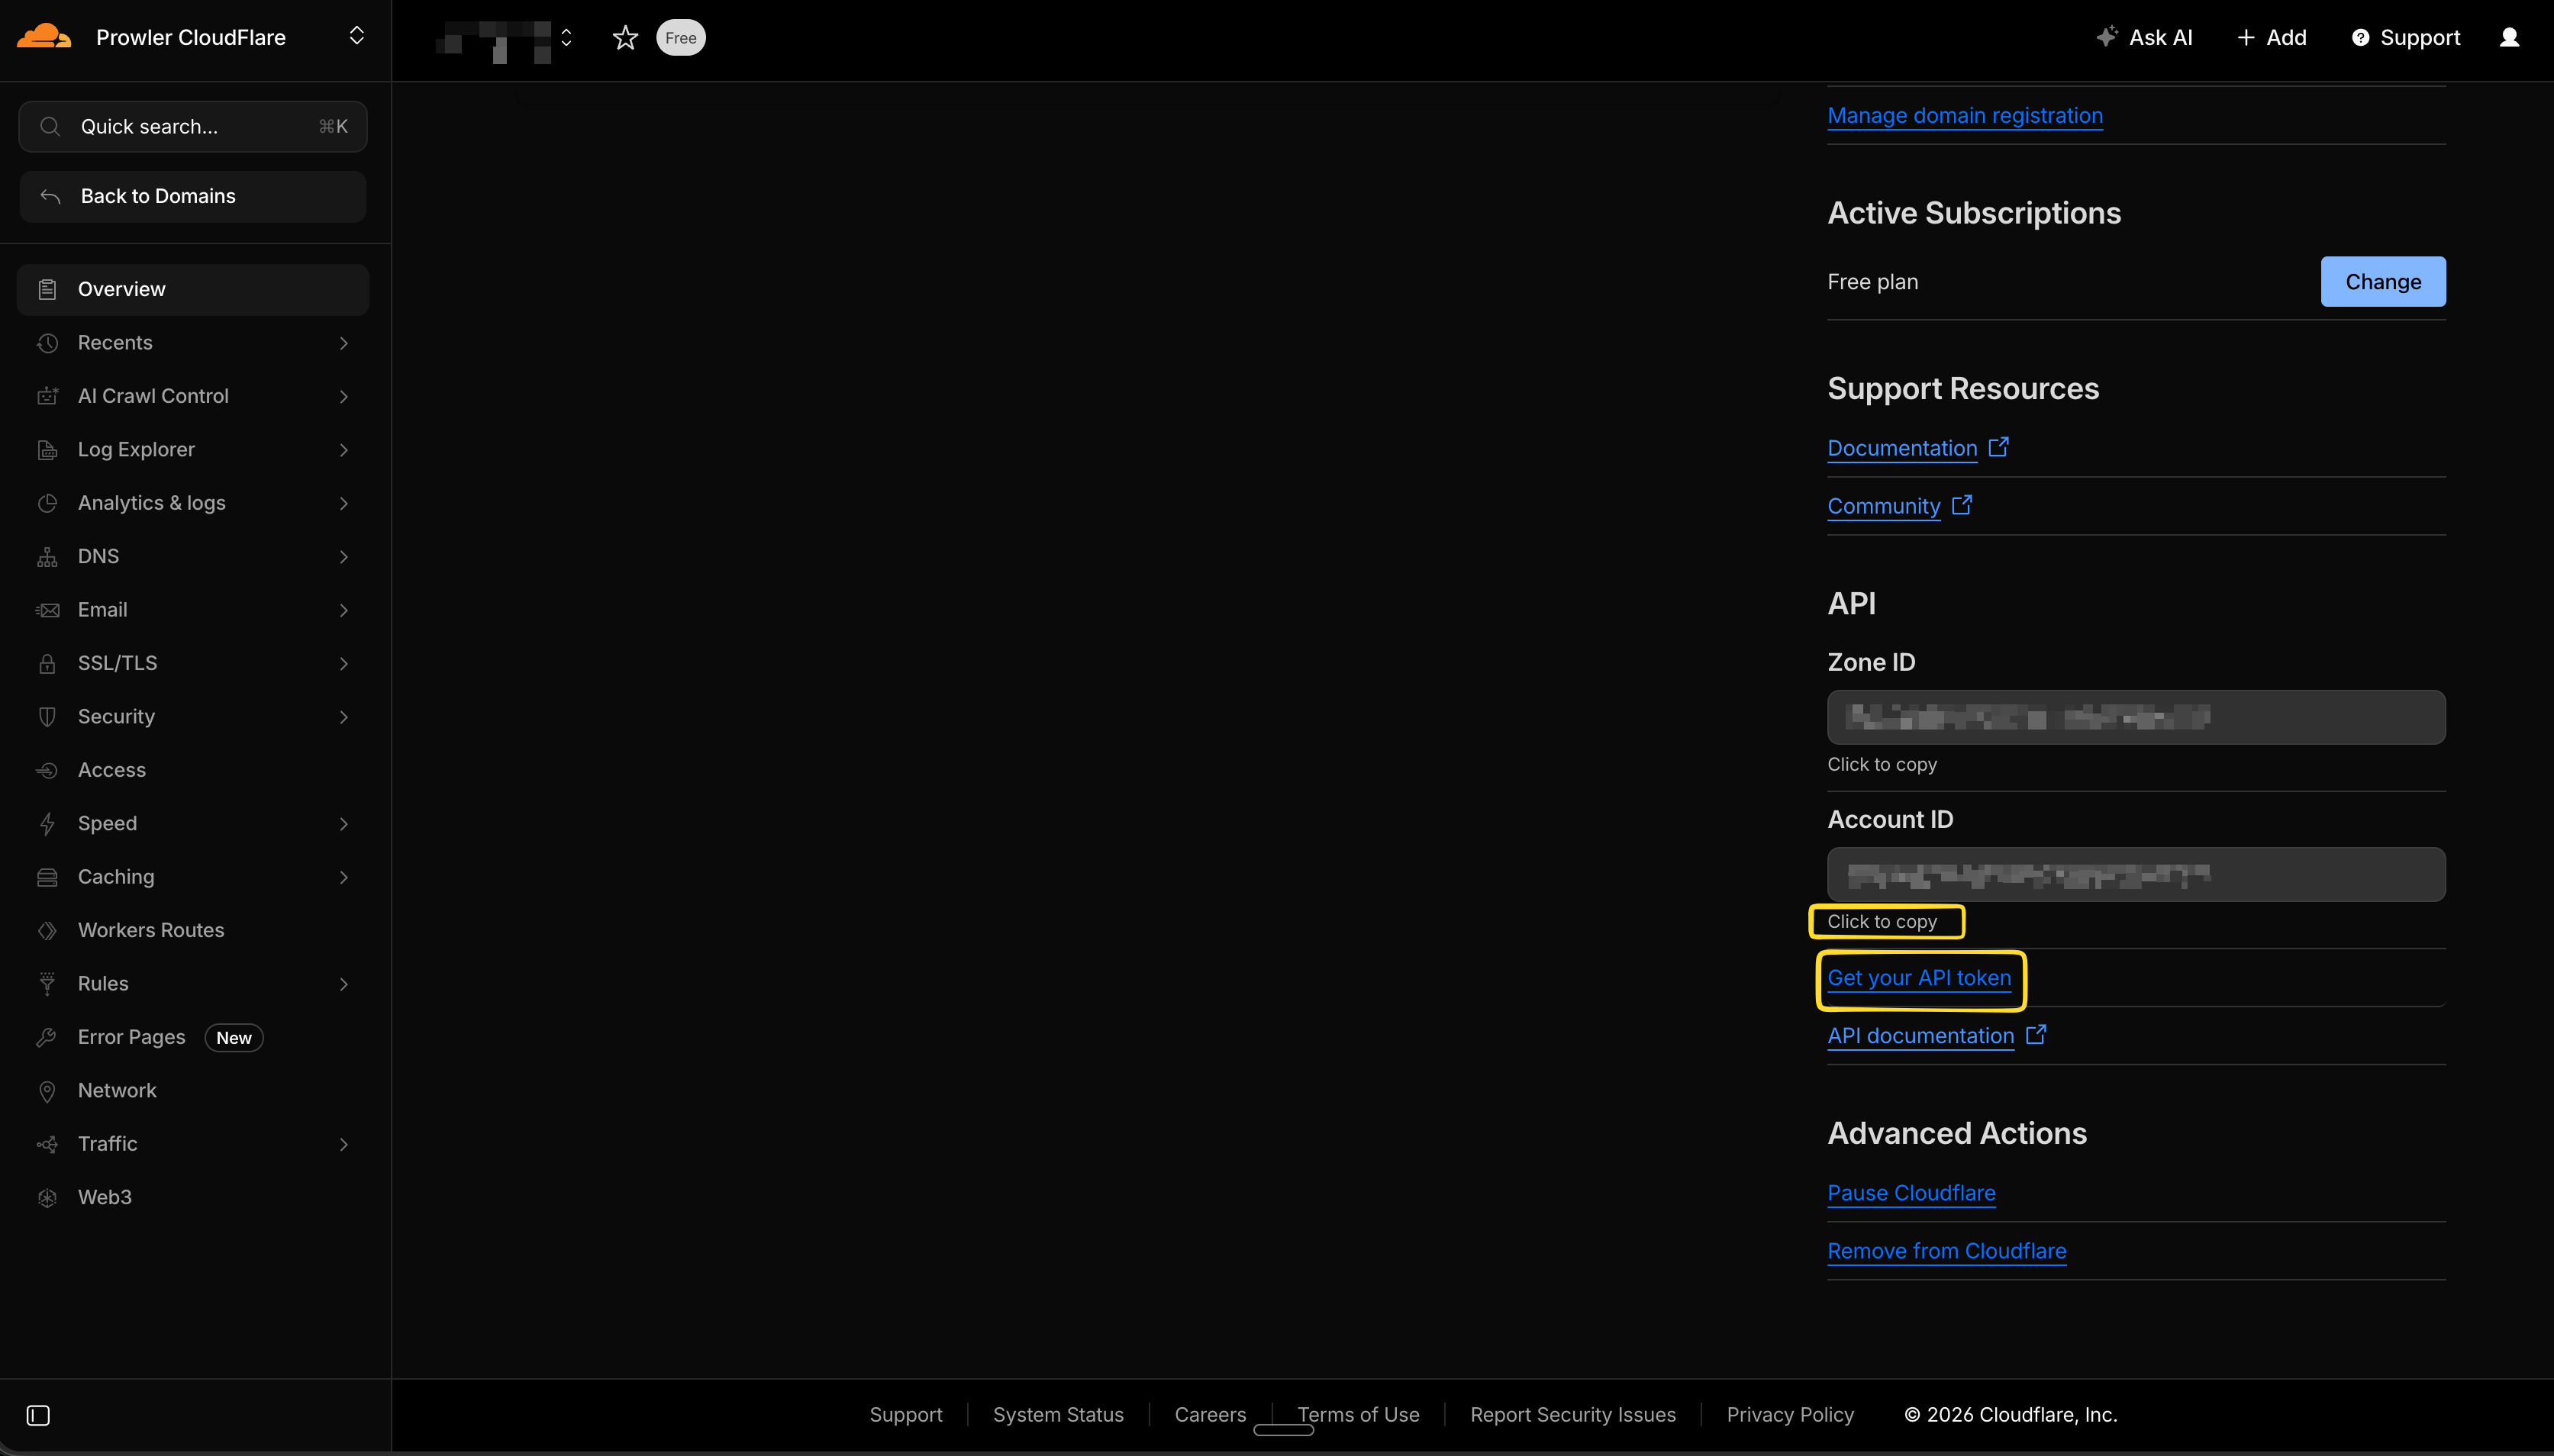 The Account ID is a 32-character hexadecimal string (e.g., `372e67954025e0ba6aaa6d586b9e0b59`). This value acts as the unique identifier for the Cloudflare account in Prowler Cloud.
### Step 2: Open Prowler Cloud
1. Go to [Prowler Cloud](https://cloud.prowler.com/) or launch [Prowler App](/user-guide/tutorials/prowler-app).
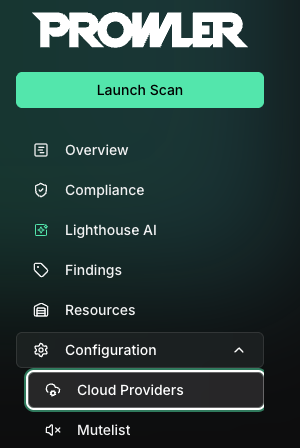
2. Navigate to "Configuration" > "Providers".
The Account ID is a 32-character hexadecimal string (e.g., `372e67954025e0ba6aaa6d586b9e0b59`). This value acts as the unique identifier for the Cloudflare account in Prowler Cloud.
### Step 2: Open Prowler Cloud
1. Go to [Prowler Cloud](https://cloud.prowler.com/) or launch [Prowler App](/user-guide/tutorials/prowler-app).
2. Navigate to "Configuration" > "Providers".
 3. Click "Add Provider".
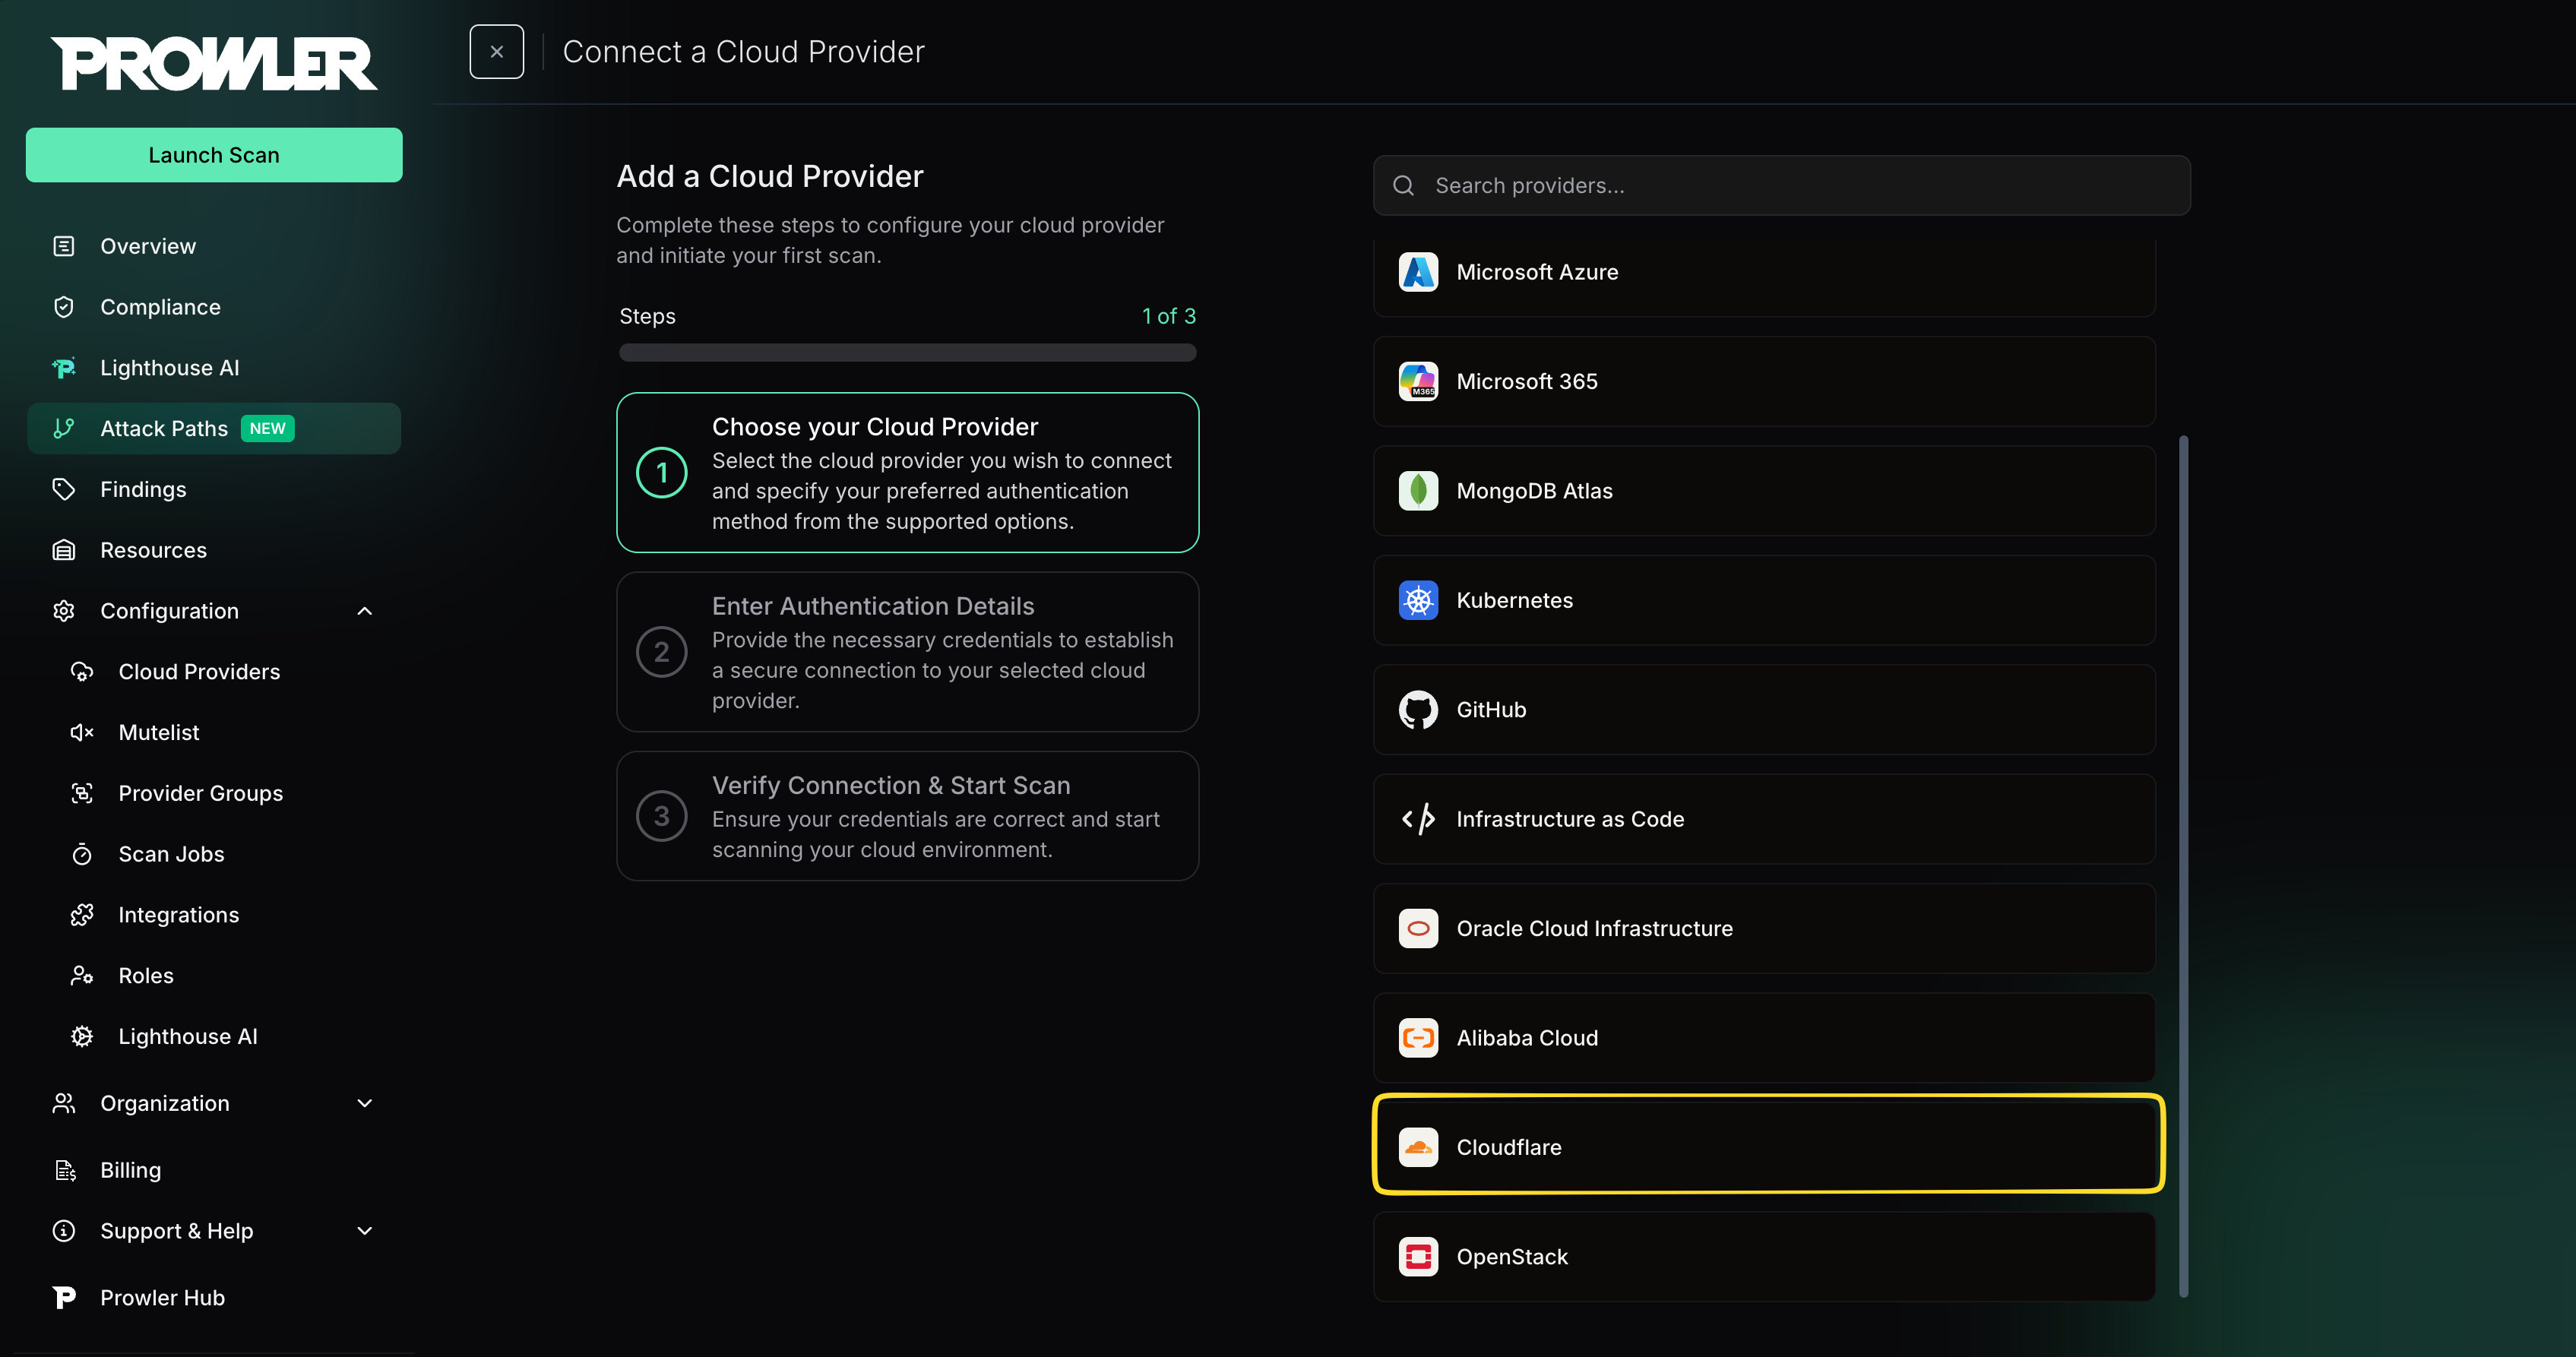
 4. Select "Cloudflare".
 5. Add the **Account ID** and an optional alias, then click "Next".
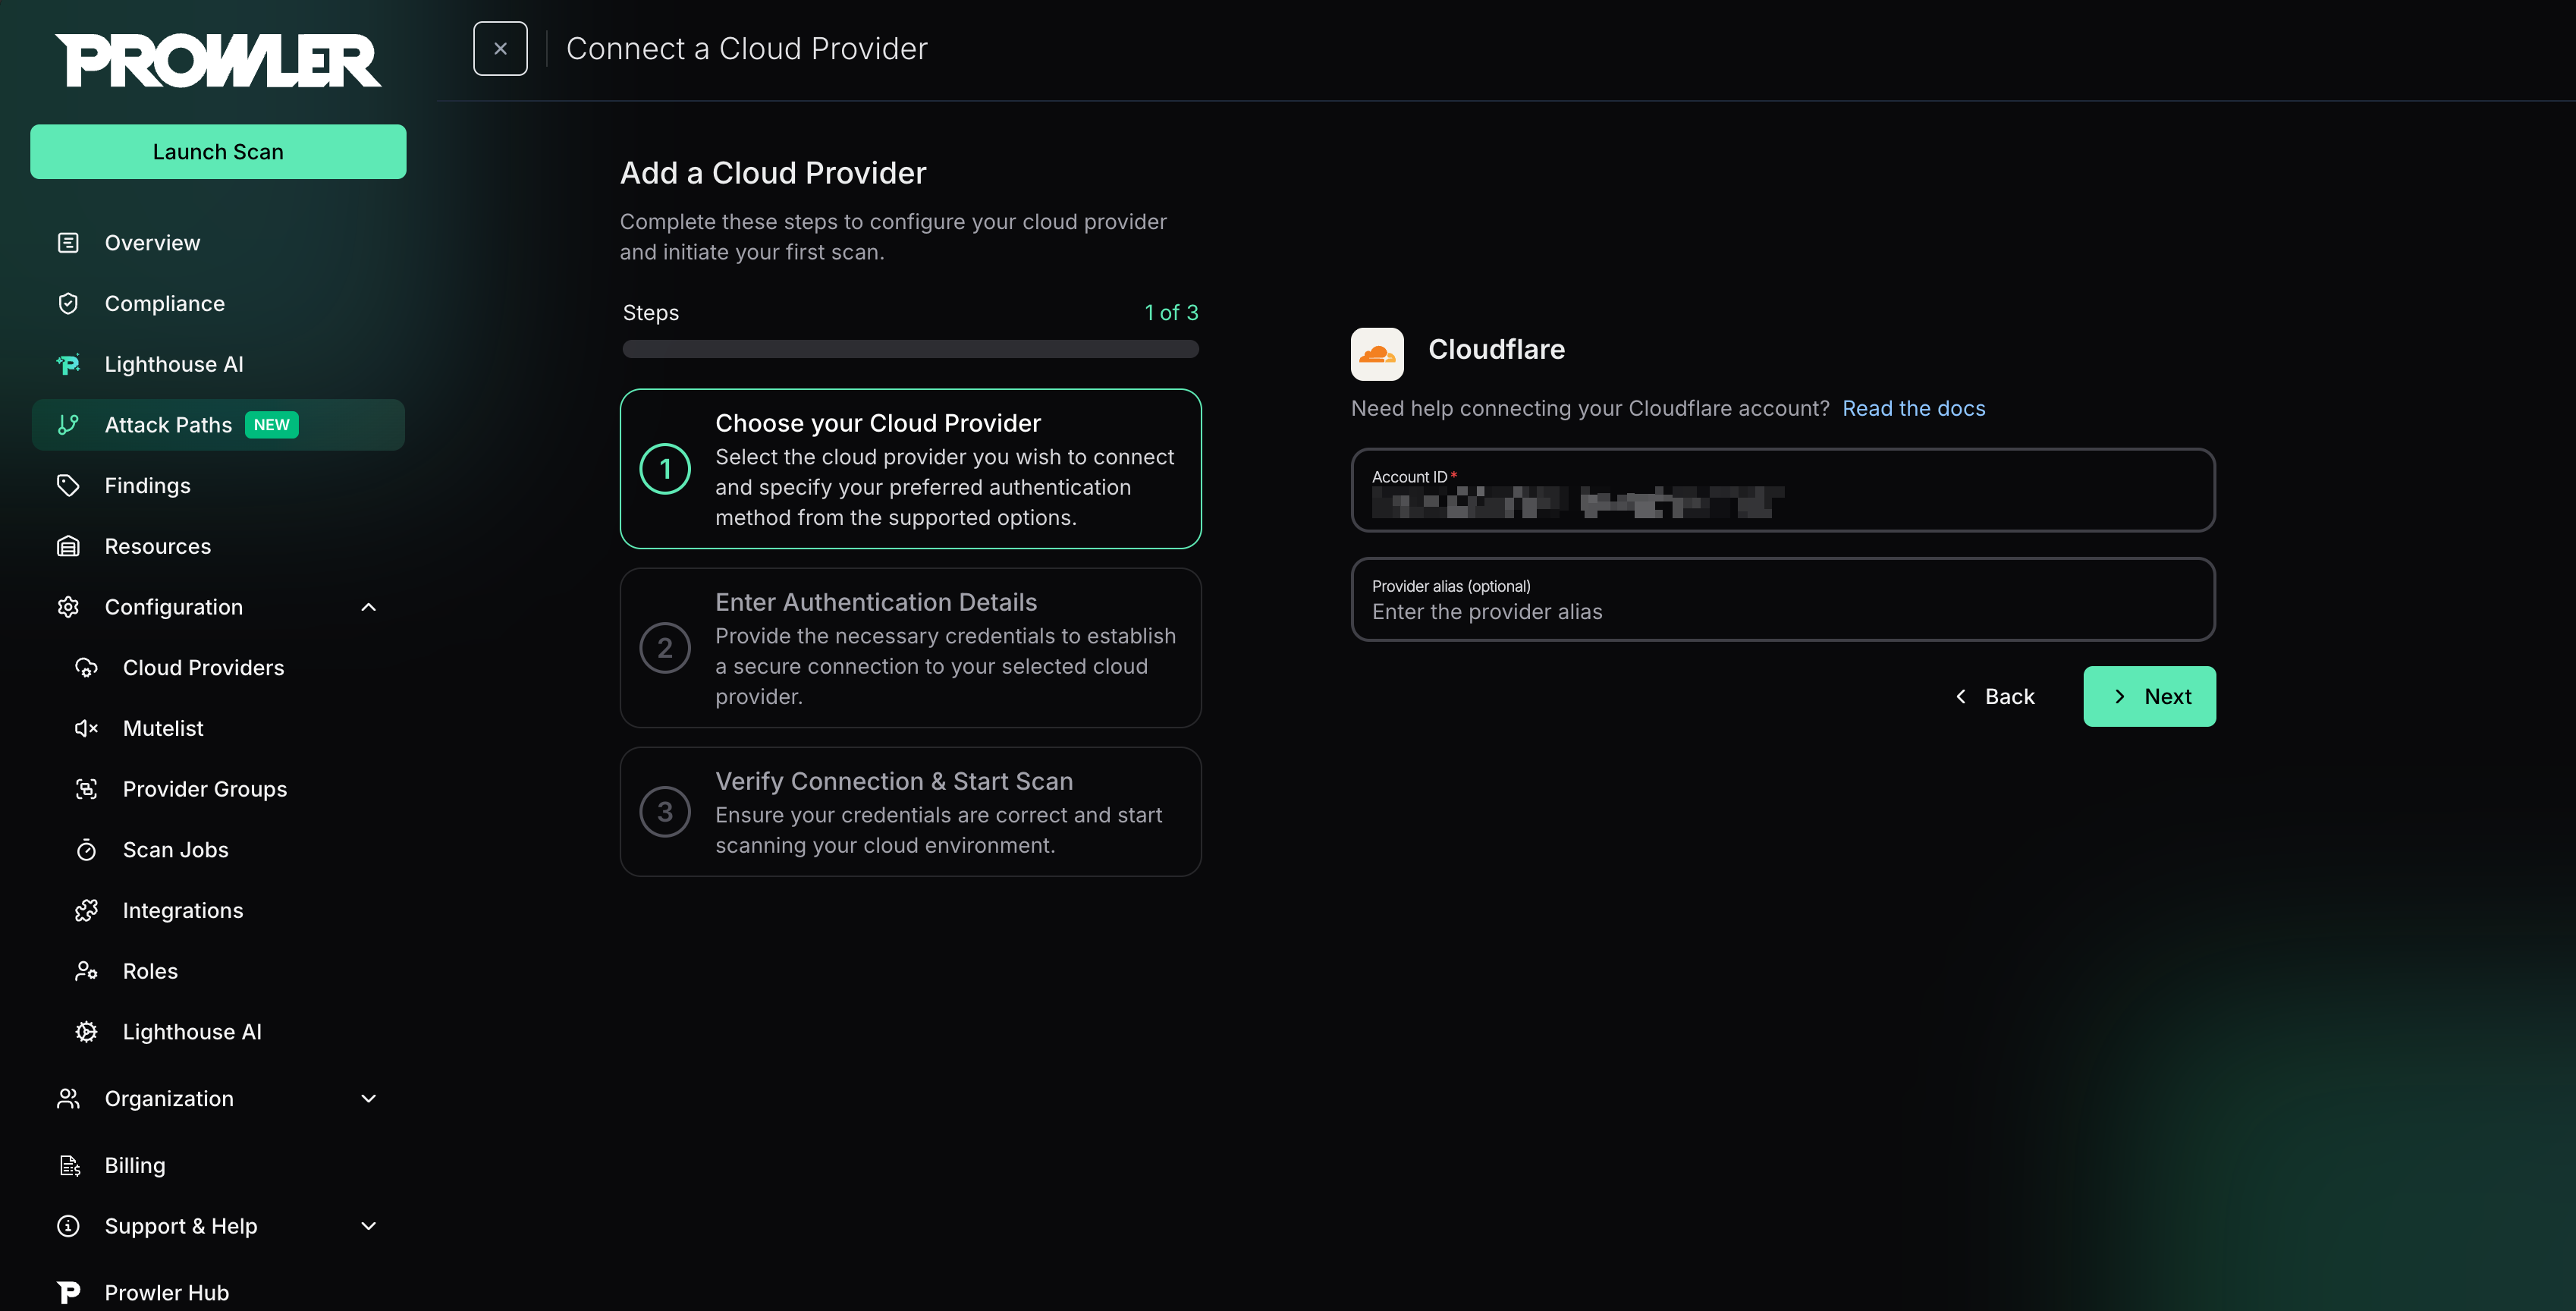 ### Step 3: Choose and Provide Authentication
After the Account ID is in place, select the authentication method that matches the Cloudflare setup:
### Step 3: Choose and Provide Authentication
After the Account ID is in place, select the authentication method that matches the Cloudflare setup:
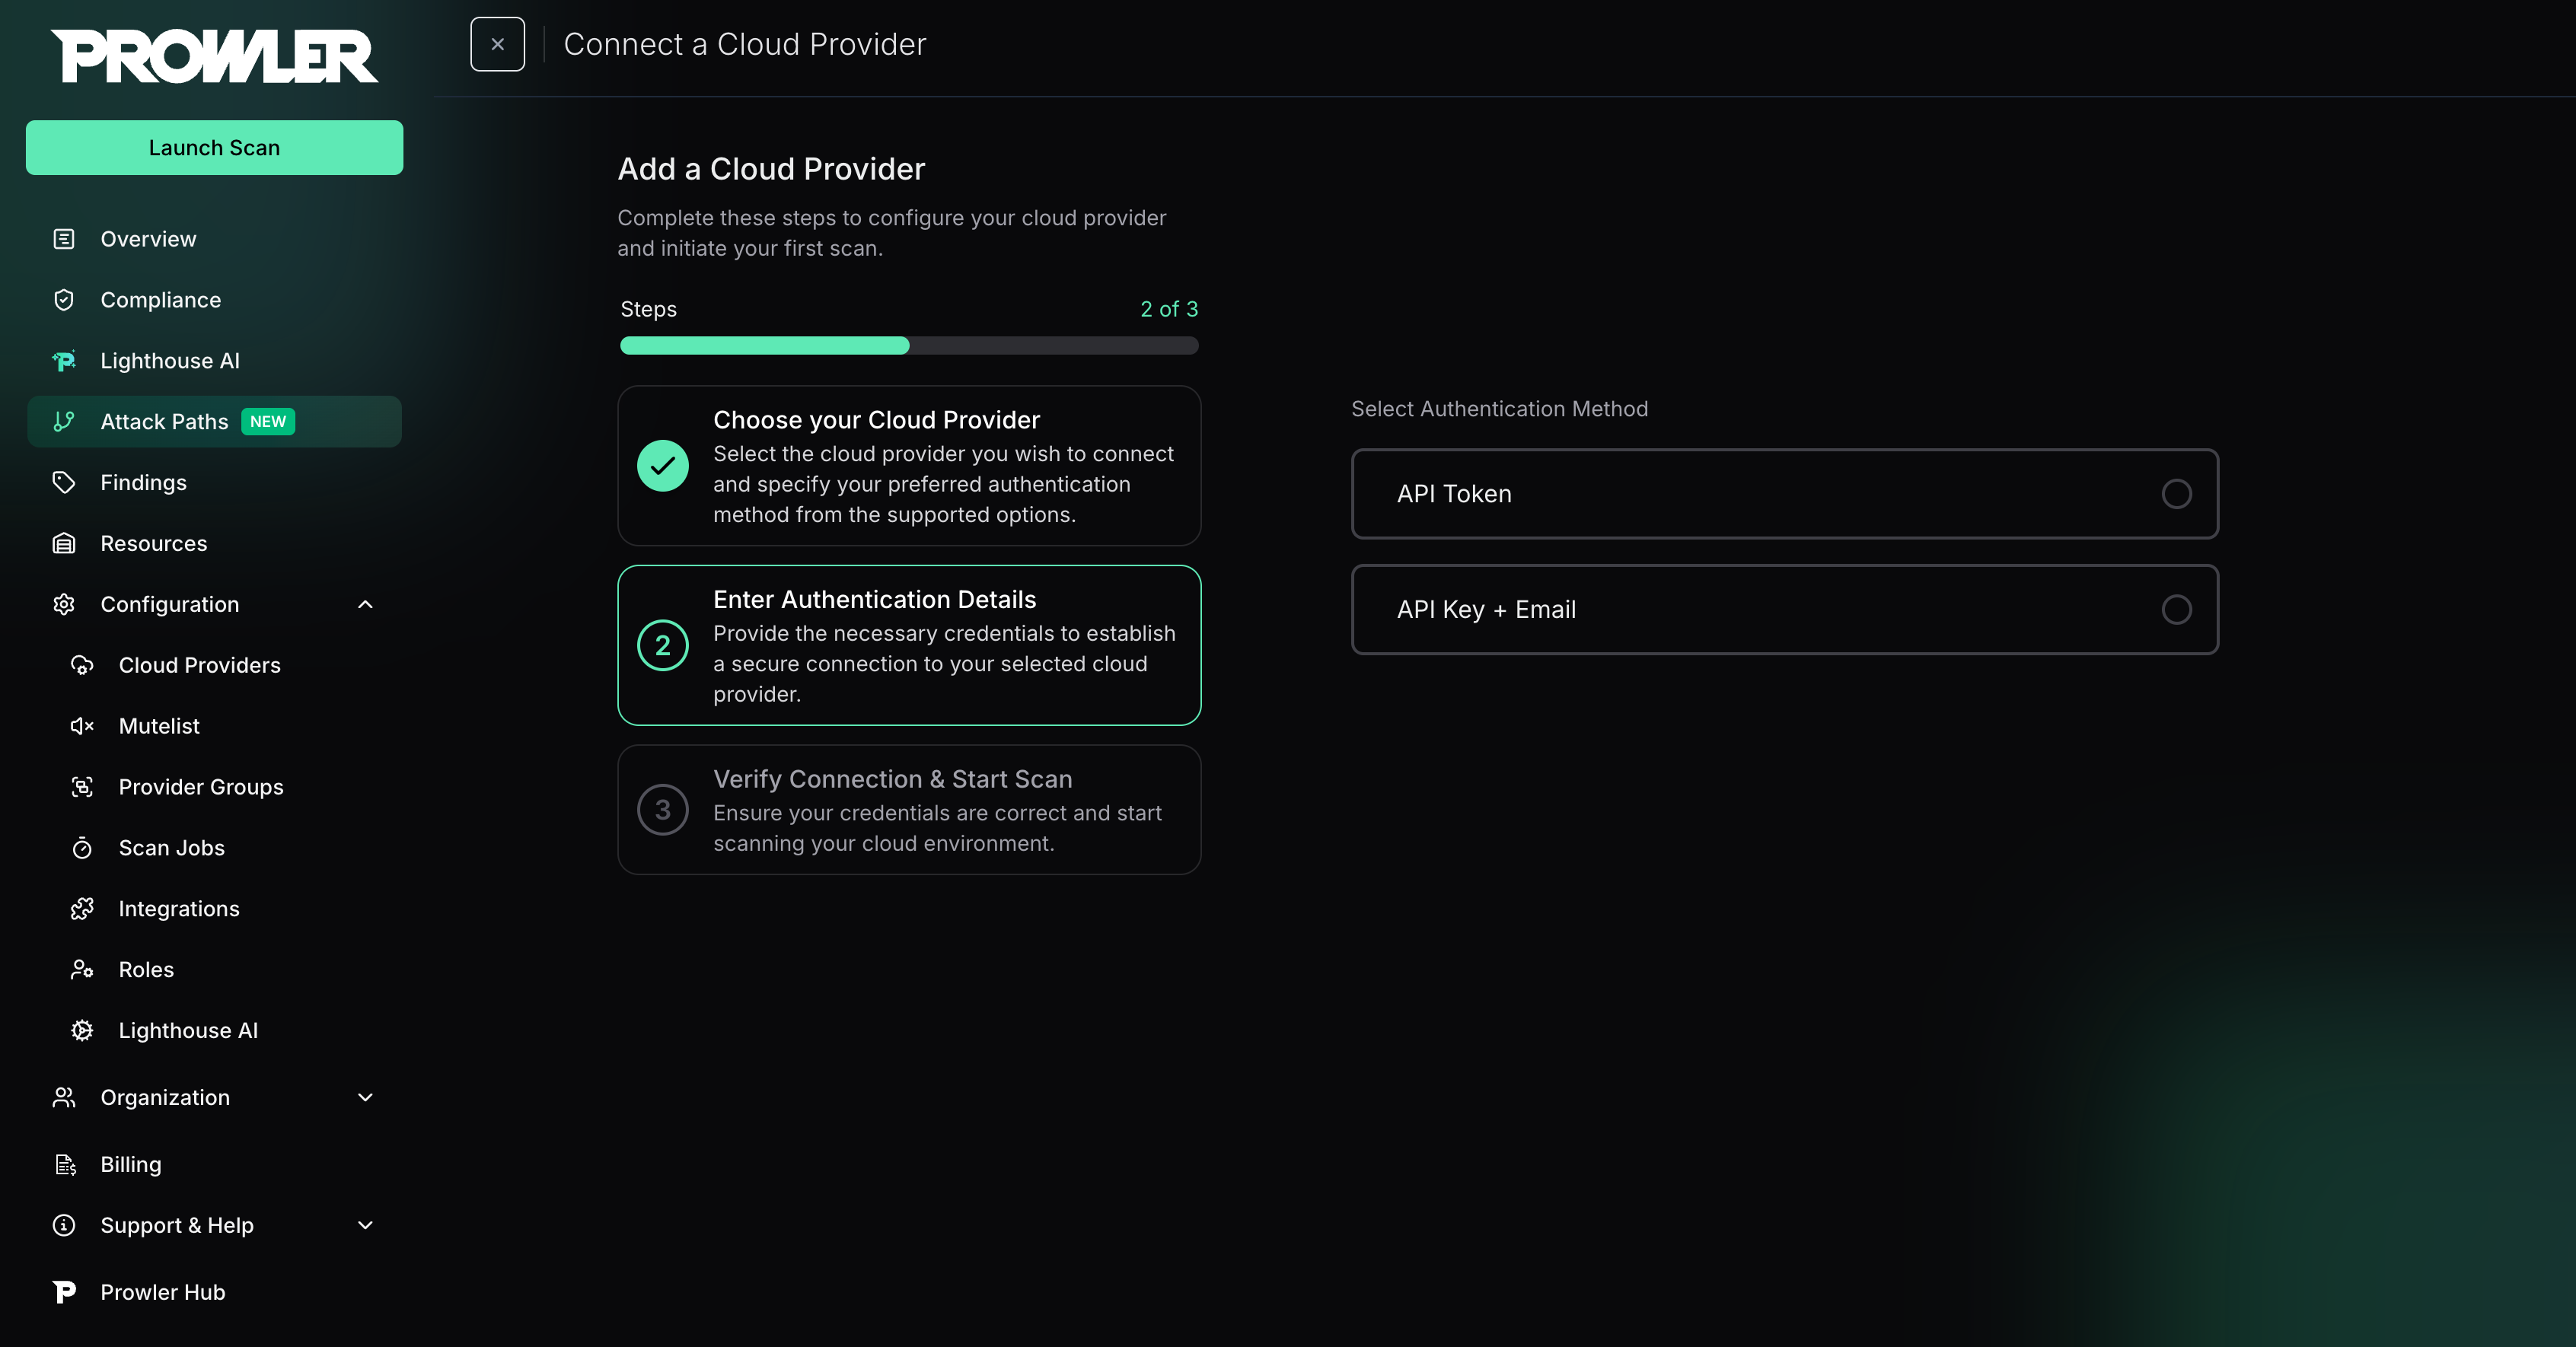 #### User API Token Authentication (Recommended)
1. Select **API Token**.
2. Enter the **User API Token** created in the Cloudflare Dashboard.
#### User API Token Authentication (Recommended)
1. Select **API Token**.
2. Enter the **User API Token** created in the Cloudflare Dashboard.
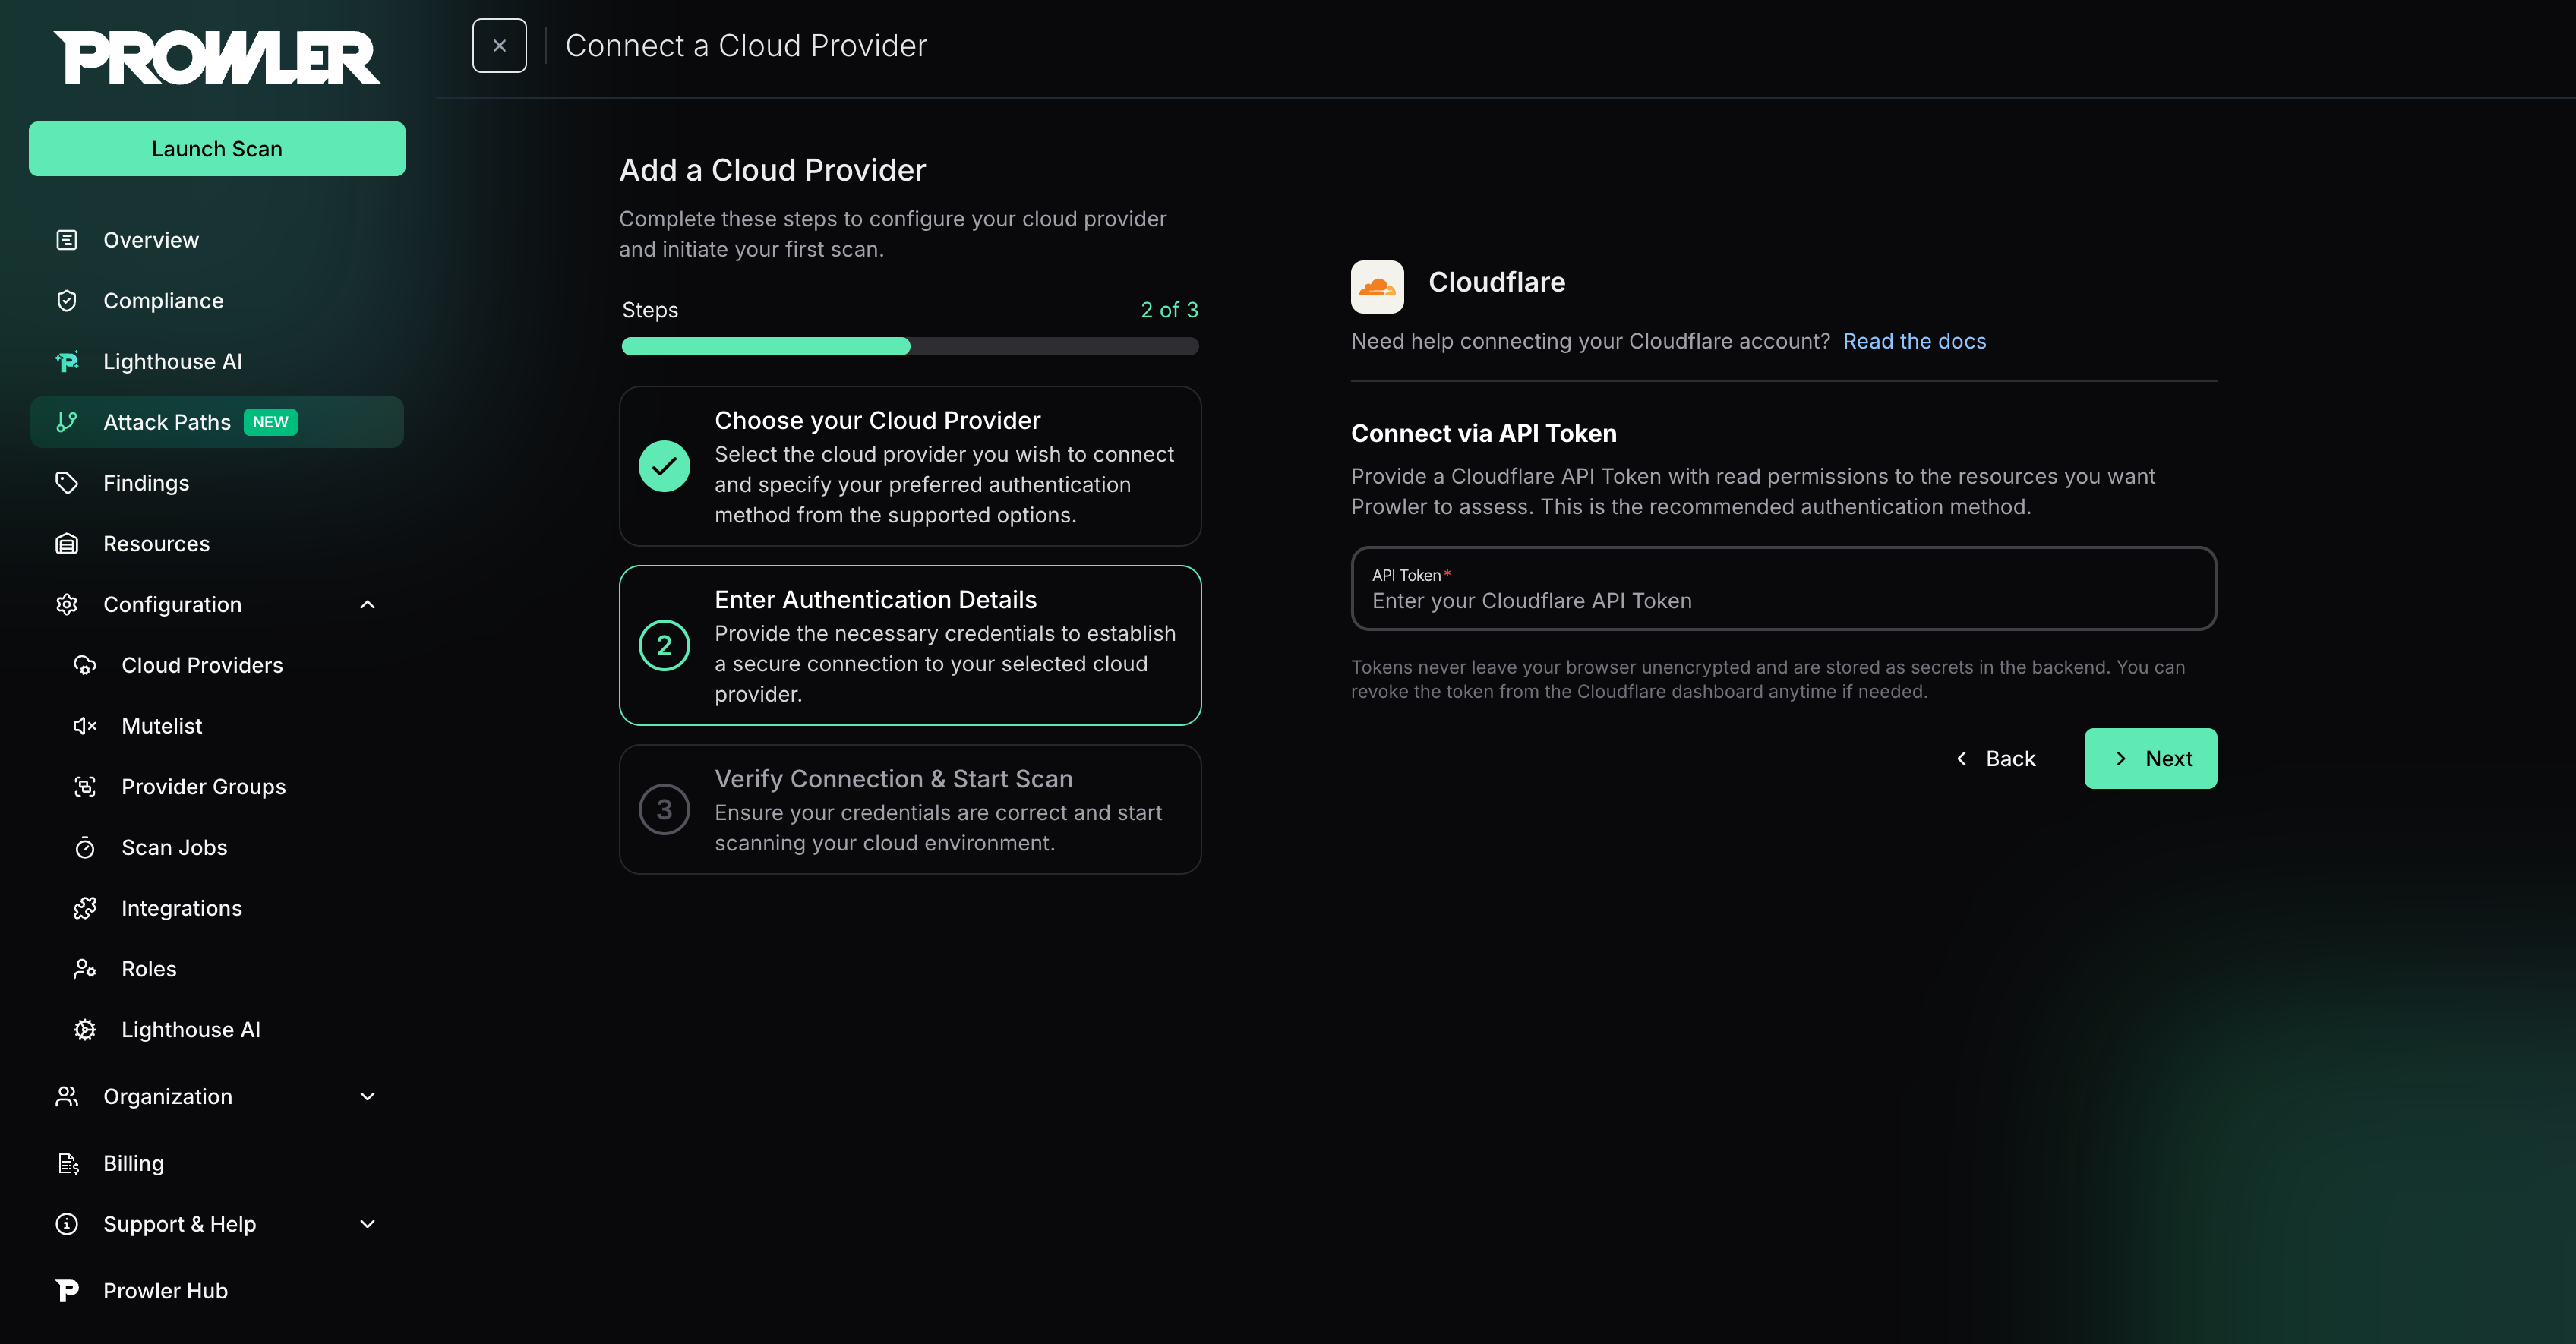 Use this method for scoped, least-privilege access. Full setup steps are in the [Authentication guide](/user-guide/providers/cloudflare/authentication#api-token-recommended).
#### API Key and Email Authentication (Legacy)
1. Select **API Key + Email**.
2. Enter the **Global API Key**.
3. Enter the **email address** associated with the Cloudflare account.
Use this method for scoped, least-privilege access. Full setup steps are in the [Authentication guide](/user-guide/providers/cloudflare/authentication#api-token-recommended).
#### API Key and Email Authentication (Legacy)
1. Select **API Key + Email**.
2. Enter the **Global API Key**.
3. Enter the **email address** associated with the Cloudflare account.
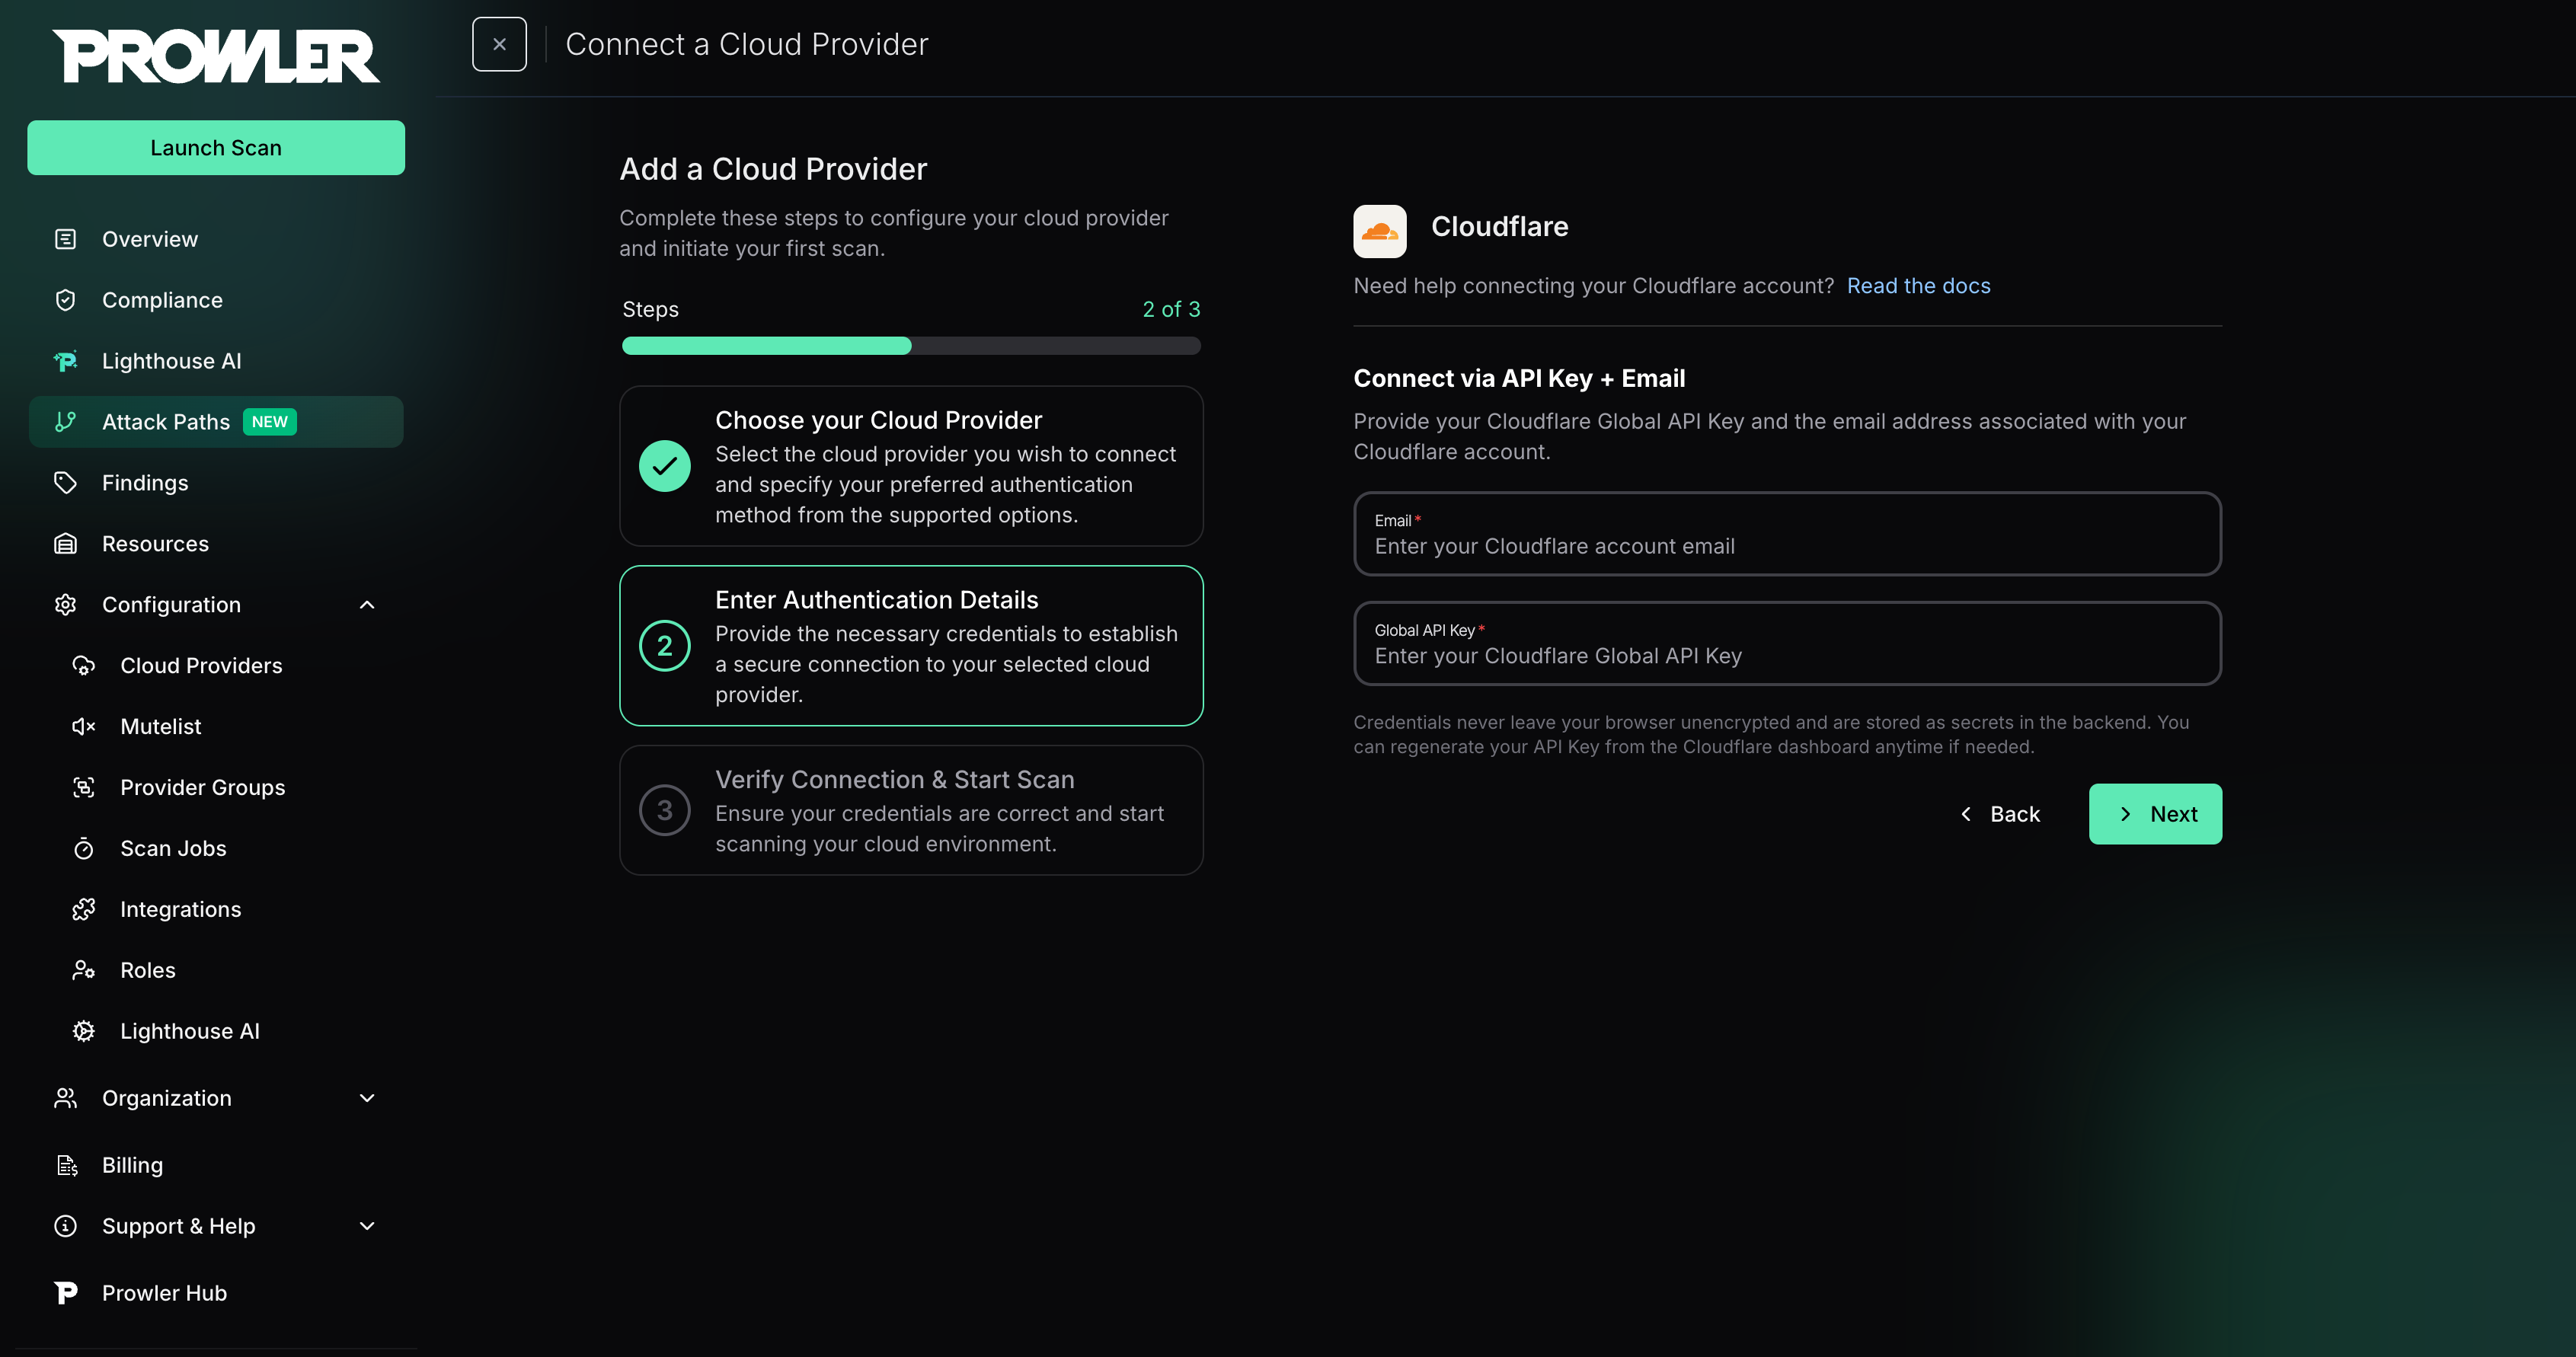 For the complete setup workflow, follow the [Authentication guide](/user-guide/providers/cloudflare/authentication#api-key-and-email-legacy).
### Step 4: Launch the Scan
1. Review the summary.
2. Click **Launch Scan** to start auditing Cloudflare.
For the complete setup workflow, follow the [Authentication guide](/user-guide/providers/cloudflare/authentication#api-key-and-email-legacy).
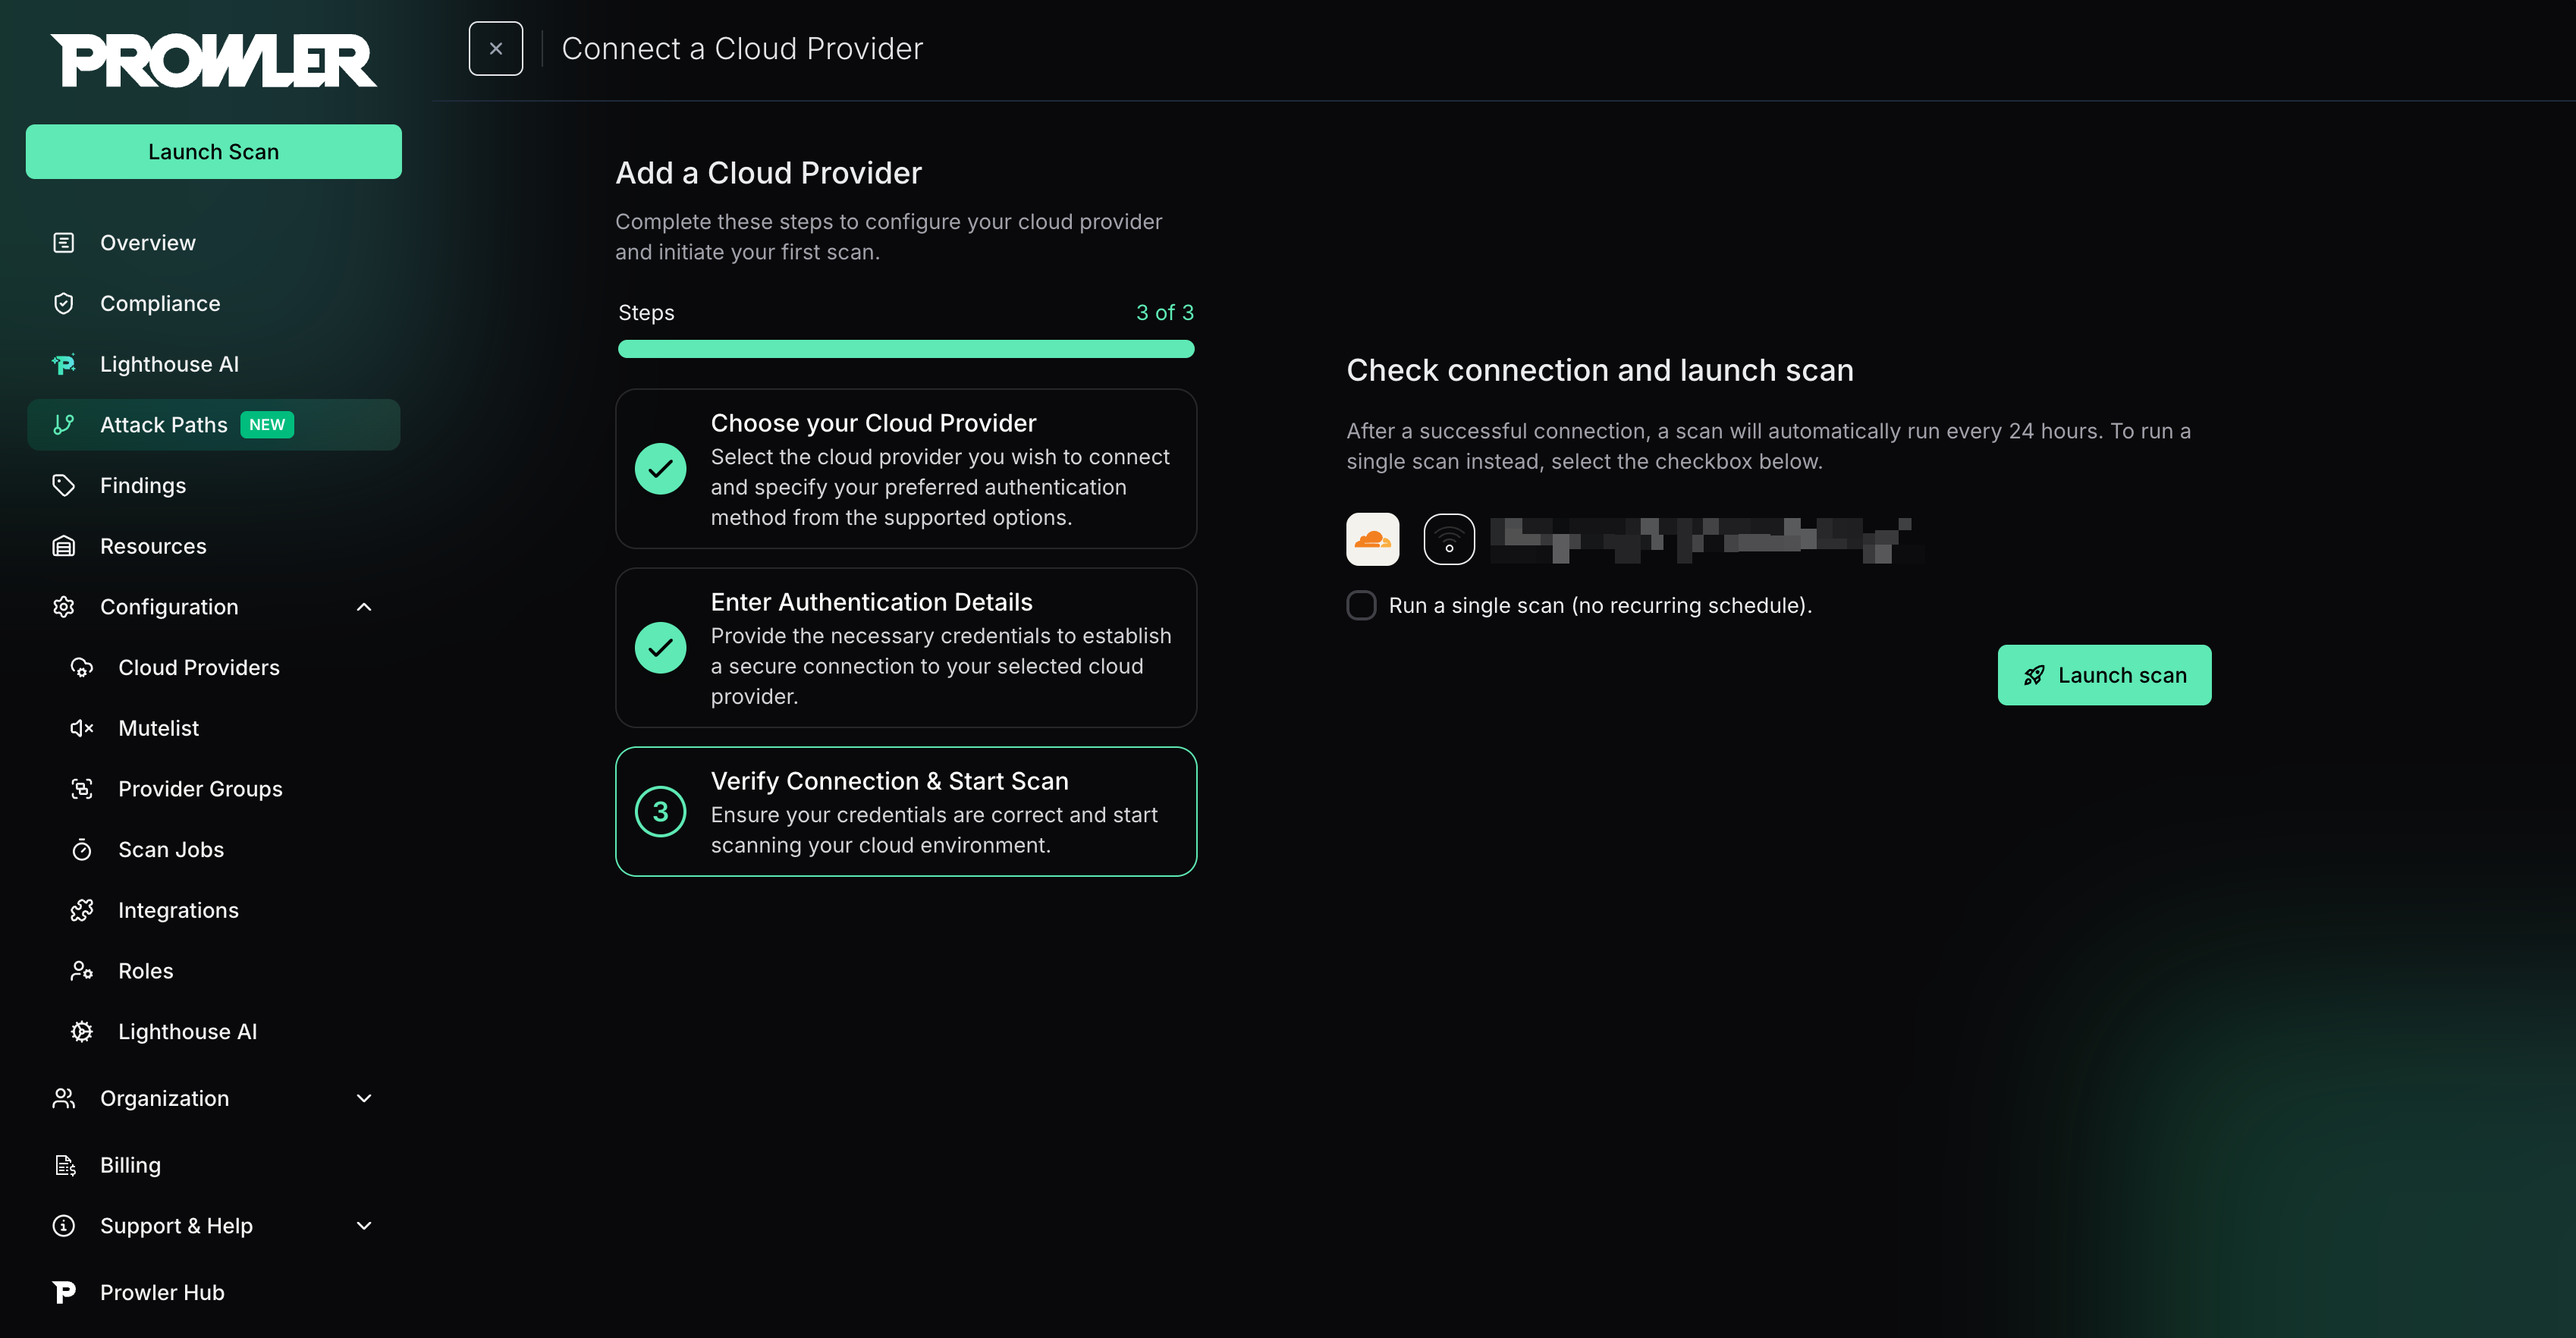
### Step 4: Launch the Scan
1. Review the summary.
2. Click **Launch Scan** to start auditing Cloudflare.
 ***
## Prowler CLI
### Step 1: Set Up Authentication
Choose the matching method from the [Cloudflare Authentication](/user-guide/providers/cloudflare/authentication) guide:
* **User API Token** (recommended): Set `CLOUDFLARE_API_TOKEN`
* **API Key + Email** (legacy): Set `CLOUDFLARE_API_KEY` and `CLOUDFLARE_API_EMAIL`
### Step 2: Run the First Scan
Run a baseline scan after credentials are configured:
```console theme={null}
prowler cloudflare
```
Prowler automatically discovers all zones accessible with the provided credentials and runs security checks against them.
### Step 3: Filter the Scan Scope (Optional)
#### Filter by Zone
To scan only specific zones, use the `-f`, `--region`, or `--filter-region` argument:
```console theme={null}
prowler cloudflare -f example.com
```
Multiple zones can be specified:
```console theme={null}
prowler cloudflare -f example.com example.org
```
Zone IDs are also supported:
```console theme={null}
prowler cloudflare -f 023e105f4ecef8ad9ca31a8372d0c353
```
#### Filter by Account
To restrict the scan to specific accounts, use the `--account-id` argument:
```console theme={null}
prowler cloudflare --account-id 372e67954025e0ba6aaa6d586b9e0b59
```
Multiple account IDs can be specified:
```console theme={null}
prowler cloudflare --account-id 372e67954025e0ba6aaa6d586b9e0b59 9a7806061c88ada191ed06f989cc3dac
```
If any of the provided account IDs are not accessible with the current credentials, Prowler raises an error and stops execution.
Account and zone filtering can be combined to narrow the scan scope further:
```console theme={null}
prowler cloudflare --account-id 372e67954025e0ba6aaa6d586b9e0b59 -f example.com
```
### Step 4: Use a Custom Configuration (Optional)
Prowler uses a configuration file to customize provider behavior. The Cloudflare configuration includes:
```yaml theme={null}
cloudflare:
# Maximum number of retries for API requests (default is 2)
max_retries: 2
```
To use a custom configuration:
```console theme={null}
prowler cloudflare --config-file /path/to/config.yaml
```
***
***
## Prowler CLI
### Step 1: Set Up Authentication
Choose the matching method from the [Cloudflare Authentication](/user-guide/providers/cloudflare/authentication) guide:
* **User API Token** (recommended): Set `CLOUDFLARE_API_TOKEN`
* **API Key + Email** (legacy): Set `CLOUDFLARE_API_KEY` and `CLOUDFLARE_API_EMAIL`
### Step 2: Run the First Scan
Run a baseline scan after credentials are configured:
```console theme={null}
prowler cloudflare
```
Prowler automatically discovers all zones accessible with the provided credentials and runs security checks against them.
### Step 3: Filter the Scan Scope (Optional)
#### Filter by Zone
To scan only specific zones, use the `-f`, `--region`, or `--filter-region` argument:
```console theme={null}
prowler cloudflare -f example.com
```
Multiple zones can be specified:
```console theme={null}
prowler cloudflare -f example.com example.org
```
Zone IDs are also supported:
```console theme={null}
prowler cloudflare -f 023e105f4ecef8ad9ca31a8372d0c353
```
#### Filter by Account
To restrict the scan to specific accounts, use the `--account-id` argument:
```console theme={null}
prowler cloudflare --account-id 372e67954025e0ba6aaa6d586b9e0b59
```
Multiple account IDs can be specified:
```console theme={null}
prowler cloudflare --account-id 372e67954025e0ba6aaa6d586b9e0b59 9a7806061c88ada191ed06f989cc3dac
```
If any of the provided account IDs are not accessible with the current credentials, Prowler raises an error and stops execution.
Account and zone filtering can be combined to narrow the scan scope further:
```console theme={null}
prowler cloudflare --account-id 372e67954025e0ba6aaa6d586b9e0b59 -f example.com
```
### Step 4: Use a Custom Configuration (Optional)
Prowler uses a configuration file to customize provider behavior. The Cloudflare configuration includes:
```yaml theme={null}
cloudflare:
# Maximum number of retries for API requests (default is 2)
max_retries: 2
```
To use a custom configuration:
```console theme={null}
prowler cloudflare --config-file /path/to/config.yaml
```
***