Introduction
You can integrate Prowler SaaS with SAML SSO identity providers such as Okta to enable single sign-on for your organization's users. In parallel, invite users and set their permissions from the User Management tab. The Prowler SaaS SAML integration currently supports the following features:
- IdP-initiated SSO
- SP-initiated SSO
- Just-in-time provisioning
- Users from your organization signing into Prowler SaaS for the first time will be automatically created. You can also manually invite them as usual from the User Management tab.
For SSO integration with Azure AD / Entra ID, see our Entra ID configuration instructions.
How to Integrate
Step 1 - Setting Your Email Domain
-
From Integrations Tab, expand the SAML SSO section, then select Enable.
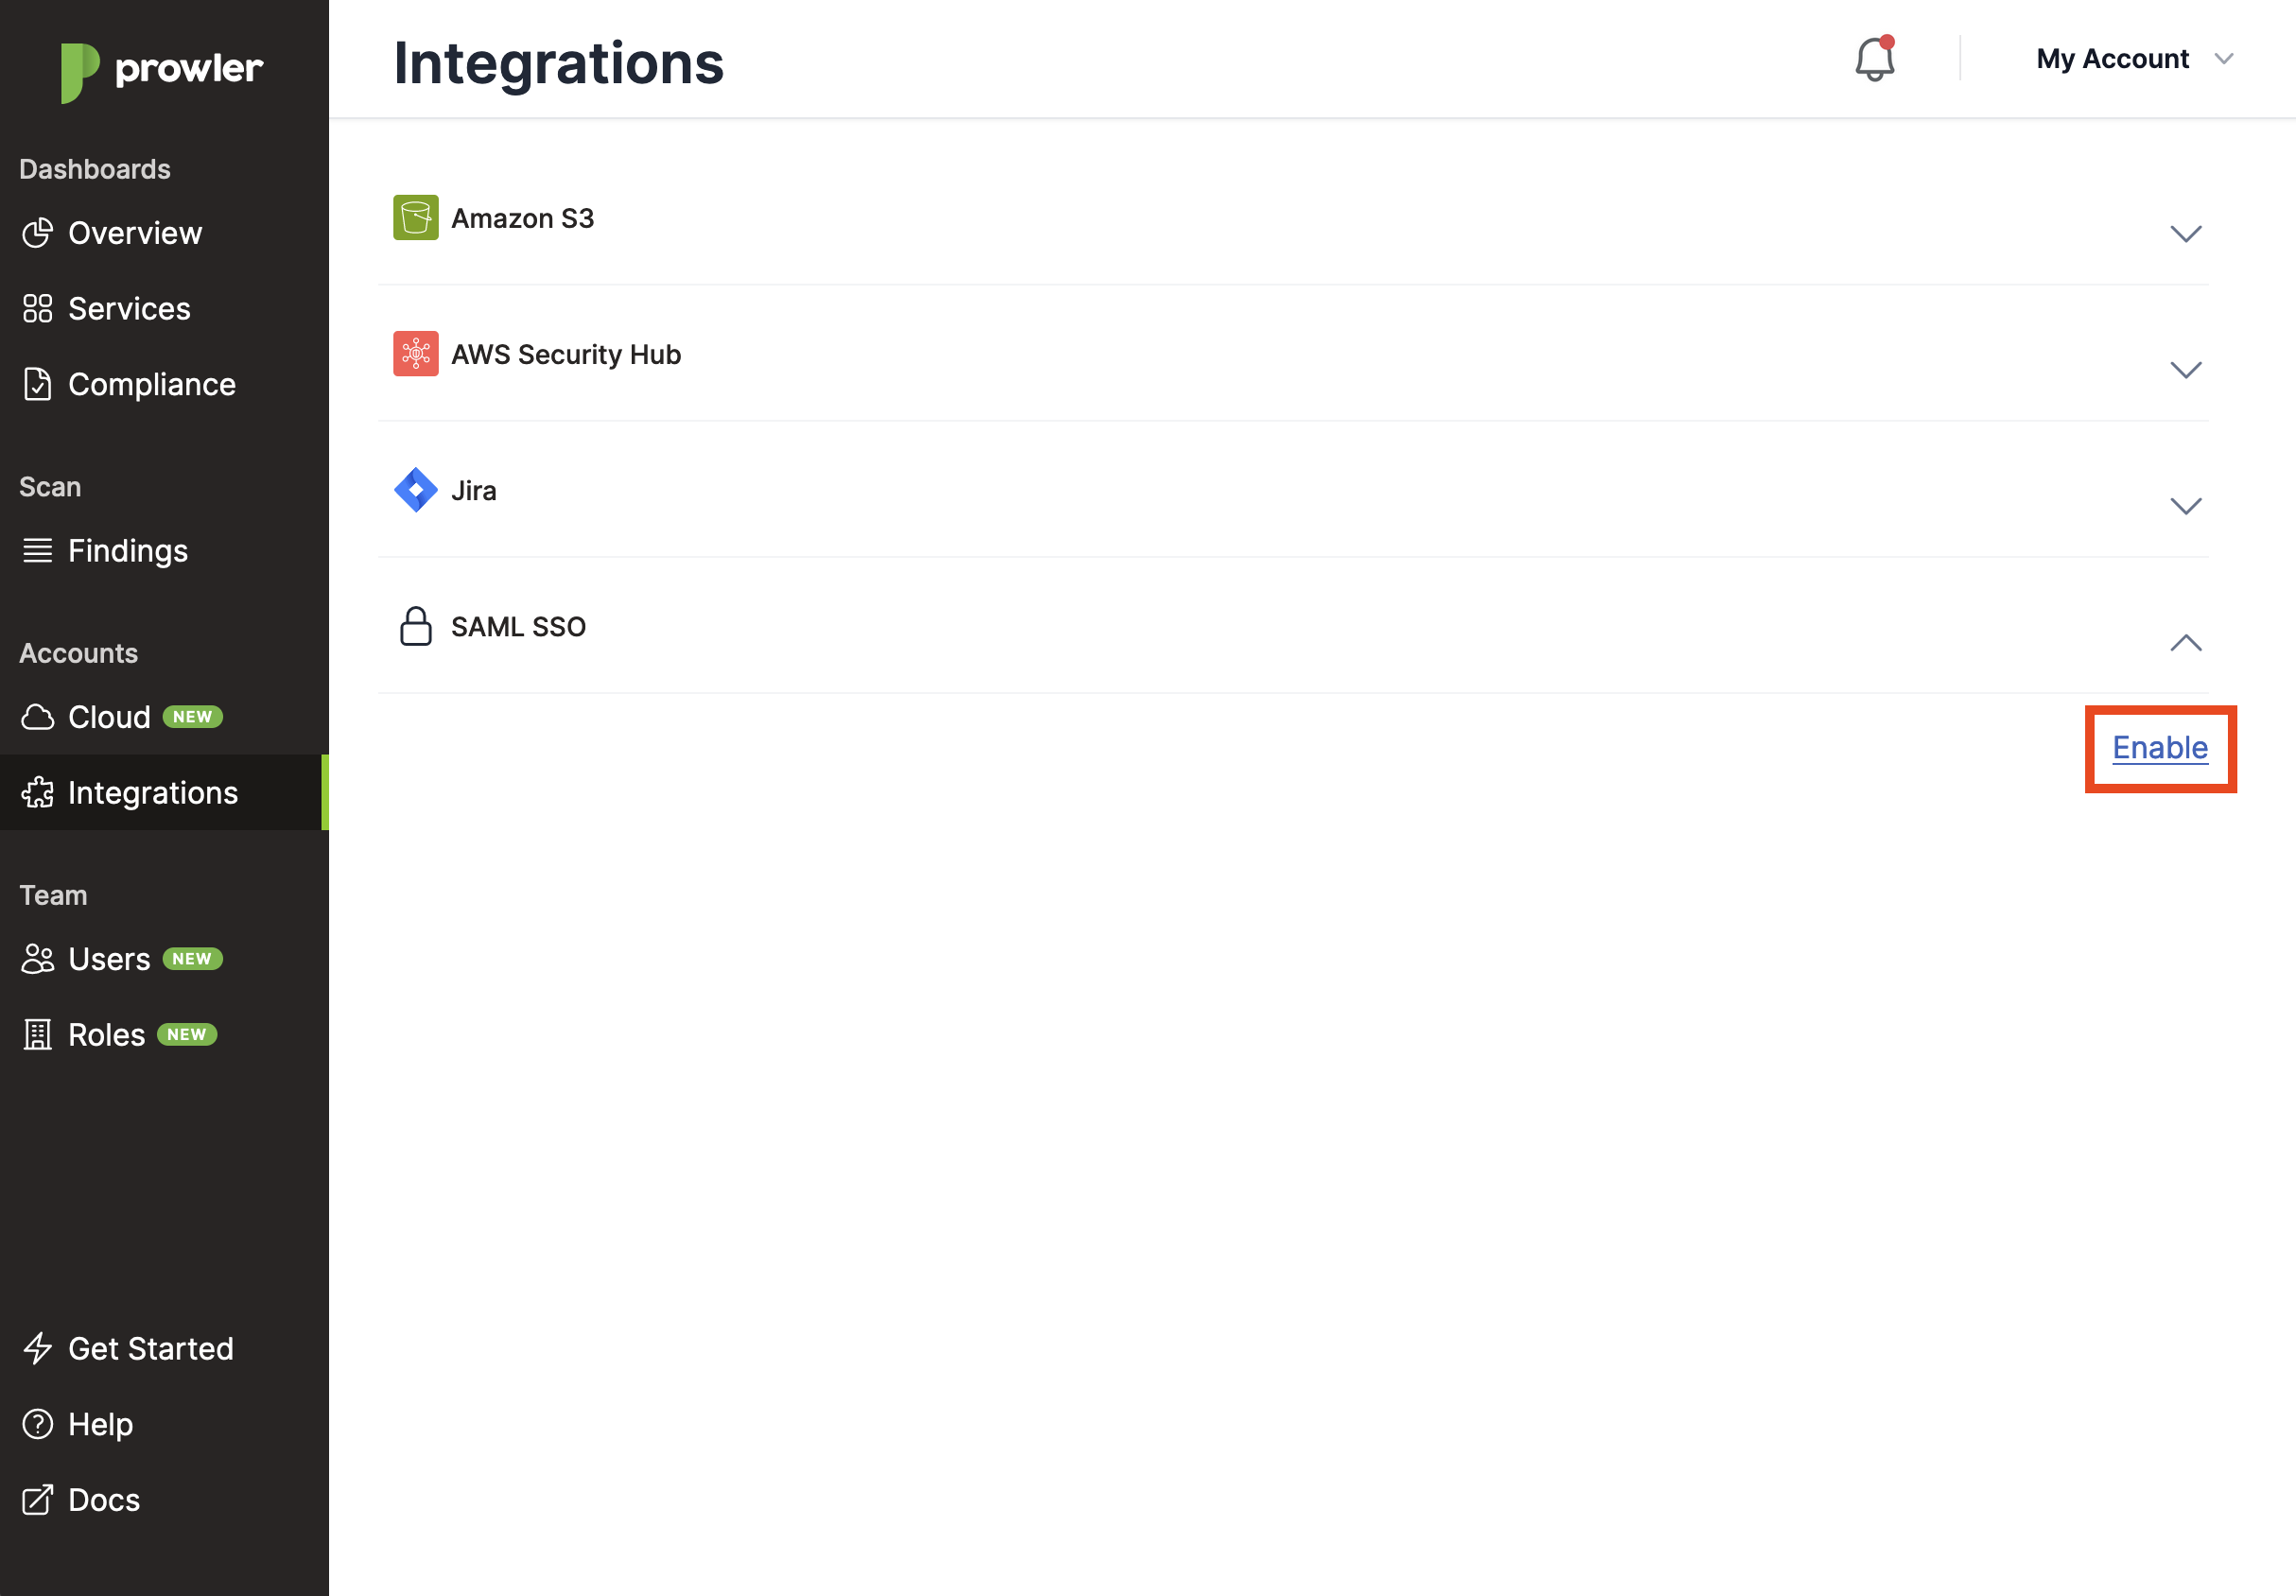
-
Enter your allowed domain.
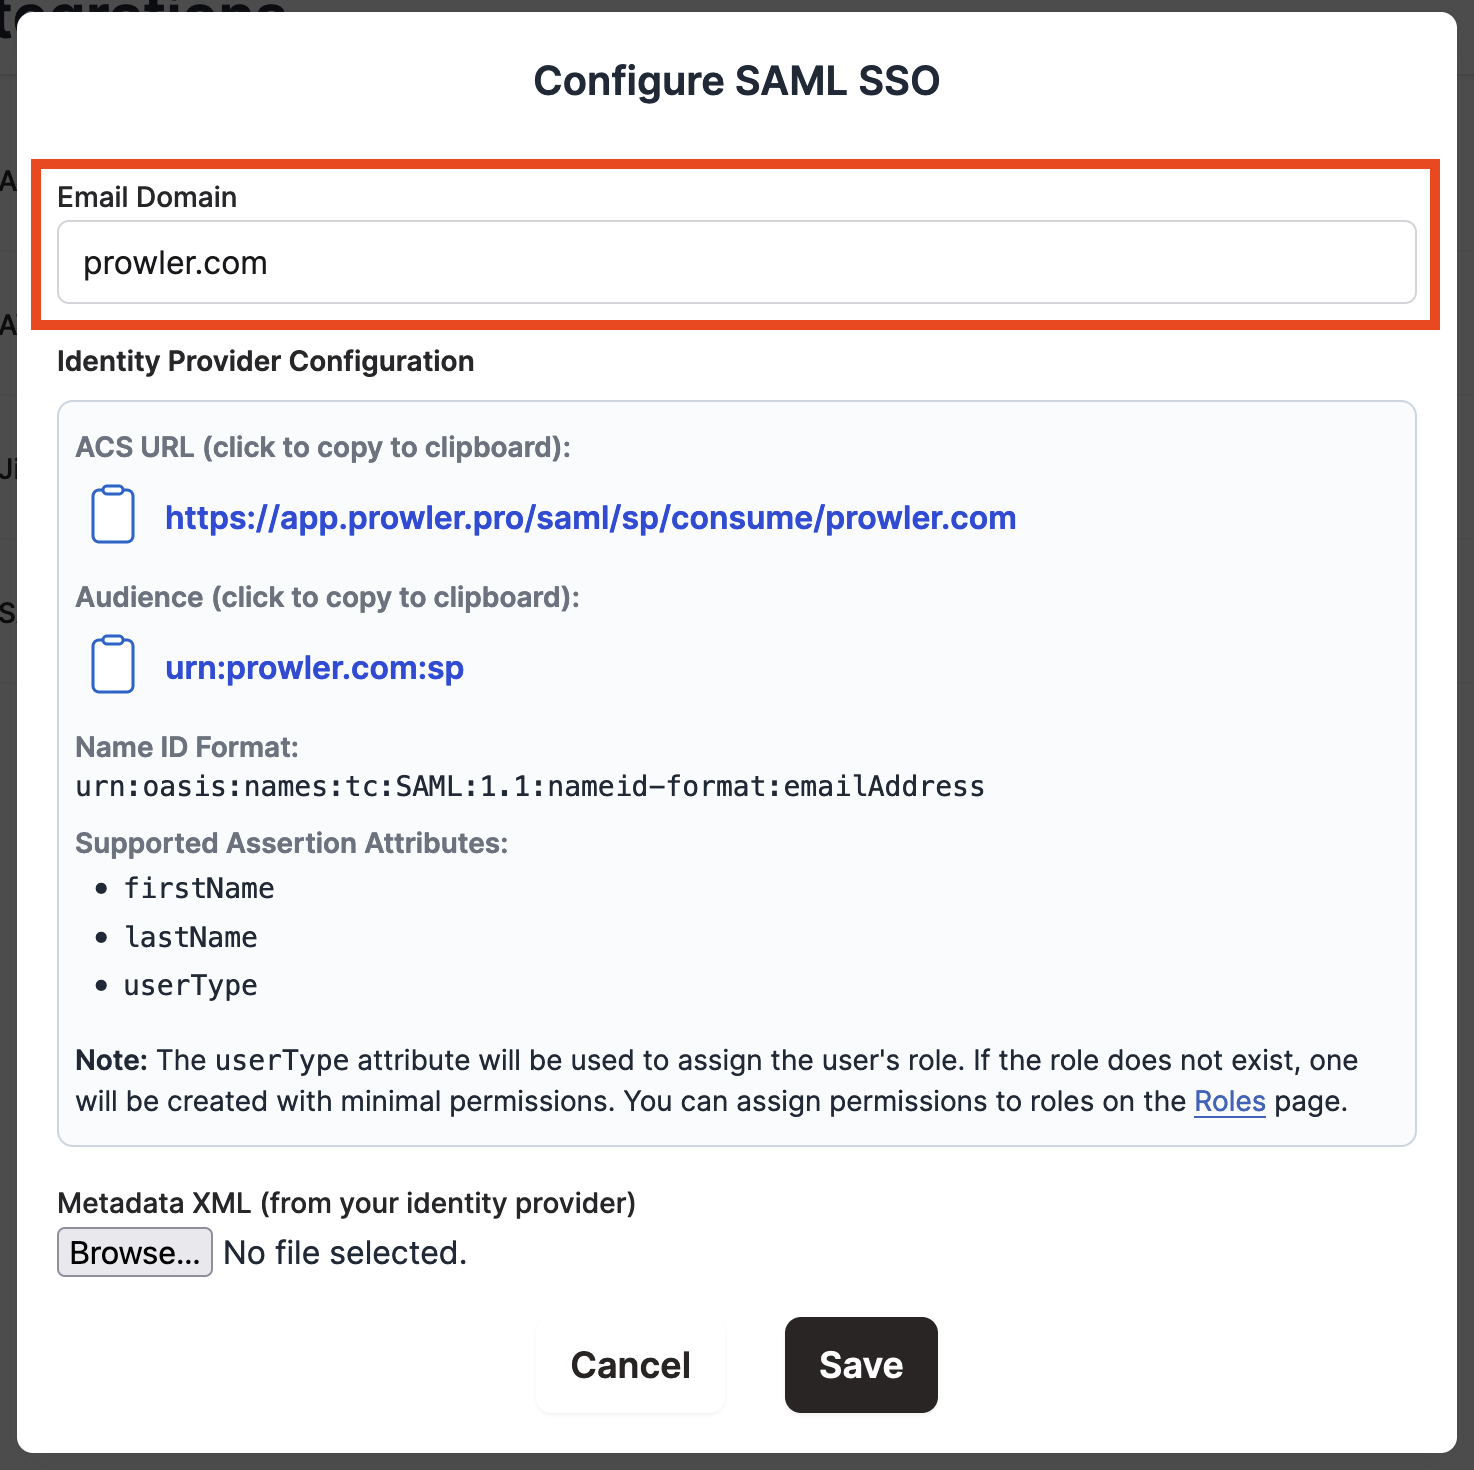
-
In Okta, browse the app catalog and search for Prowler, click Add Integration, and enter the same email domain in General Settings.
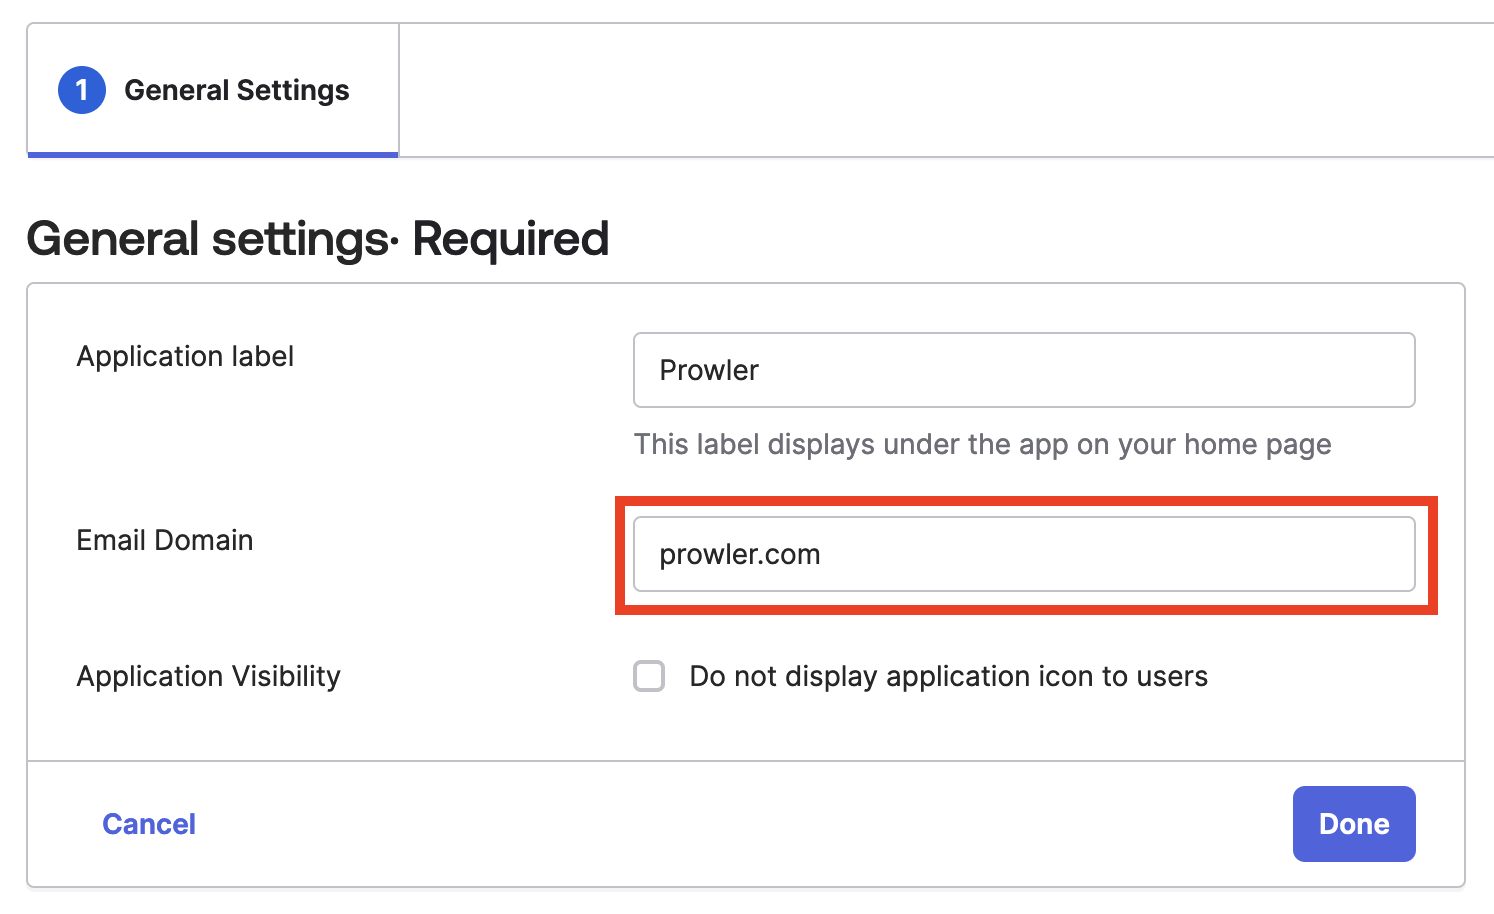
-
Upload the metadata XML file and select Save.
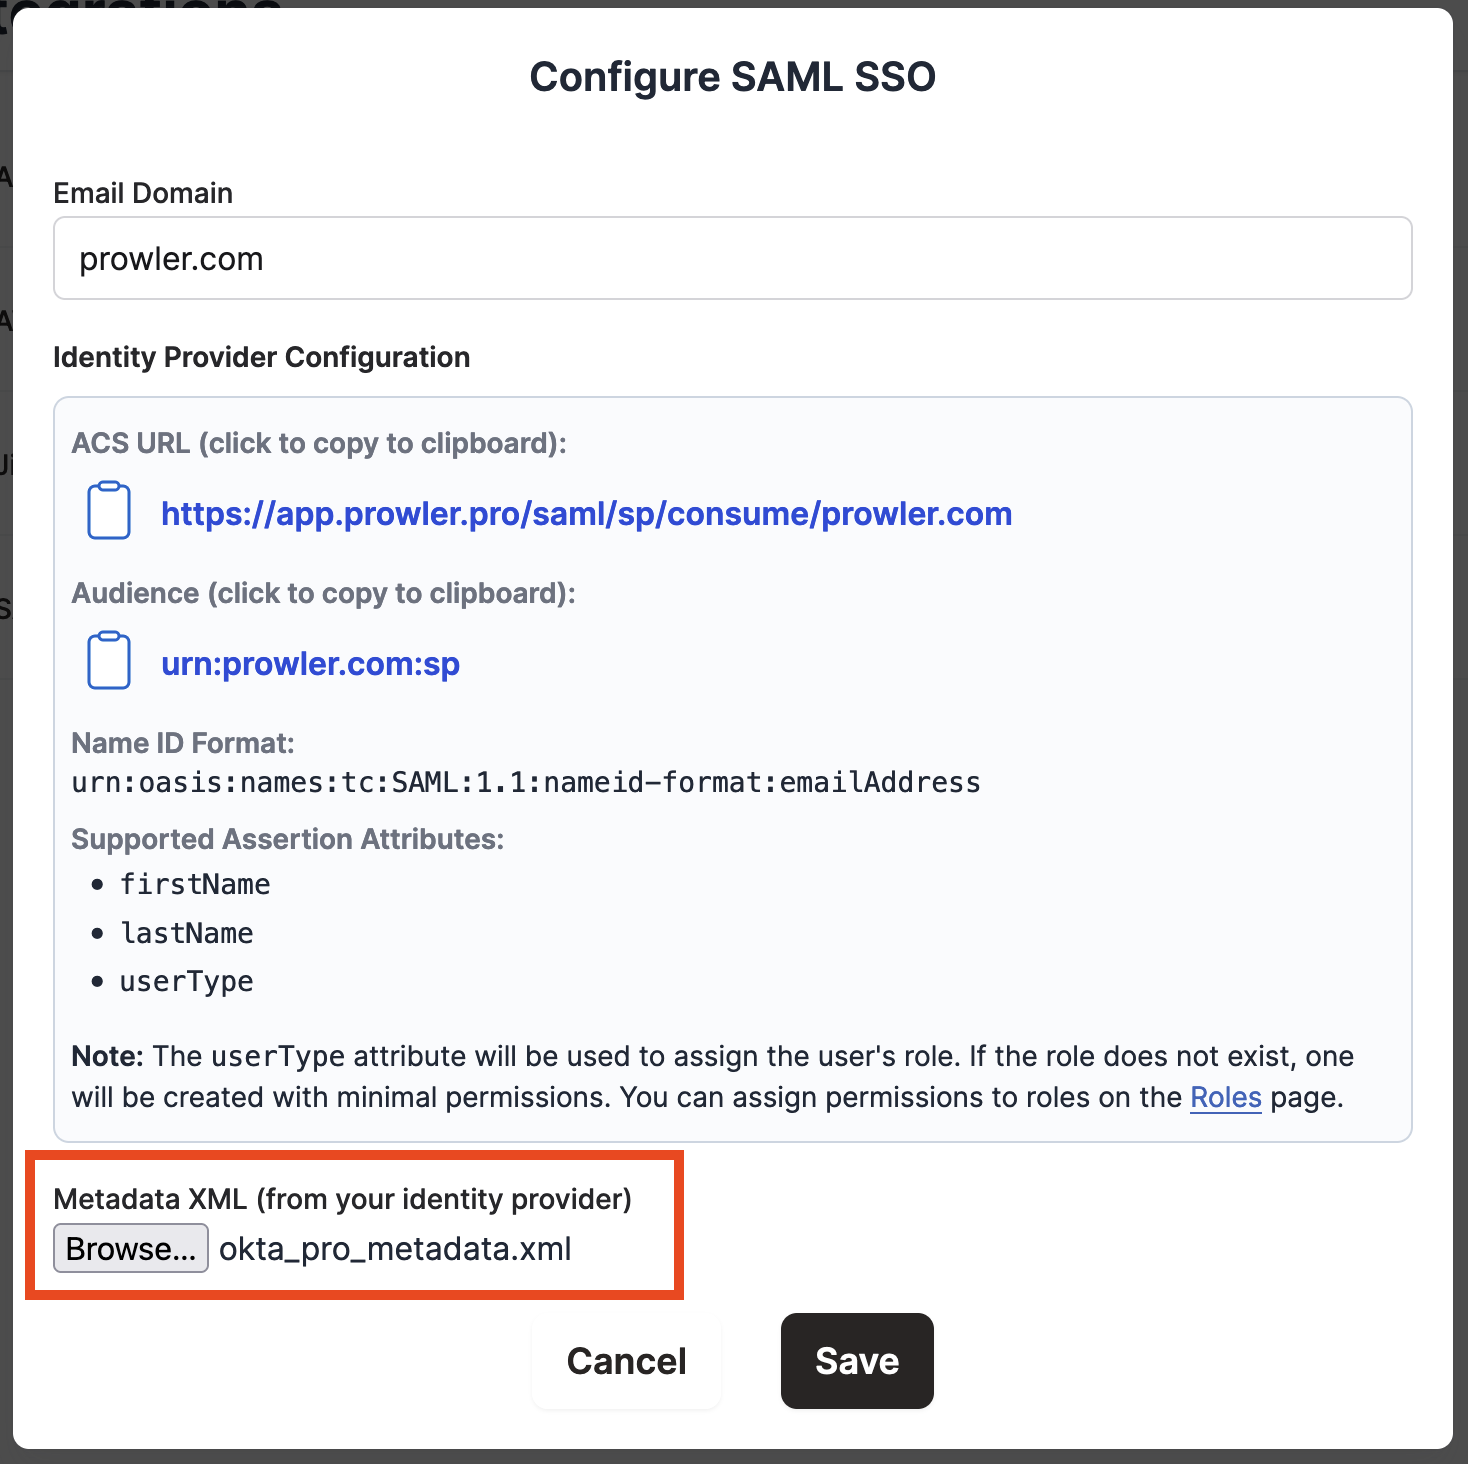
Step 2 - Configuring Prowler SaaS Roles from the userType Attribute
Prowler SaaS can automatically assign a role for just-in-time provisioned users based on the userType assertion attribute. If a role has not been created for the provisioned user's userType value, one will be created for them with minimal permissions. You can then edit the permissions for that role in the Role Management tab.
Note
Only users provisioned by signing in without first being invited from the User Management tab will automatically have a role assigned. Users added from the Prowler SaaS will already have a role.
Below are instructions on how to configure this mapping.
In Prowler SaaS
As mentioned above, the userType value will be used to assign a Prowler SaaS role and a list of permitted accounts.
In the Role Management tab, find any newly created roles and assign the desired permissions by clicking Edit.
Note
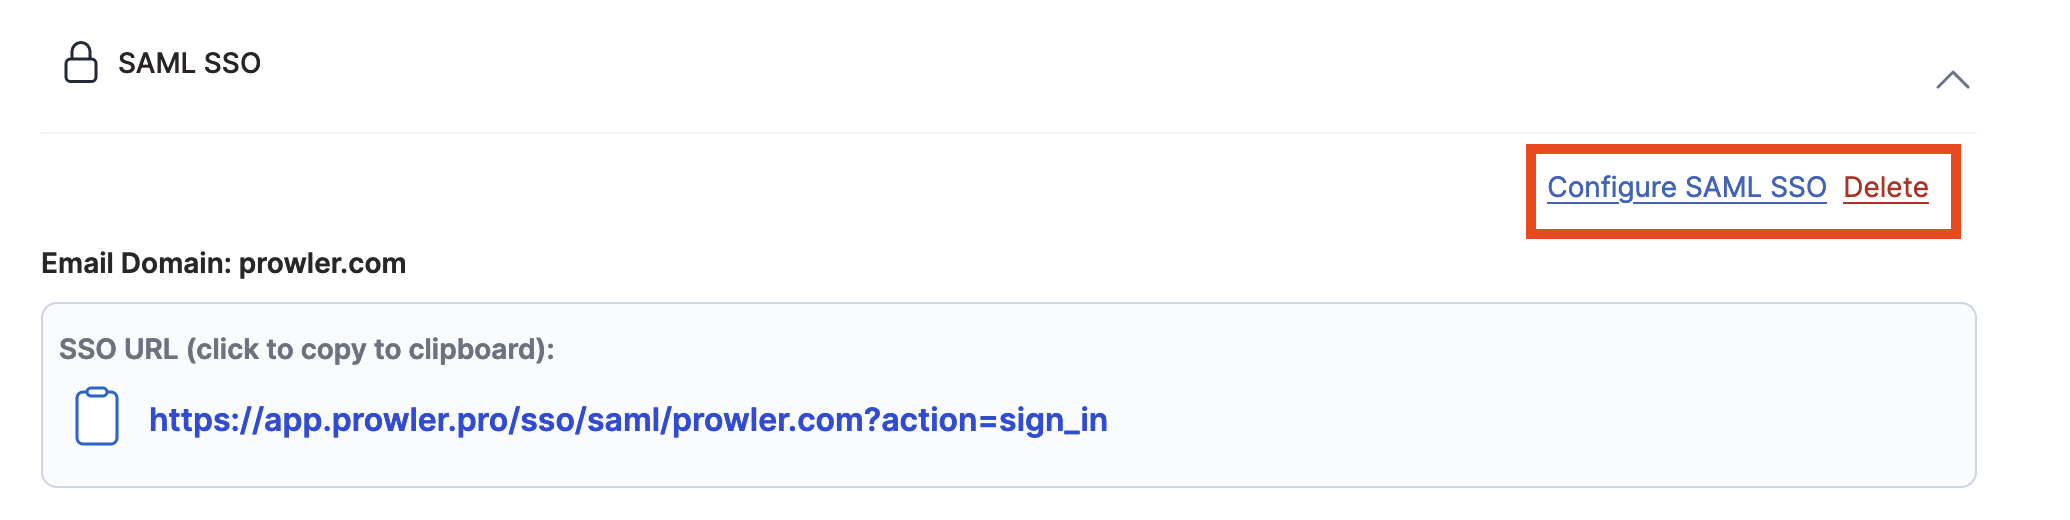
If you want to edit or remove your SAML integration at any point, select SAML SSO from the Integrations tab and click Configure SAML SSO or Delete
How to Sign In
Using an Email Address
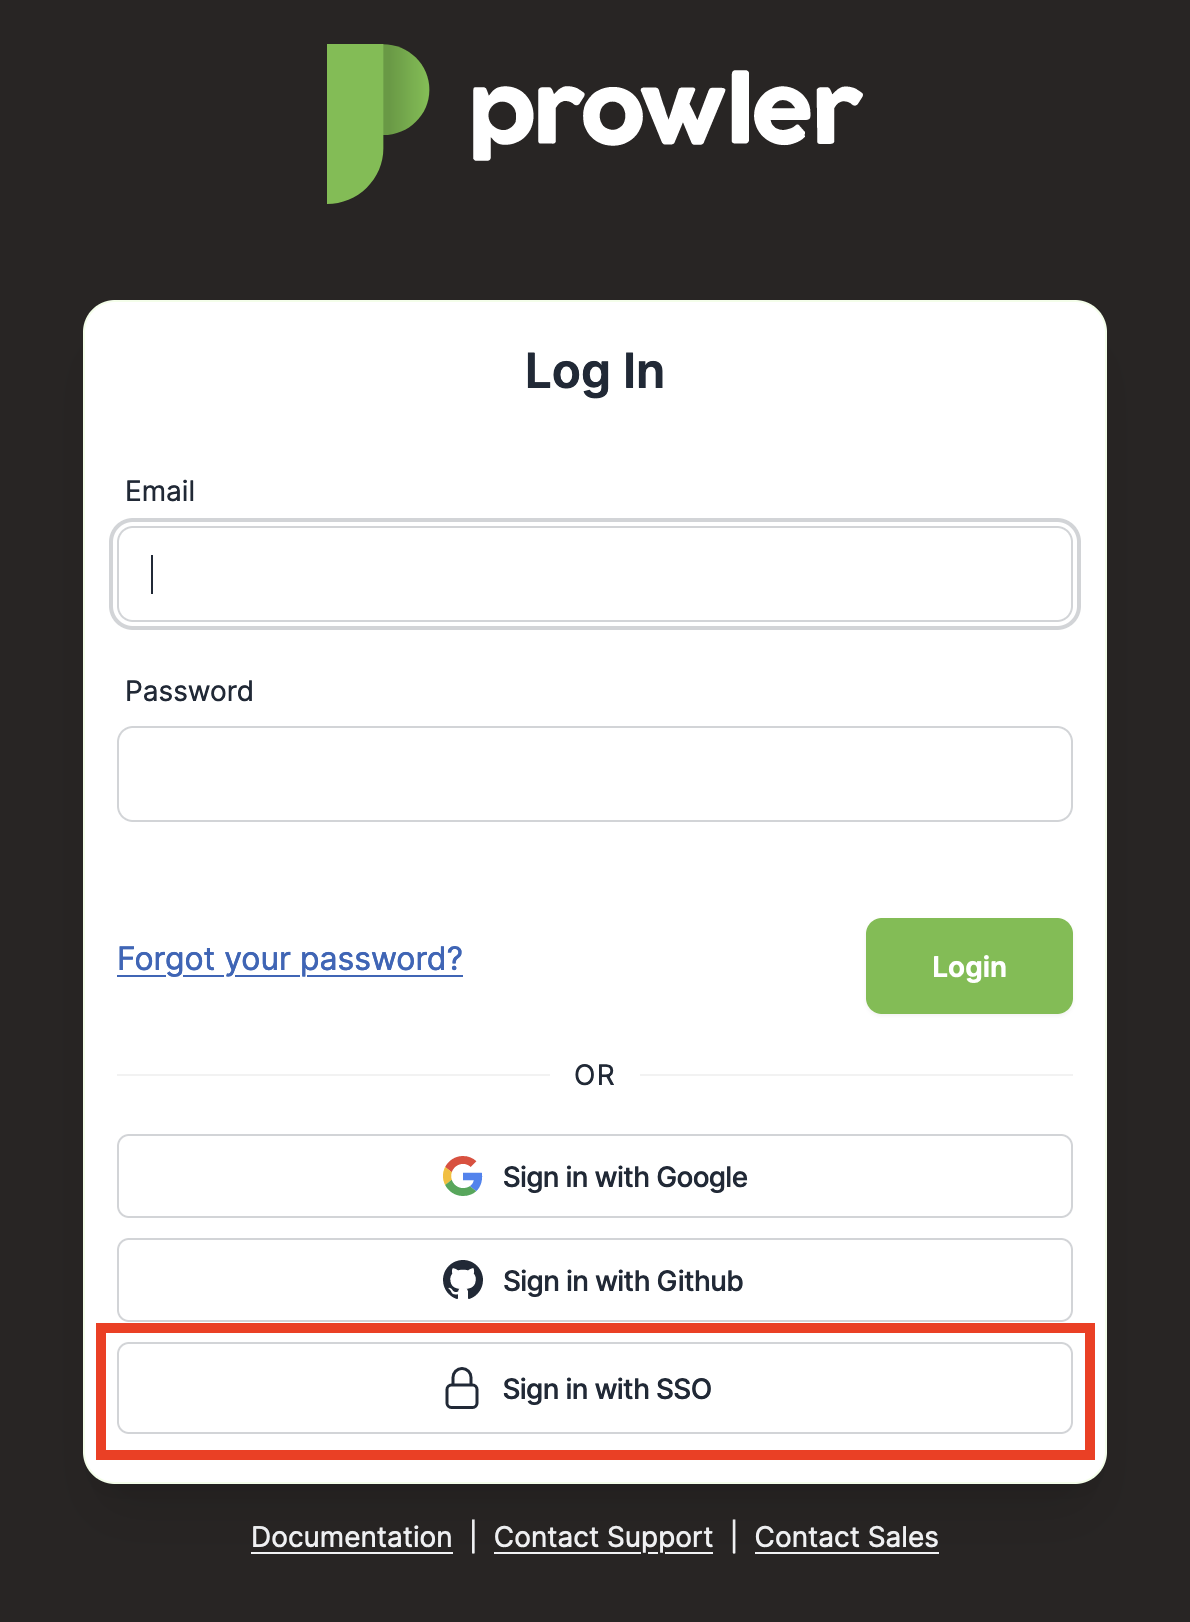
-
From the Sign In page, click Sign in with SSO.
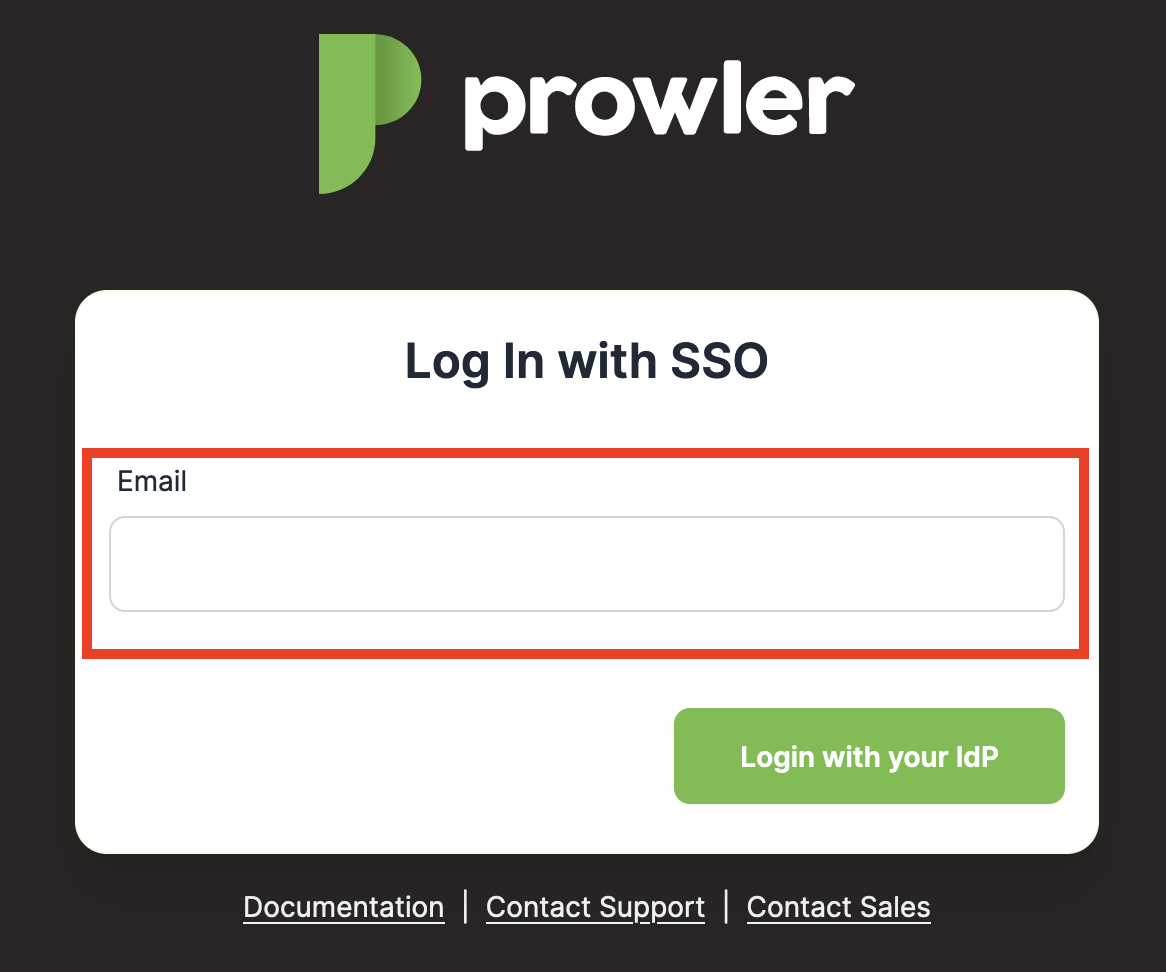
-
Then enter your email address and click Login with your IdP
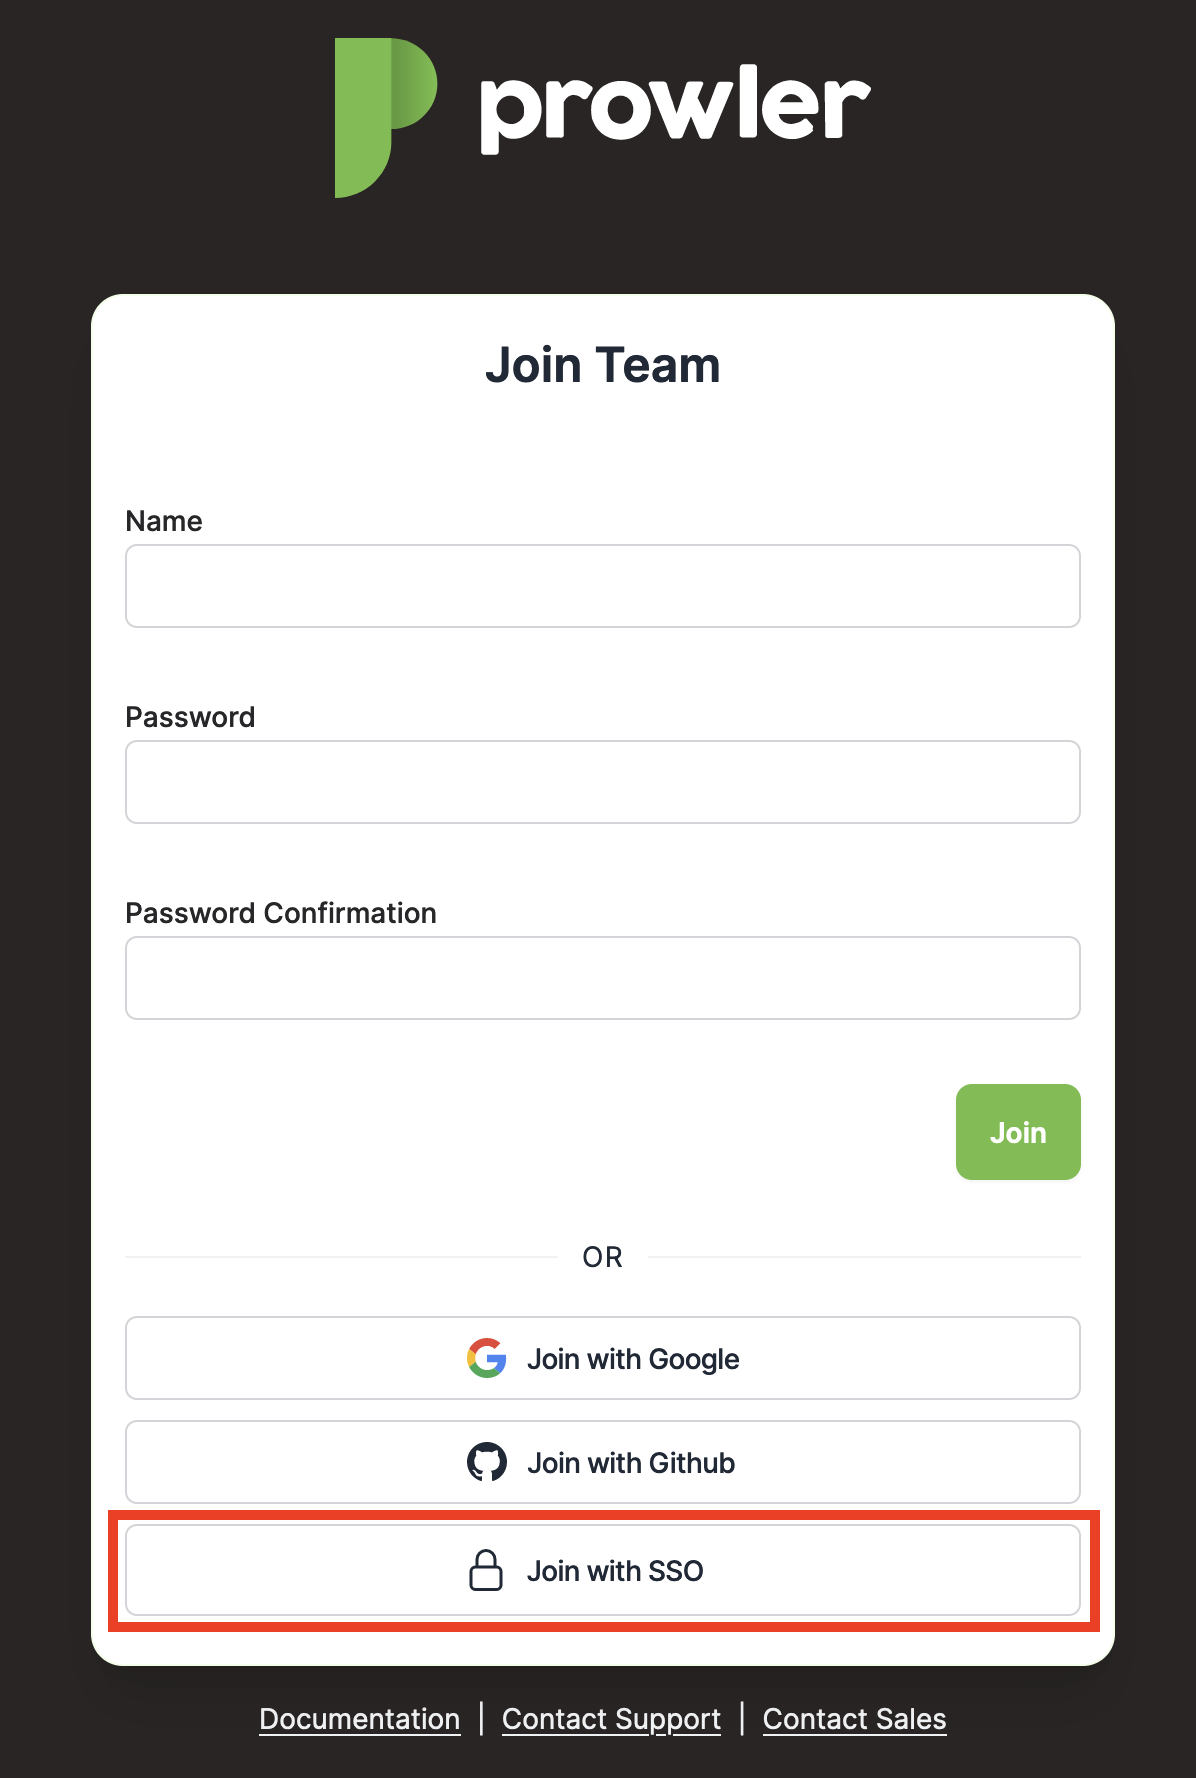
Using an Invitation
If a user is invited via email and SAML SSO has been configured for the Prowler SaaS account, they can click the Join with SSO button: