 About Us
Prowler Cloud
Walkthrough video onboarding an AWS Account using Assumed Role.
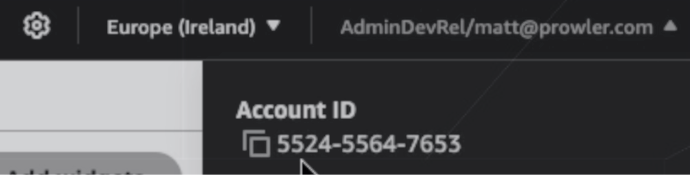
Step 1: Get Your AWS Account ID
- Log in to the AWS Console
- Locate your AWS account ID in the top-right dropdown menu
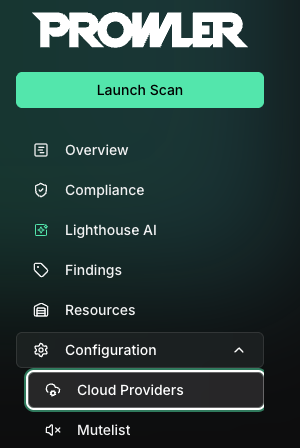
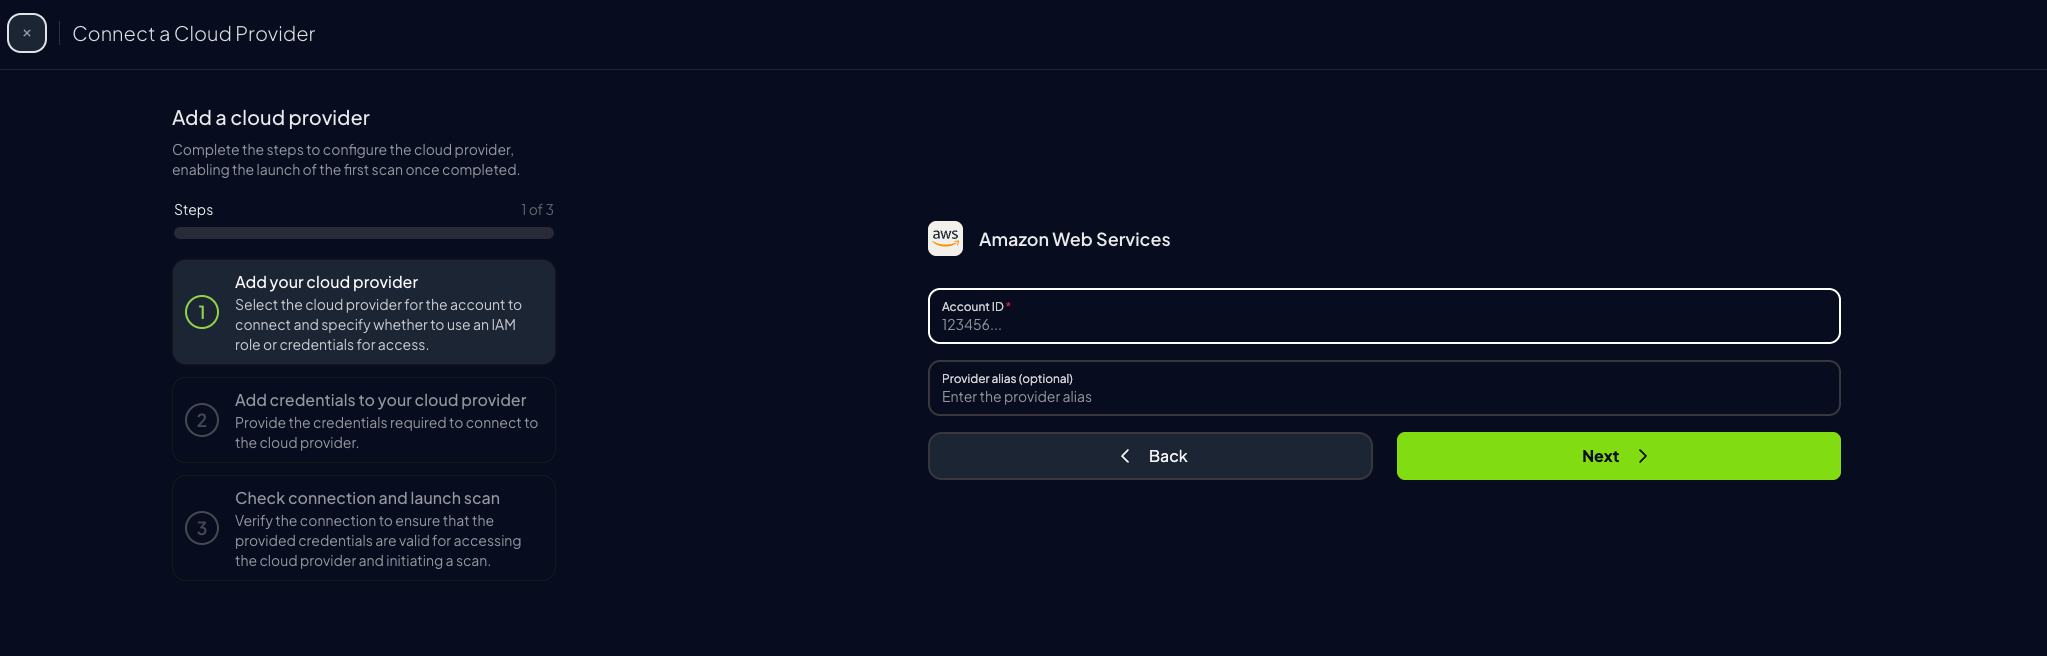
Step 2: Access Prowler Cloud
- Navigate to Prowler Cloud or launch Prowler Local Server
-
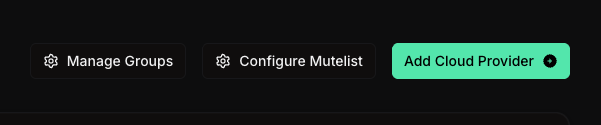
Go to “Configuration” > “Providers”
-
Click “Add Provider”
-
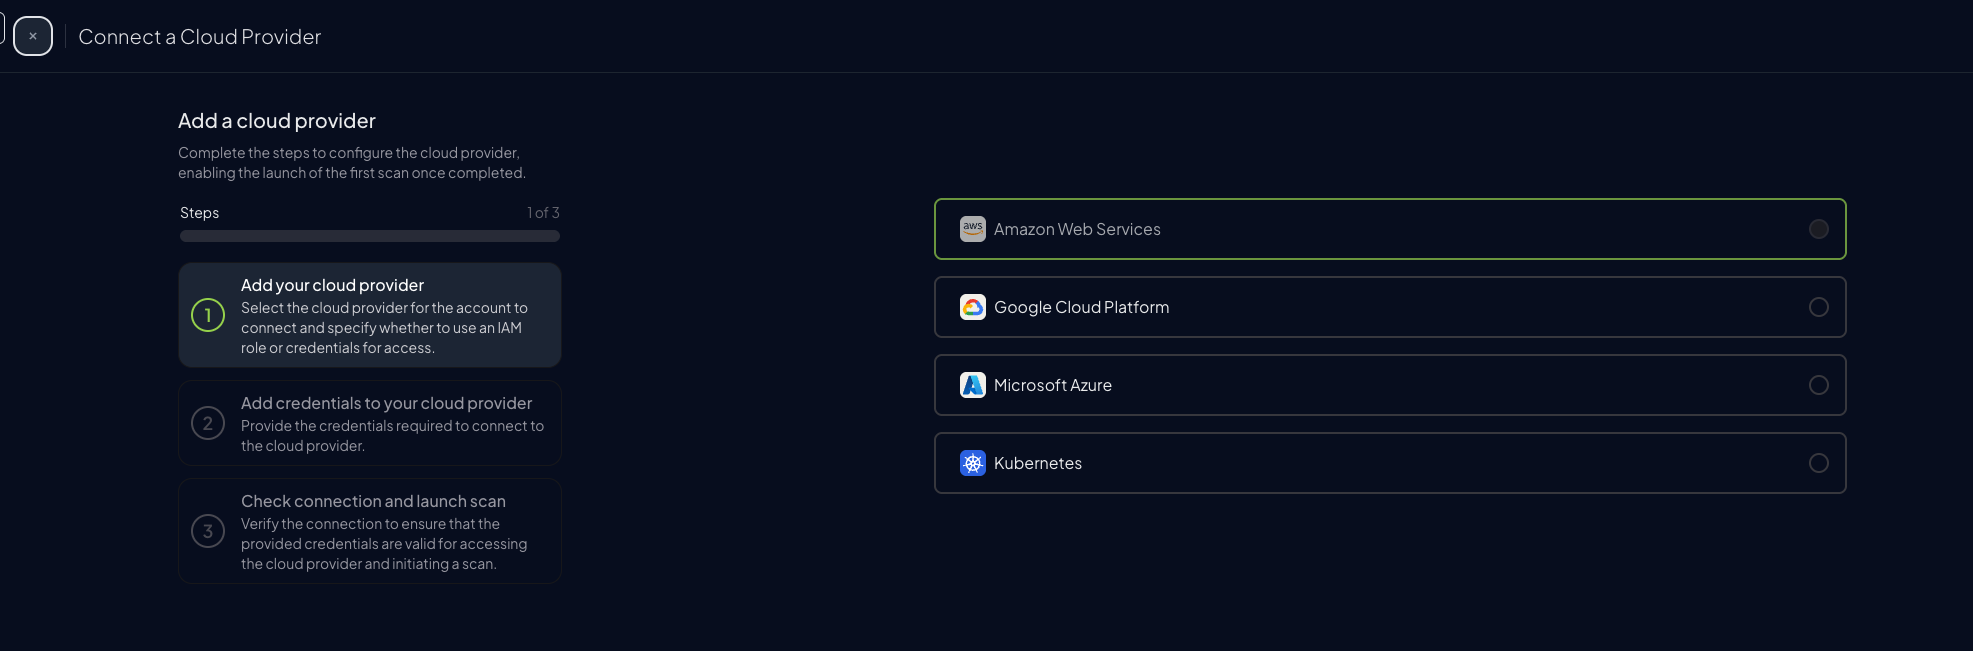
Select “Amazon Web Services”
-
Enter your AWS Account ID and optionally provide a friendly alias
-
Choose the preferred authentication method (next step)
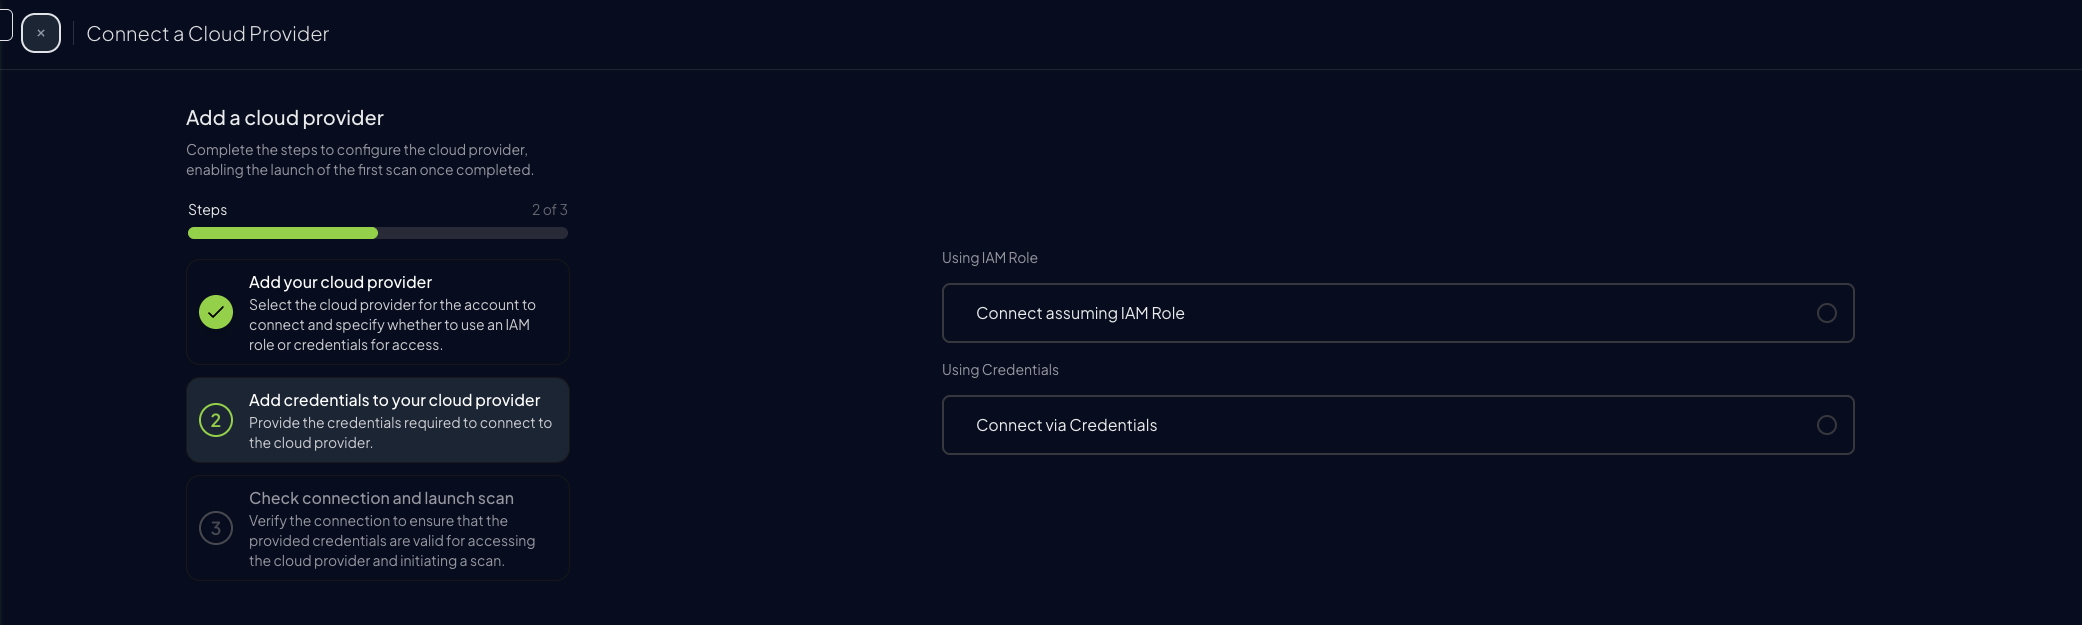
Step 3: Set Up AWS Authentication
Before proceeding, choose the preferred authentication mode: Credentials- Quick scan using an IAM user’s access keys
- No extra setup in AWS
- Static keys can be rotated or revoked at any time
- Recommended for production
- With AWS SDK Default as the credential source, no long-lived keys are stored in Prowler (Access & Secret Key still requires pasted keys)
- Requires permission to create an IAM role in the target account
Assume Role (Recommended)
This method grants permanent access and is the recommended setup for production environments.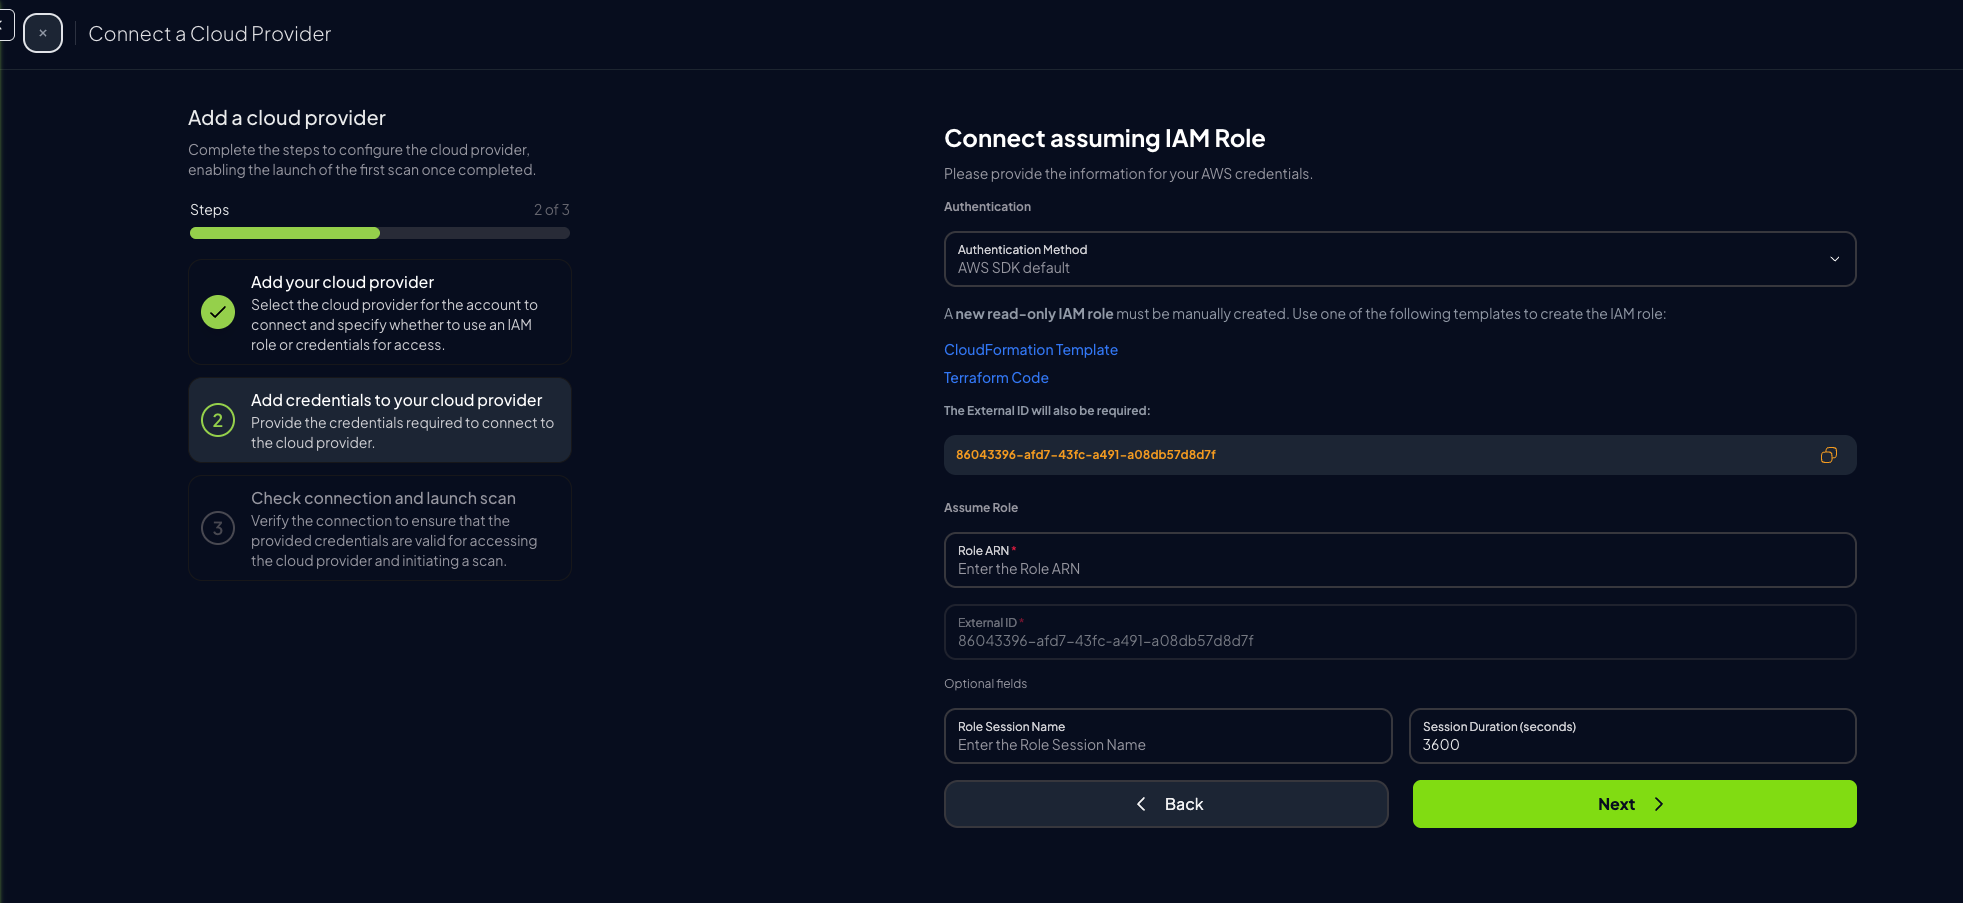
-
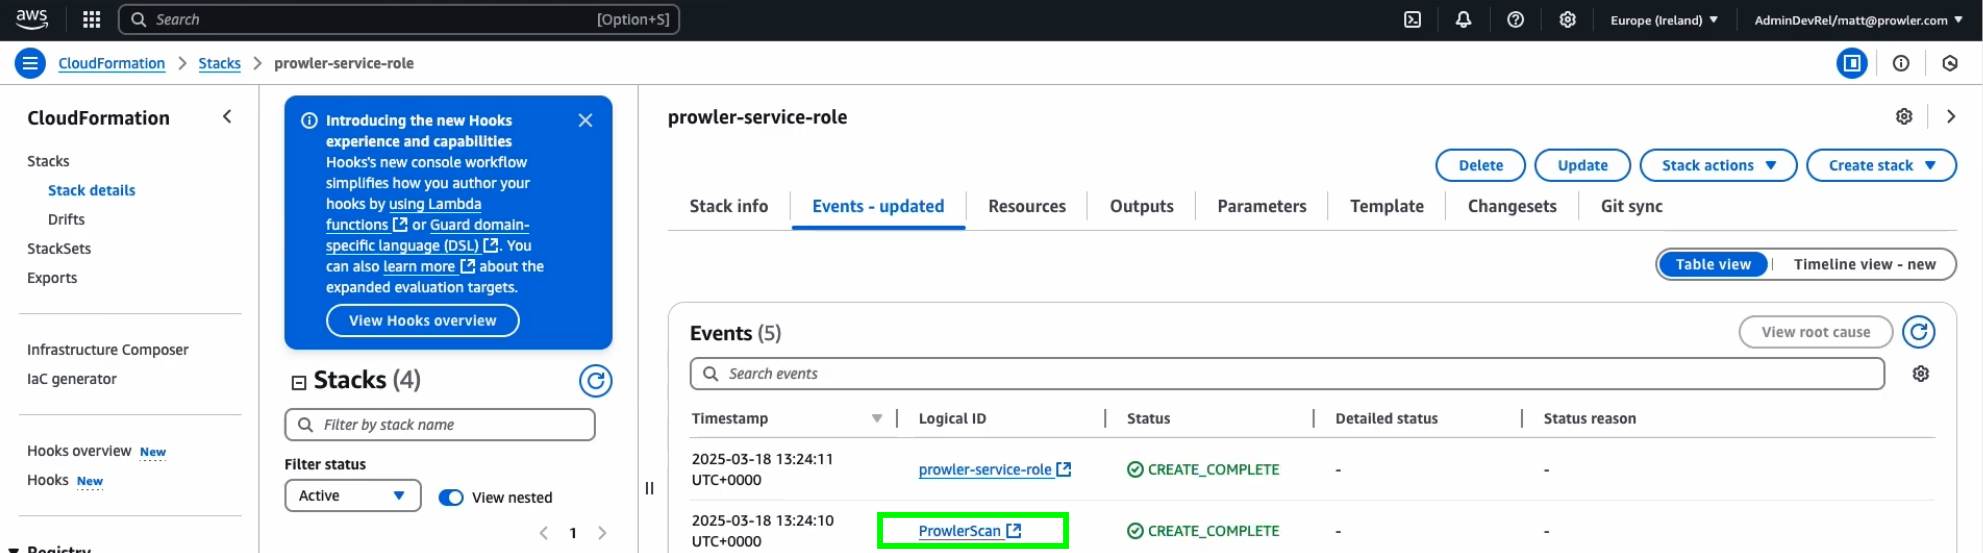
Once the role is created, go to the IAM Console, click the “ProwlerScan” role to open its details:
-
Copy the Role ARN

-
Paste the ARN into the corresponding field in Prowler Cloud or Prowler Local Server

-
Select the credential source Prowler should use to call
sts:AssumeRole. The option label differs between deployments but both map to the sameaws-sdk-defaultcredential type:- “Prowler Cloud will assume your IAM role” (default in Prowler Cloud) / “AWS SDK Default” (in Prowler Local Server): Prowler uses the credentials available in the API and worker environment through the AWS SDK default credential chain. In Prowler Local Server, these containers have no AWS credentials by default — see Configuring AWS SDK Default for Prowler Local Server before choosing this option, or the connection test will fail with
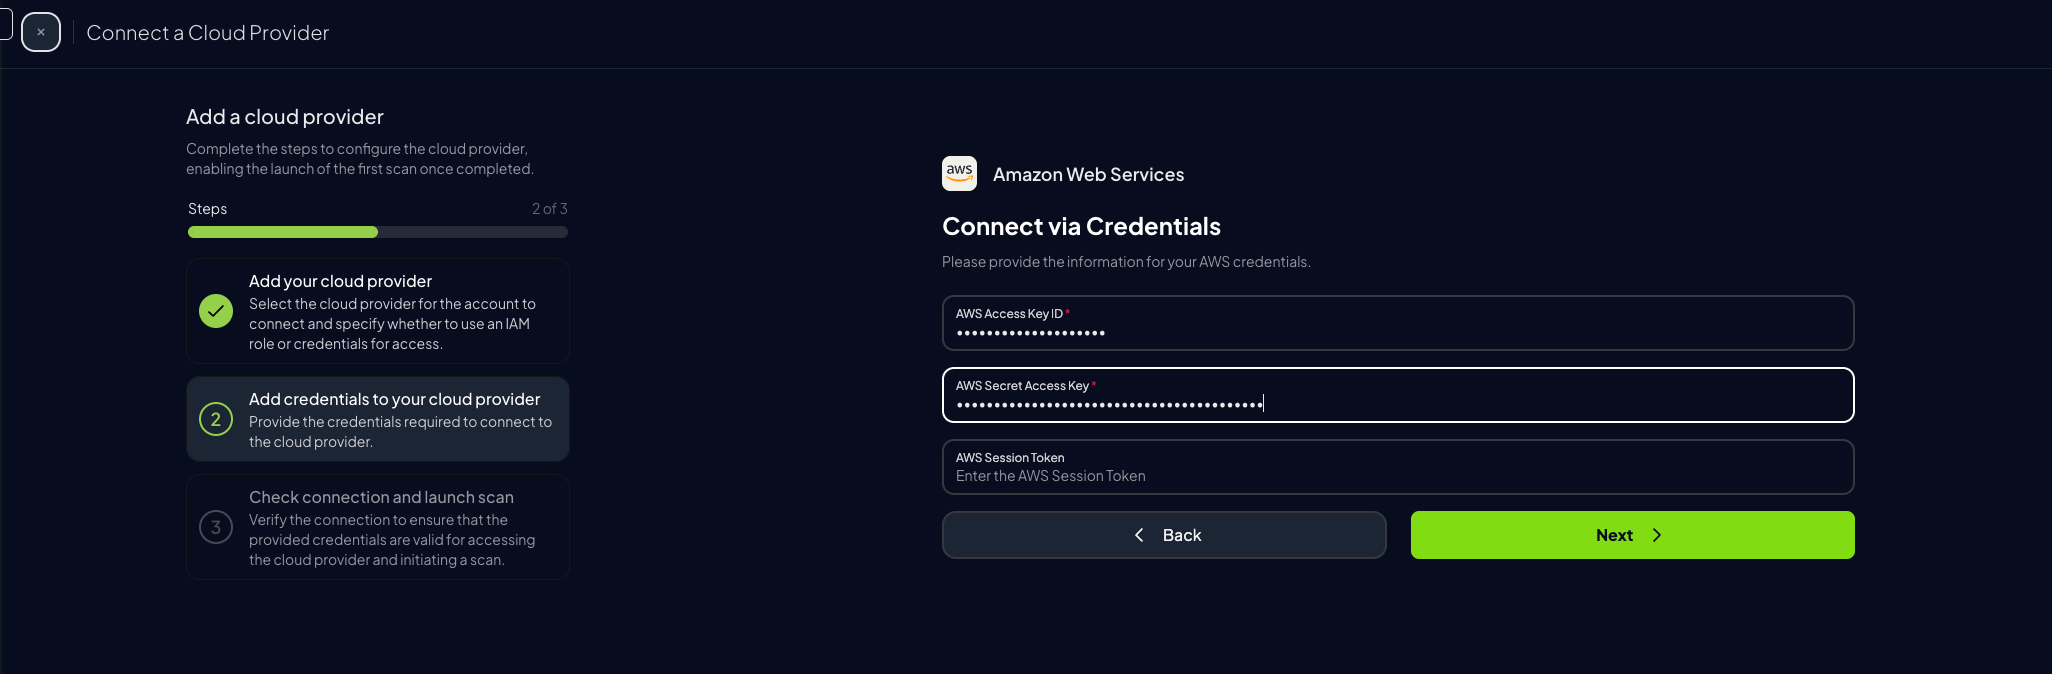
InvalidClientTokenId. - Access & Secret Key: Paste an IAM user’s
AWS_ACCESS_KEY_IDandAWS_SECRET_ACCESS_KEY(and optionalAWS_SESSION_TOKEN) into the form. The IAM principal must be allowed to assume the target role and must match theIAMPrincipalparameter of the scan role template (default:role/prowler*).
- “Prowler Cloud will assume your IAM role” (default in Prowler Cloud) / “AWS SDK Default” (in Prowler Local Server): Prowler uses the credentials available in the API and worker environment through the AWS SDK default credential chain. In Prowler Local Server, these containers have no AWS credentials by default — see Configuring AWS SDK Default for Prowler Local Server before choosing this option, or the connection test will fail with
-
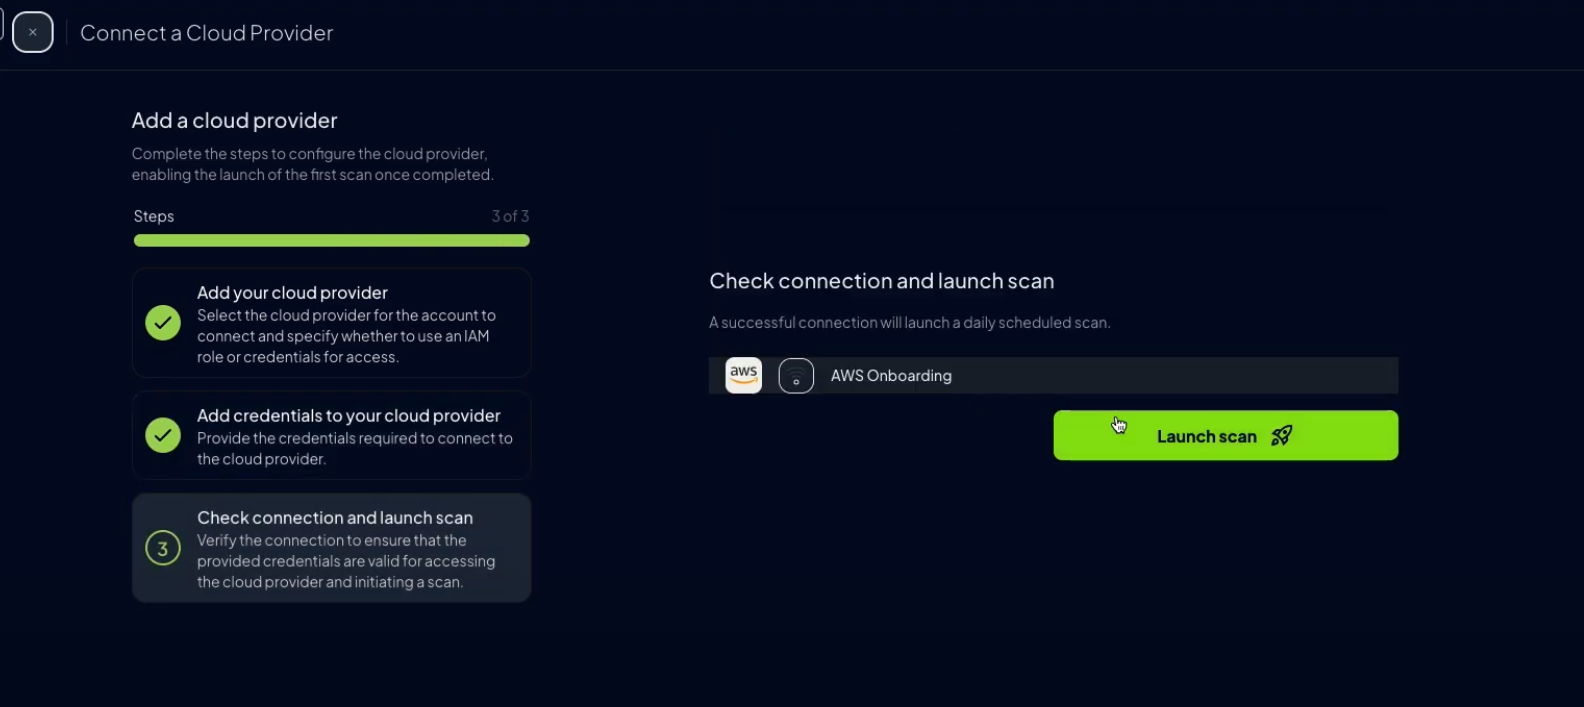
Click “Next”, then “Launch Scan”
Check if your AWS Security Token Service (STS) has the EU (Ireland) endpoint active. If not, we will not be able to connect to your AWS account.If that is the case your STS configuration may look like this:
Credentials (Static Access Keys)
AWS accounts can also be configured using static credentials (not recommended for long-term use):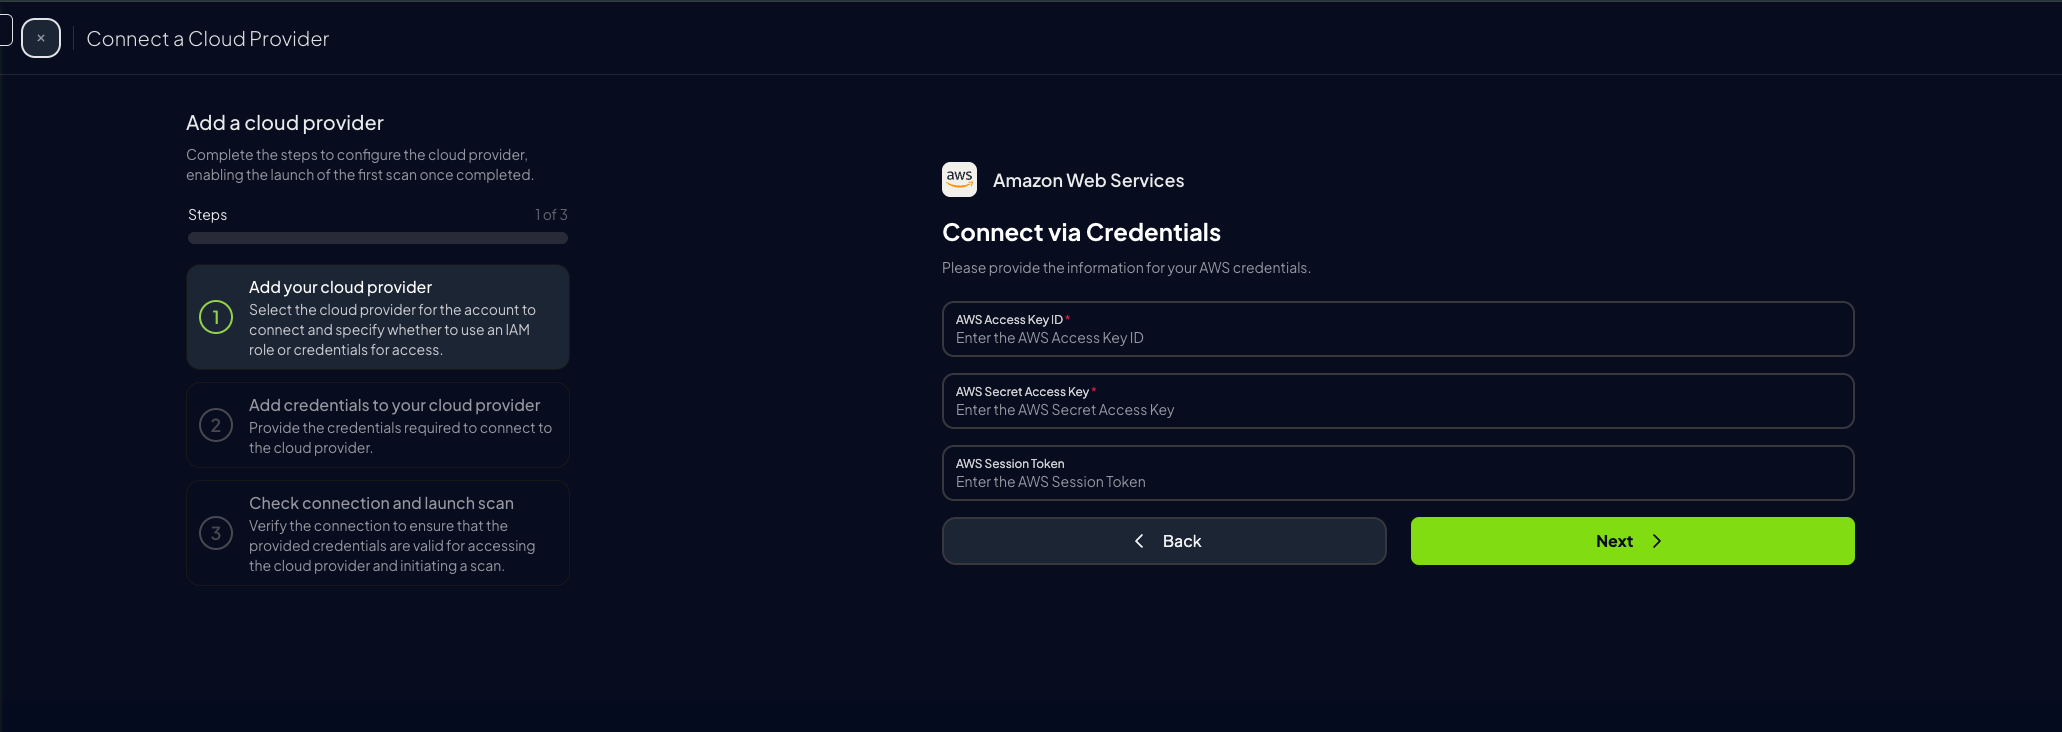
-
Complete the form in Prowler Cloud or Prowler Local Server and click “Next”
-
Click “Launch Scan”
Prowler CLI
Configure AWS Credentials
To authenticate with AWS, use one of the following methods:AWS Profiles
To use a custom AWS profile, specify it with the following command:Multi-Factor Authentication (MFA)
For IAM entities requiring Multi-Factor Authentication (MFA), use the--mfa flag. Prowler prompts for the following values to initiate a new session:
- ARN of your MFA device
- TOTP (time-based one-time password)