 About Us
- API Token (Recommended) — Scoped, least-privilege access to specific permissions and zones.
- API Key and Email (Legacy) — Global access to the entire account using the Global API Key.
Required Permissions
Prowler requires read-only access to Cloudflare zones and their settings. The following permissions must be configured when creating the API Token:| Resource | Permission | Access | Description |
|---|---|---|---|
Account | Account Settings | Read | Required to list accounts and verify user identity |
Zone | Zone | Read | Required to list zones, rulesets, bot management, and SSL settings |
Zone | Zone Settings | Read | Required to read zone security settings (TLS, HSTS, WAF, etc.) |
Zone | DNS | Read | Required to read DNS records and DNSSEC status |
API Token (Recommended)
User API Tokens are the recommended authentication method because they:- Can be scoped to specific permissions and zones
- Are more secure than global API keys
- Can be easily rotated without affecting other integrations
Create a User API Token, not an Account API Token. User API Tokens are created from the profile settings and offer finer permission control.
- Create User API Token — creates a User API Token (recommended). Opens the Create Custom Token form prefilled with the four required read-only scopes (
Account Settings,Zone,Zone Settings,DNS) and the nameProwler Security Scanner. Adjust Account Resources and Zone Resources to match the accounts and zones you want to scan, then click Create Token. - Create Account-Owned API Token — creates an account-owned token instead. Use this for automation or CI/CD where the token should not depend on a specific user account remaining active. Requires the Super Administrator or Administrator role on the account.
Template URLs only pre-fill the token creation form. Review the permissions, configure resources, and click Create Token to complete the process.
Step 1: Create a User API Token
- Log into the Cloudflare Dashboard.
- Click the profile icon in the top right corner, then select “My Profile”.
- Click the API Tokens tab.
- Click Create Token, then select Create Custom Token at the bottom of the page.
-
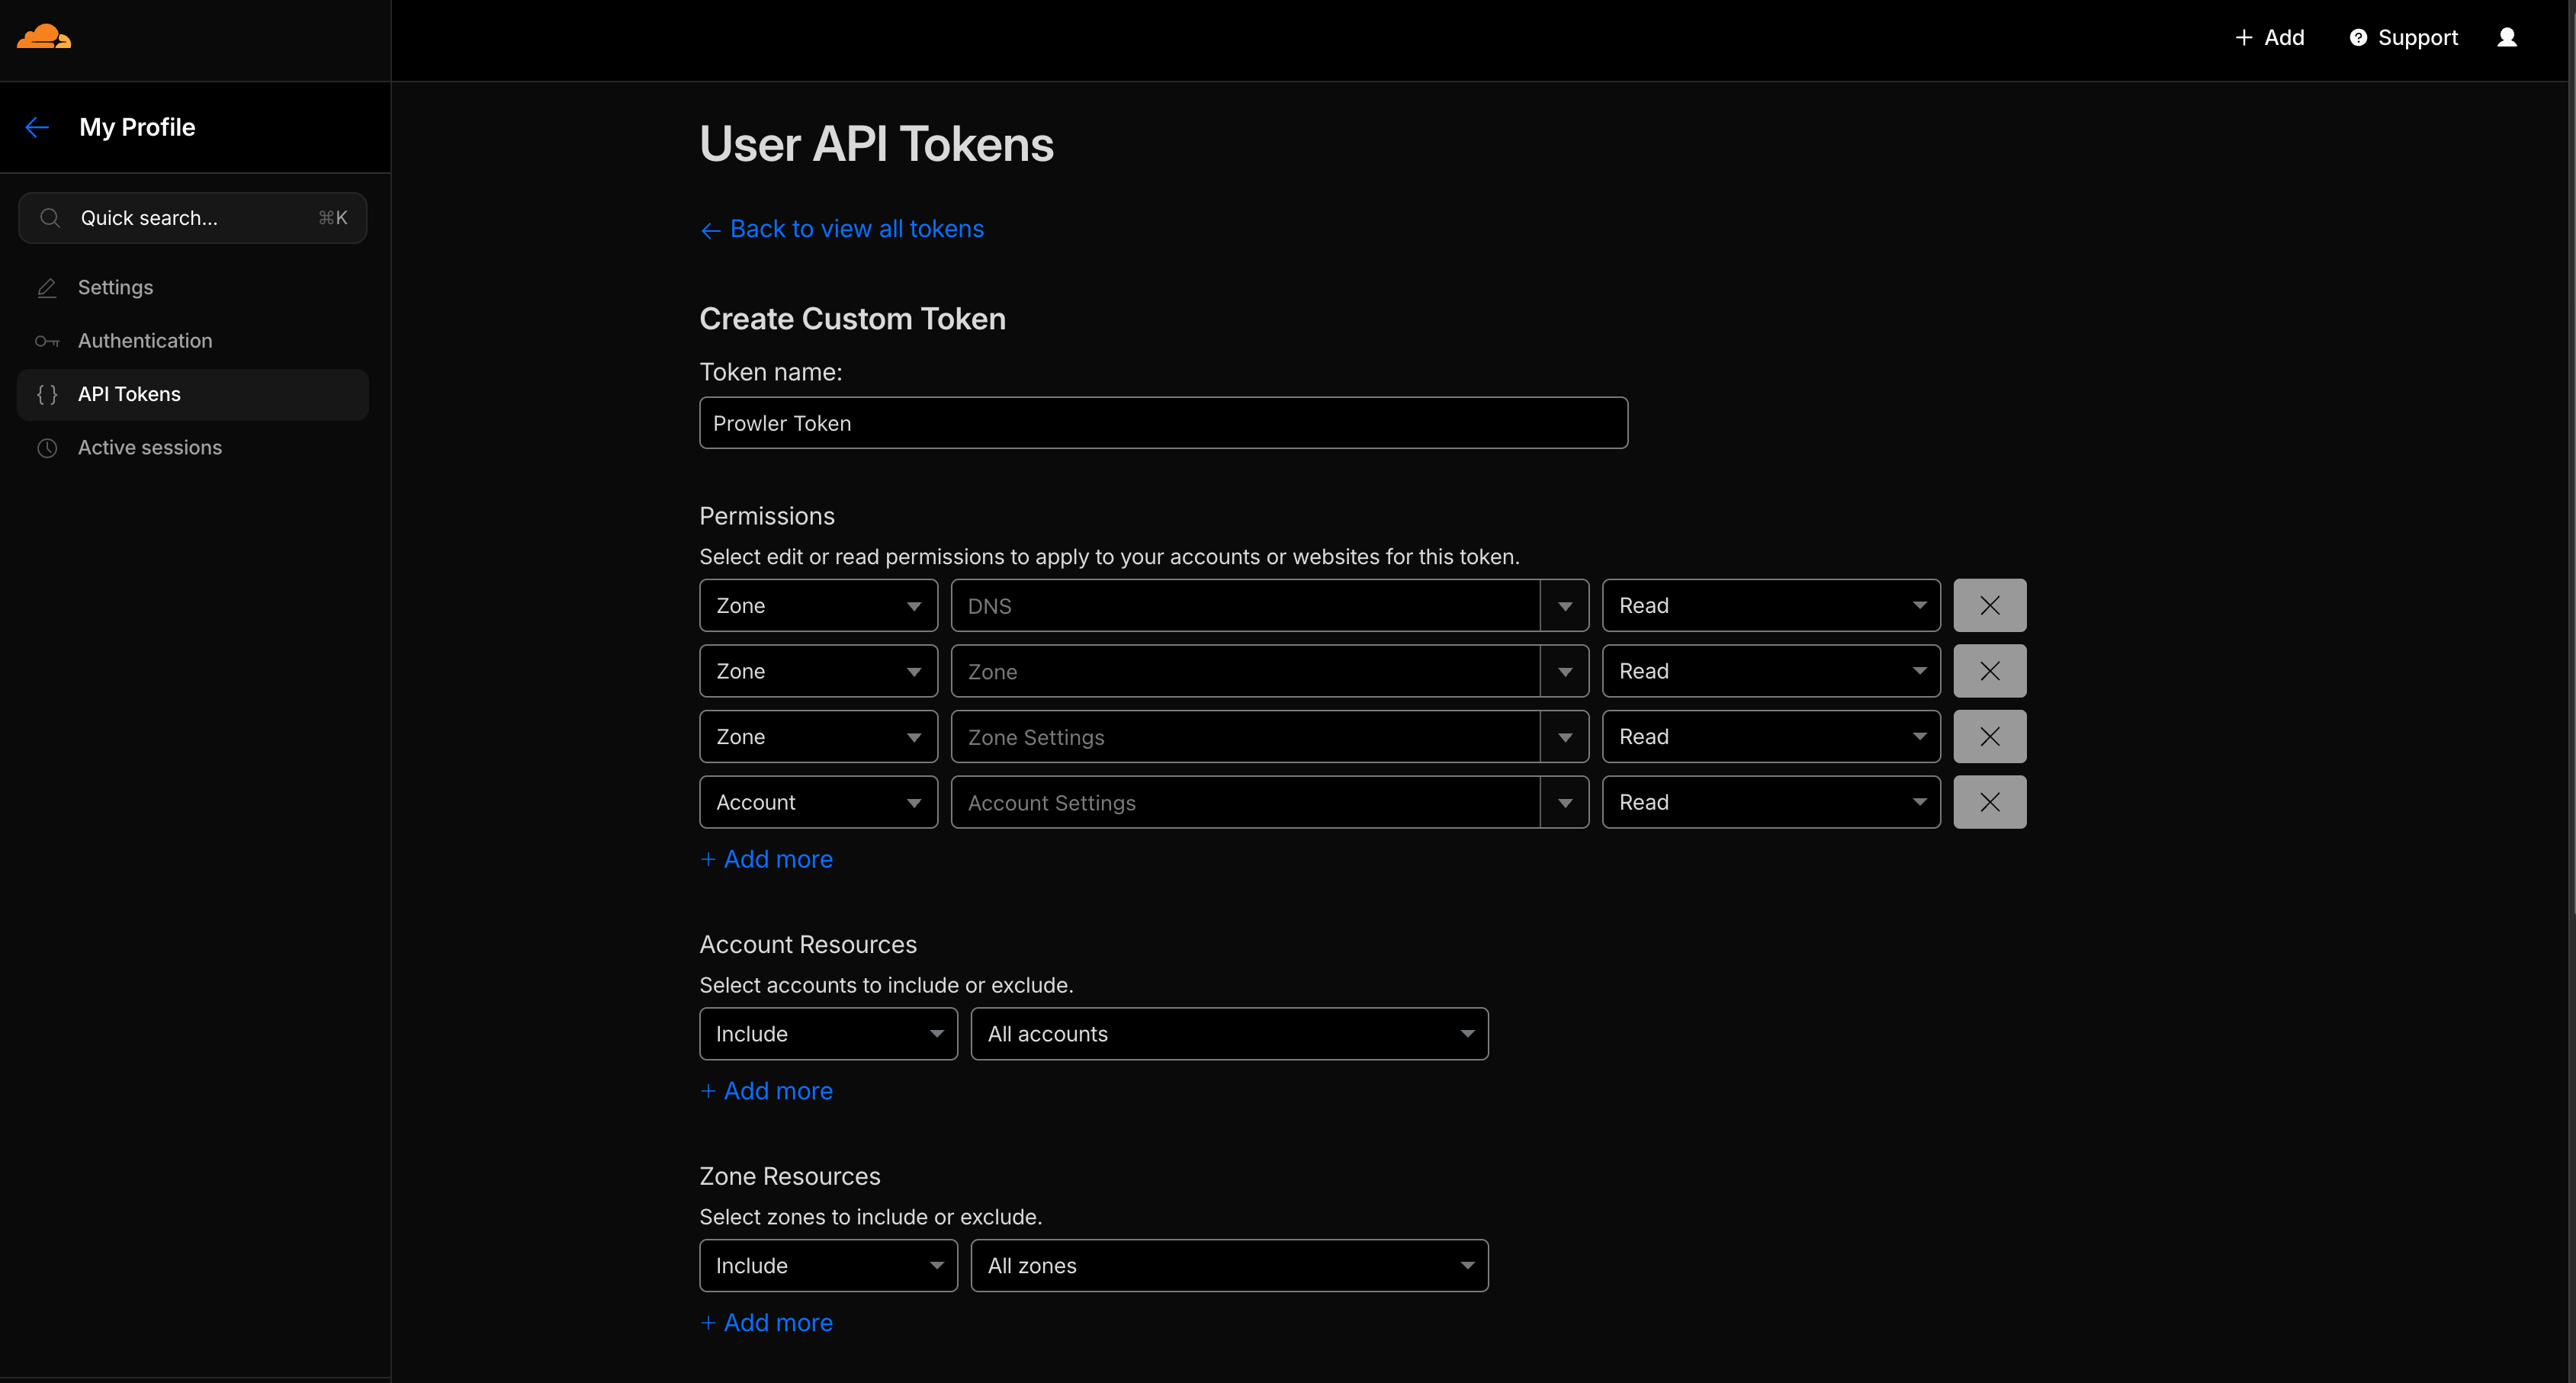
Configure the token with the following settings:
- Token name: A descriptive name (e.g., “Prowler Security Scanner”)
- Permissions:
Account—Account Settings—ReadZone—Zone—ReadZone—Zone Settings—ReadZone—DNS—Read
- Zone Resources: Select either:
- Include → All zones (to scan all zones in the account)
- Include → Specific zone (to limit access to specific zones)
-
Configure the Account Resources and Zone Resources, and optionally set a TTL for the token expiration. Click Continue to summary.
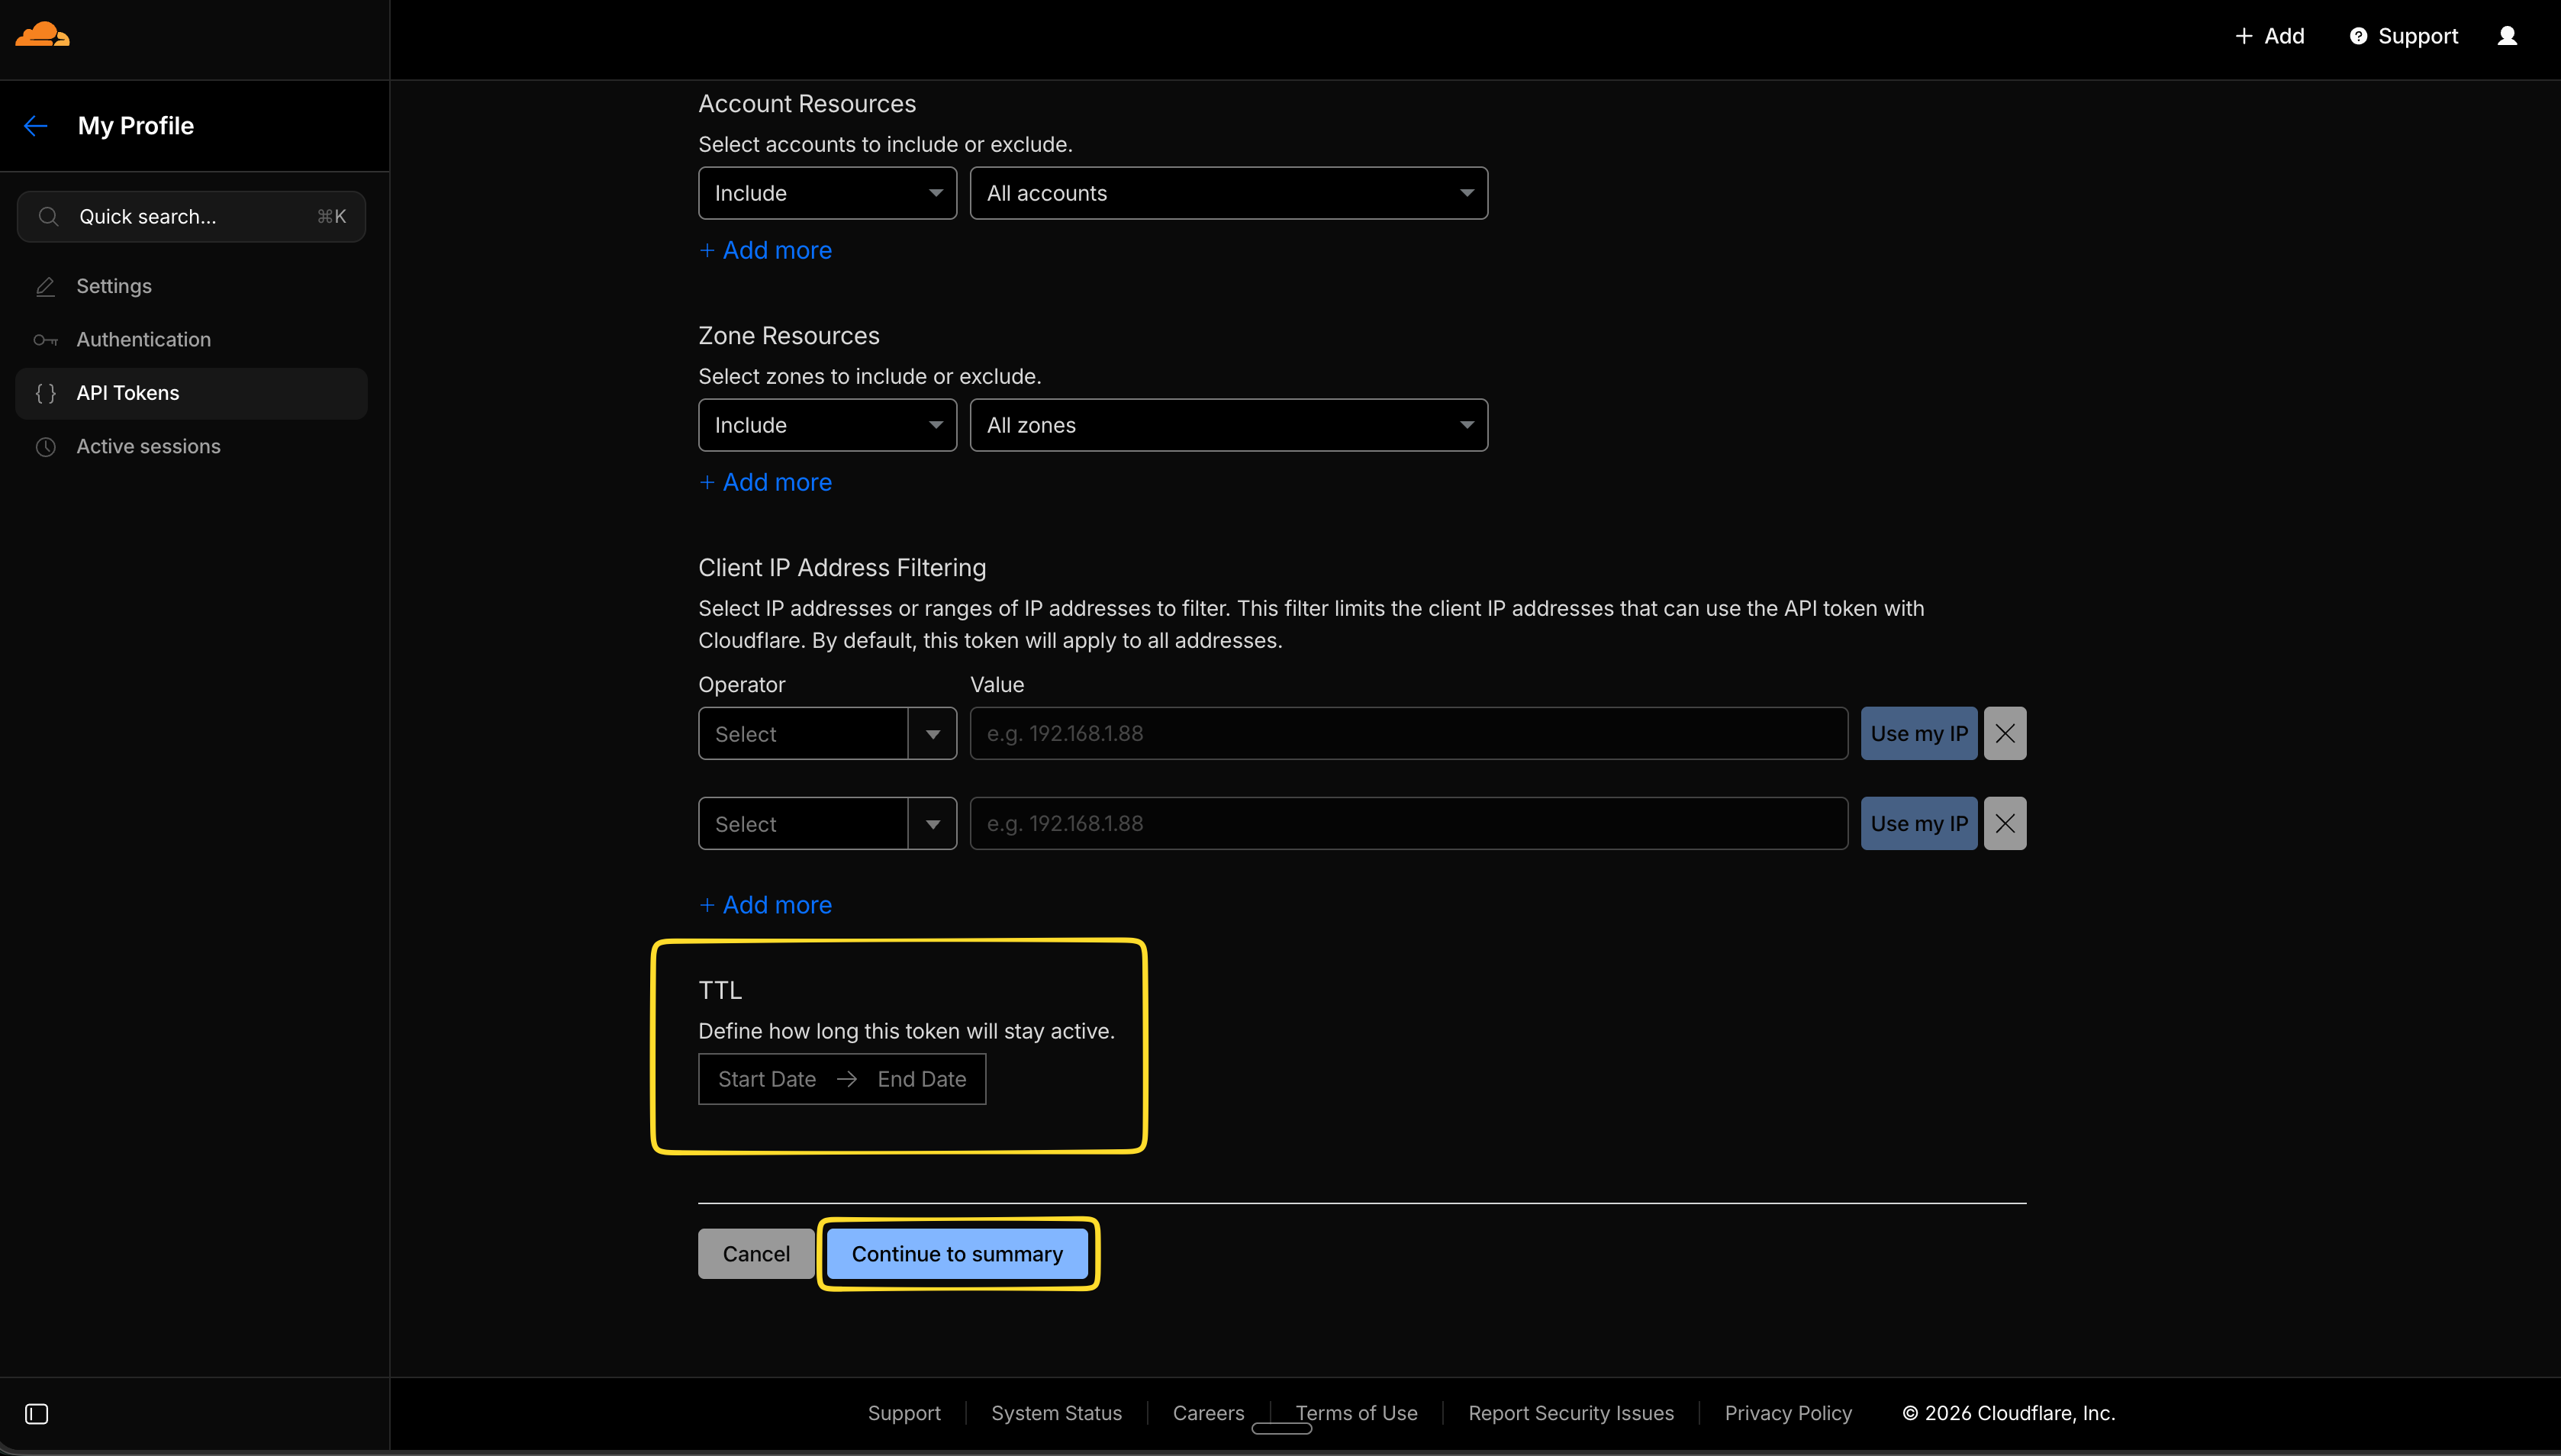
- Review the permissions and click Create Token.
- Copy the token immediately.
Step 2: Provide the Token to Prowler
- Prowler Cloud: Paste the token in the credentials form when configuring the Cloudflare provider.
- Prowler CLI: Export the token as an environment variable:
API Key and Email (Legacy)
API Keys provide full access to the Cloudflare account. While supported, this method is less secure than API Tokens because it grants broader permissions.Step 1: Get the Global API Key
- Log into the Cloudflare Dashboard.
- Click the profile icon in the top right corner, then select “My Profile”.
- Click the API Tokens tab.
- Scroll down to the API Keys section.
- Click View next to Global API Key.
- Enter the account password to reveal the key, then copy it.
Step 2: Provide the Credentials to Prowler
- Prowler Cloud: Enter the Global API Key and email in the credentials form when configuring the Cloudflare provider.
- Prowler CLI: Export both values as environment variables:
The email must match the email address used to log into the Cloudflare account.
Best Practices
- Use API Tokens instead of API Keys — Tokens can be scoped to specific permissions and zones.
- Use environment variables — Never hardcode credentials in scripts or commands.
- Rotate credentials regularly — Create new tokens periodically and revoke old ones.
- Use least privilege — Only grant the minimum permissions needed for scanning.
- Monitor token usage — Review the Cloudflare audit log for suspicious activity.
Troubleshooting
”Missing X-Auth-Email header” Error
This error occurs when using API Key authentication without providing the email address. Ensure bothCLOUDFLARE_API_KEY and CLOUDFLARE_API_EMAIL are set.
”Authentication error” or “Permission denied”
- Verify the API Token or API Key is correct and not expired.
- Check that the token has the required permissions.
- Ensure the token has access to the zones targeted for scanning.
”Both API Token and API Key and Email credentials are set”
This warning appears when all three environment variables are set (CLOUDFLARE_API_TOKEN, CLOUDFLARE_API_KEY, CLOUDFLARE_API_EMAIL). To resolve, unset the credentials that are not needed:
“Account not found” Error
This error occurs when a specified--account-id is not accessible with the current credentials. Verify the Account ID is correct and that the credentials have access to the target account.