 About Us
clouds.yaml authentication method.
Quick Start: Getting Your OpenStack Credentials
- OVH
- Generic Public Cloud
Step 1: Create an OpenStack User with Reader Role
Before using Prowler, create a dedicated user in your OVH Public Cloud account:- Log into the OVH Control Panel
- Navigate to “Public Cloud” → Select your project
-
Click “Users & Roles” in the left sidebar
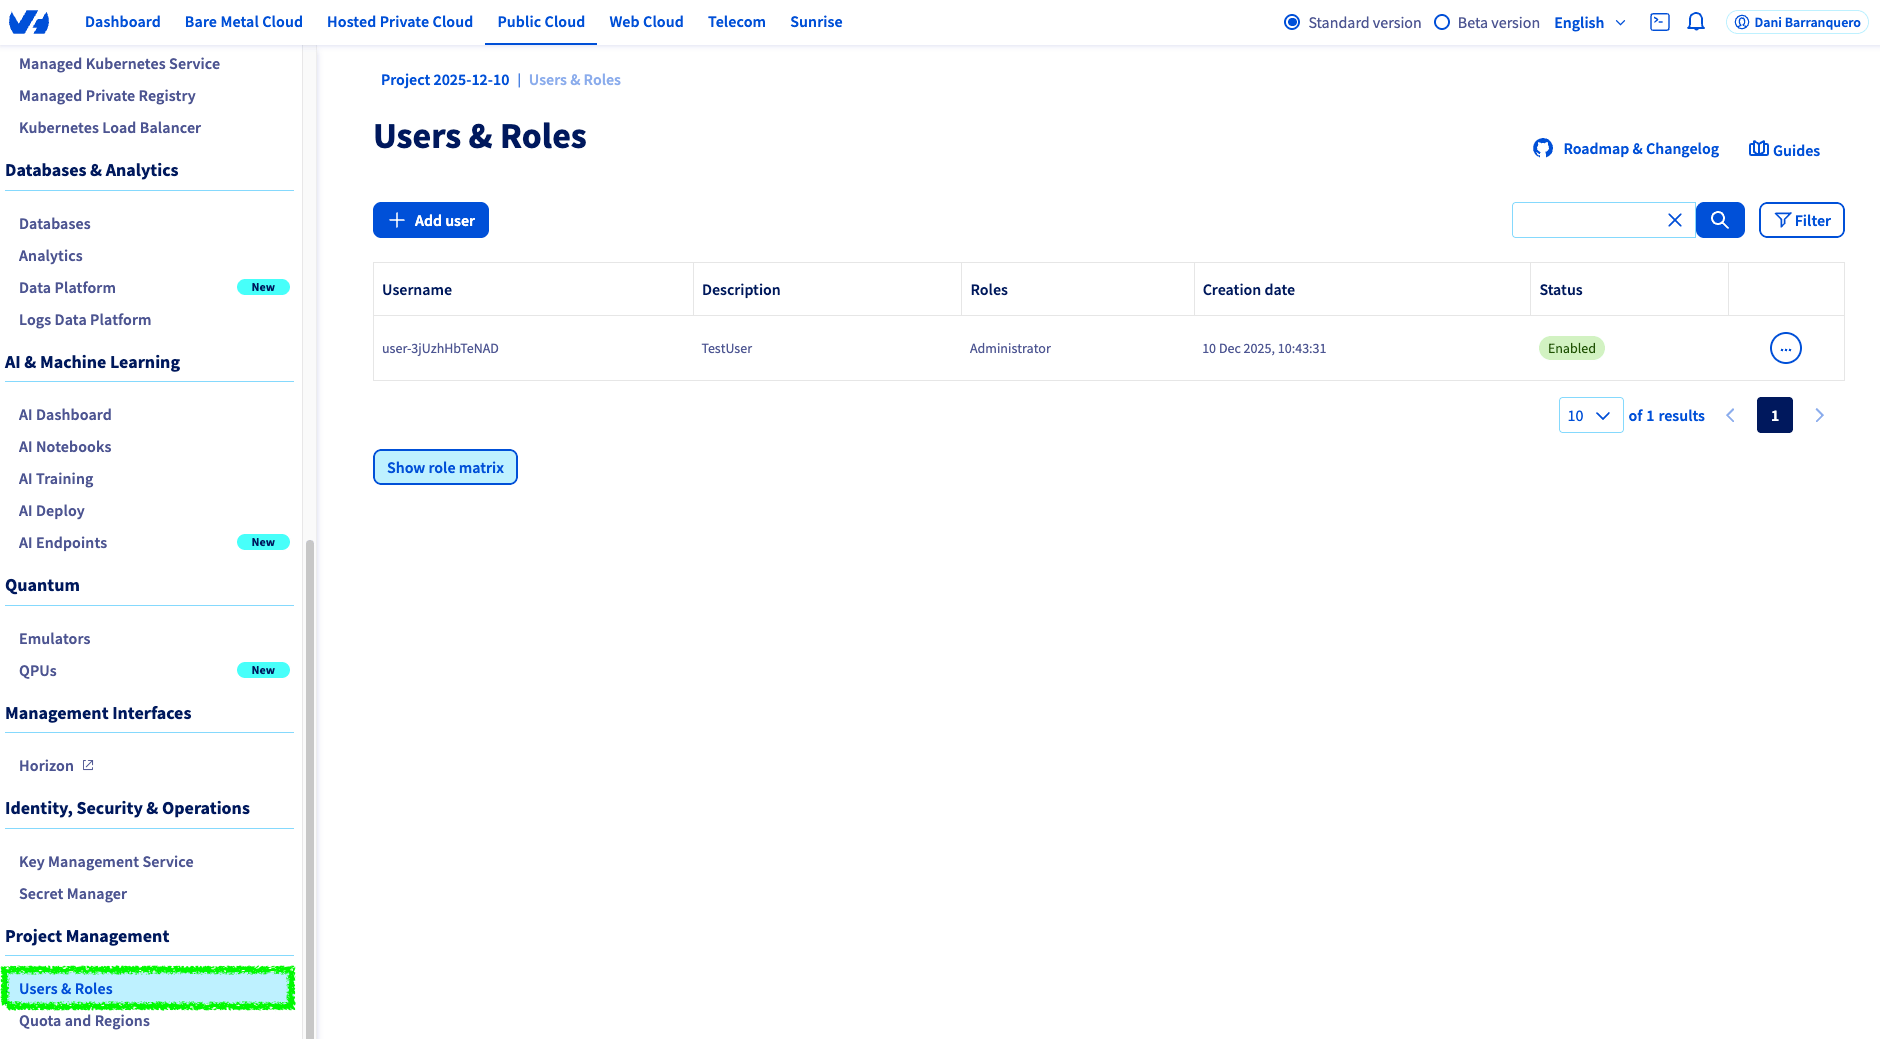
- Click “Add User”
-
Enter a user description (e.g.,
Prowler Audit User) -
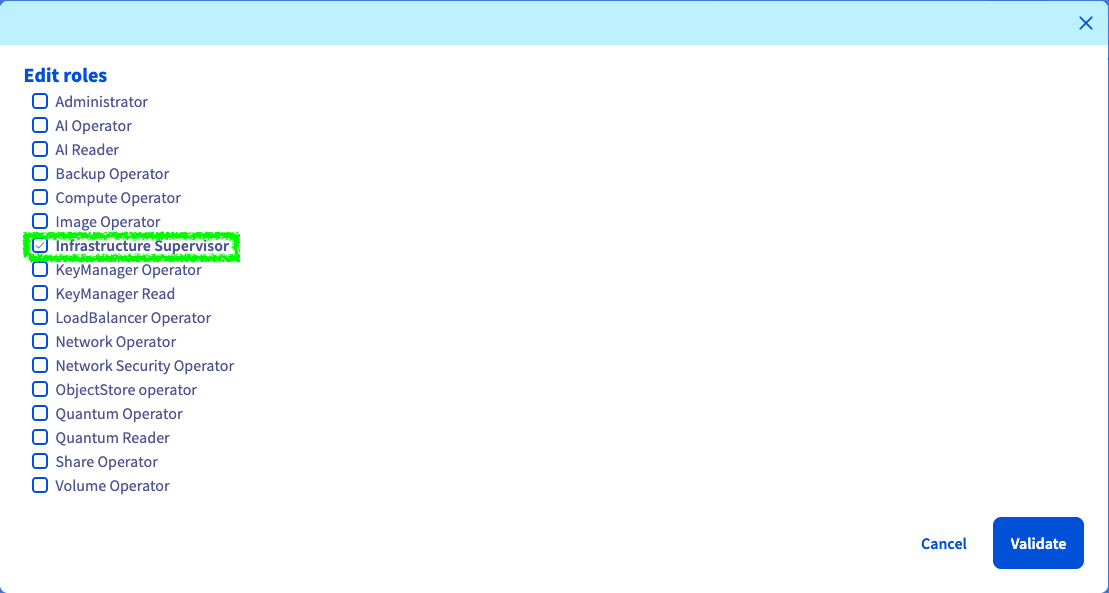
Assign the “Infrastructure Supervisor” role (this is the reader role) or specific read-only operator roles (if needed to audit only specific services)
- Click “Generate” to create the user
- Copy the password and store it securely
Step 2: Access the Horizon Dashboard
- From the OVH Control Panel, go to “Public Cloud” → Your project
-
Click “Horizon” in the left sidebar (or access the Horizon URL provided by OVH)
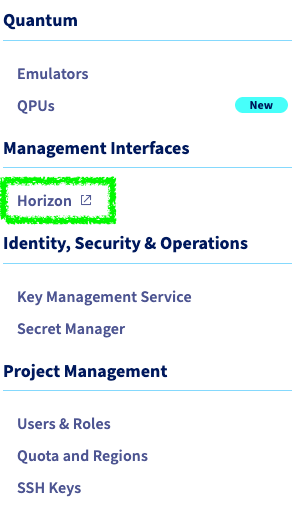
- Log in with the user credentials created in Step 1. Ensure the correct user is selected; logging in with the root user will download root user credentials. If the wrong user is logged in, log out and log in again with the correct user.
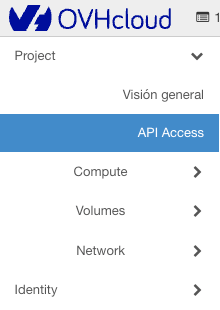
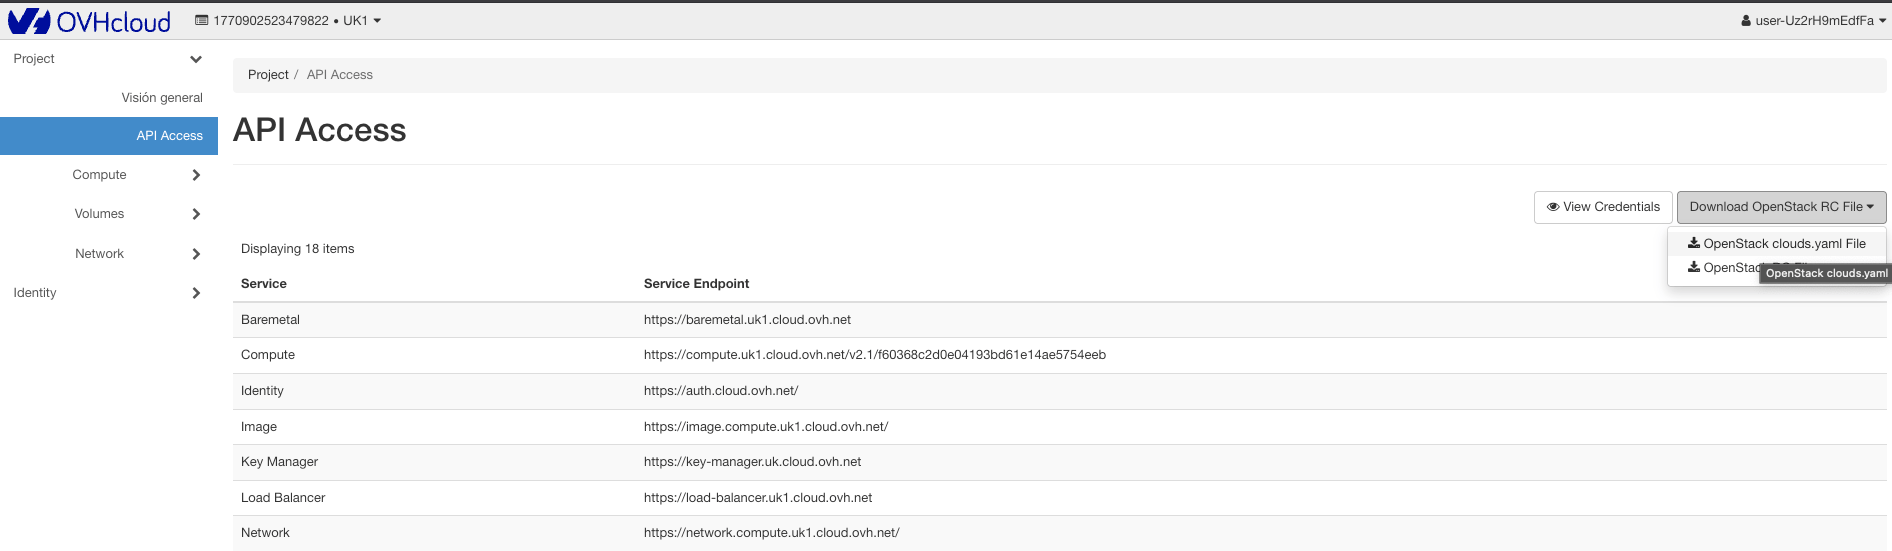
Step 3: Navigate to API Access
Once logged into Horizon:- In the left sidebar, click “Project”
-
Navigate to “API Access”
- You’ll see the API Access page with information about your OpenStack endpoints
Step 4: Download the clouds.yaml File
Theclouds.yaml file contains all necessary credentials in the correct format for Prowler:- On the API Access page, look for the “Download OpenStack RC File” dropdown button
-
Click the dropdown and select “OpenStack clouds.yaml File”
- The file will be downloaded to your computer
The clouds.yaml file contains your password in plain text. Ensure you store it securely with appropriate file permissions (see Security Best Practices below).
Step 5: Configure clouds.yaml for Prowler
Save the file to the default OpenStack configuration directory:openstack to ovh-production):Step 6: Run Prowler
Now you can scan your OVH OpenStack infrastructure:Using the default location:Managing Multiple OpenStack Environments
To scan multiple OpenStack projects or providers, add multiple cloud configurations to yourclouds.yaml:
Multi-Region Scanning
Many OpenStack providers (OVH, Infomaniak, etc.) offer resources across multiple regions within the same project. By default, theclouds.yaml file downloaded from Horizon uses region_name which targets a single region. Prowler supports scanning all regions in a single run by using the regions key instead.
Configuring Multi-Region
Replace theregion_name key with a regions list in your clouds.yaml:
How It Works
Theregion_name and regions keys are part of the OpenStack SDK configuration format. When regions is set, the SDK can produce a separate cloud config object for each region — but it does not iterate over them automatically. Prowler uses this to create one authenticated connection per region and iterates over all of them when listing resources. This means:
- Authentication is tested against every configured region during connection setup
- Resources from all regions are collected in a single scan
- Findings include the specific region for each resource
- If a single region fails to connect, the entire scan fails (fail-fast)
Finding Your Available Regions
To discover which regions are available for your project, use the OpenStack CLI:Single-Region vs Multi-Region
| Configuration | Key | Behavior |
|---|---|---|
| Single region | region_name: UK1 | Scans resources in UK1 only |
| Multi-region | regions: [UK1, DE1] | Scans resources in both UK1 and DE1 |
clouds.yaml file:
Creating a User With Reader Role
For security auditing, Prowler only needs read-only access to your OpenStack resources.Understanding OpenStack Roles
OpenStack uses a role-based access control (RBAC) system. Common read-only roles include:| Role | Access Level | Recommended for Prowler |
|---|---|---|
| Reader | Read-only access to all resources | ✅ Recommended |
| Viewer | Read-only access (older deployments) | ✅ Recommended |
| Compute/Network/ObjectStore Operator | Service-specific read-only access | ✅ Recommended (OVH) |
| Member | Read and limited write access | ⚠️ Too permissive |
| Admin | Full administrative access | ❌ Not recommended |
How to Assign the Reader Role
The process for creating a user with the Reader role is covered in the Quick Start section above. Select your provider’s tab (OVH or Generic Public Cloud) for detailed instructions.Verifying Read-Only Access
After assigning read-only roles, verify the user cannot make changes:- Log into Horizon with the Prowler user credentials
- Attempt to create or modify a resource (e.g., create an instance)
- The action should be denied or the UI should show read-only mode
Some OpenStack deployments may use custom role names. Consult your OpenStack administrator to identify the appropriate read-only role for your environment.
Alternative Authentication Methods
Whileclouds.yaml is the recommended method, Prowler also supports these alternatives:
Environment Variables
Set OpenStack credentials as environment variables:Command-Line Arguments (Flags)
Pass credentials directly via CLI flags:Authentication Priority
When multiple authentication methods are configured, Prowler uses this priority order:- clouds.yaml (if
--clouds-yaml-fileor--clouds-yaml-cloudis provided) - Command-line arguments + Environment variables (CLI arguments override environment variables)
Security Best Practices
File Permissions
Protect yourclouds.yaml file from unauthorized access:
Credential Management
- Use dedicated audit users: Create separate OpenStack users specifically for Prowler audits
- Use read-only roles: Assign only Reader or Viewer roles to limit access
- Rotate credentials regularly: Change passwords and regenerate credentials periodically
- Use Application Credentials: For advanced setups, use OpenStack Application Credentials with scoped permissions and expiration dates
- Avoid hardcoding passwords: Never commit
clouds.yamlfiles with passwords to version control - Use secrets managers: For production environments, consider using tools like HashiCorp Vault or AWS Secrets Manager to store credentials
Network Security
- Use HTTPS: Always connect to OpenStack endpoints via HTTPS
- Verify SSL certificates: Avoid using
--insecureflag in production - Restrict network access: Use firewall rules to limit access to OpenStack APIs
- Use VPN or private networks: When possible, run Prowler from within your private network
Troubleshooting
”Missing mandatory OpenStack environment variables” Error
This error occurs when required credentials are not configured:”Failed to create OpenStack connection” Error
This error indicates authentication failure. Verify:- ✅ Auth URL is correct and accessible:
curl -k https://auth-url/v3 - ✅ Username and password are correct
- ✅ Project ID exists and you have access
- ✅ Network connectivity to the OpenStack endpoint
- ✅ SSL/TLS certificates are valid
”Cloud ‘name’ not found in clouds.yaml” Error
This error occurs when the specified cloud name doesn’t exist inclouds.yaml:
Solution:
- Verify the cloud name matches exactly (case-sensitive)
- Check your
clouds.yamlfile for the correct cloud name: - Ensure proper YAML syntax (use a YAML validator if needed)
Permission Denied Errors
If specific checks fail due to insufficient permissions:-
Verify role assignments:
- Ensure the user has Reader or Viewer roles
- Check if specific services require additional permissions (consult your OpenStack administrator)
Next Steps
- Getting Started with OpenStack - Run your first scan
- Mutelist - Suppress known findings and false positives
Additional Resources
Provider-Specific Documentation
- OVH Public Cloud: OpenStack Documentation