 About Us
Parallel Setup RequiredGoogle Admin Console requires the ACS URL and Entity ID from Prowler Cloud, while Prowler Cloud displays these values only after opening the SAML configuration dialog. To work around this, open Prowler Cloud in a separate browser tab, navigate to the profile page, open the “Configure SAML SSO” dialog, and copy the ACS URL and Entity ID before proceeding with the Google configuration.
Prerequisites
- Google Workspace: Super Admin access (or delegated admin with app management permissions).
- Prowler Cloud: Administrator access to the organization (role with “Manage Account” permission).
- Prowler version 5.9.0 or later.
Part A - Google Admin Console
Step 1: Navigate to Web & Mobile Apps
- Go to admin.google.com.
- In the left sidebar, navigate to Apps > Web and mobile apps.
- Click “Add app”, then select “Add custom SAML app”.

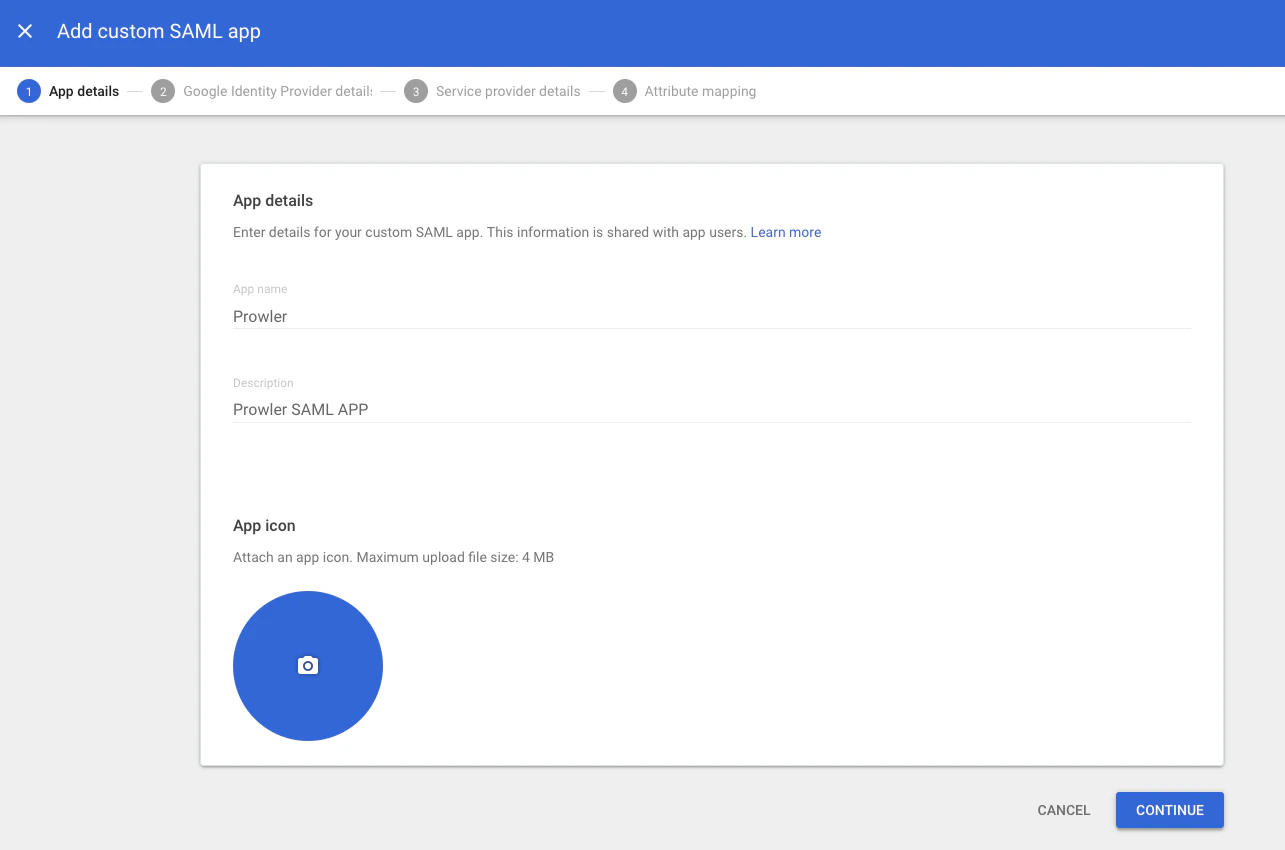
Step 2: Enter App Details
- In the App name field, enter a name (e.g.,
Prowler). - Optionally, add a description (e.g.,
Prowler SAML APP) and upload a logo. - Click “Continue”.
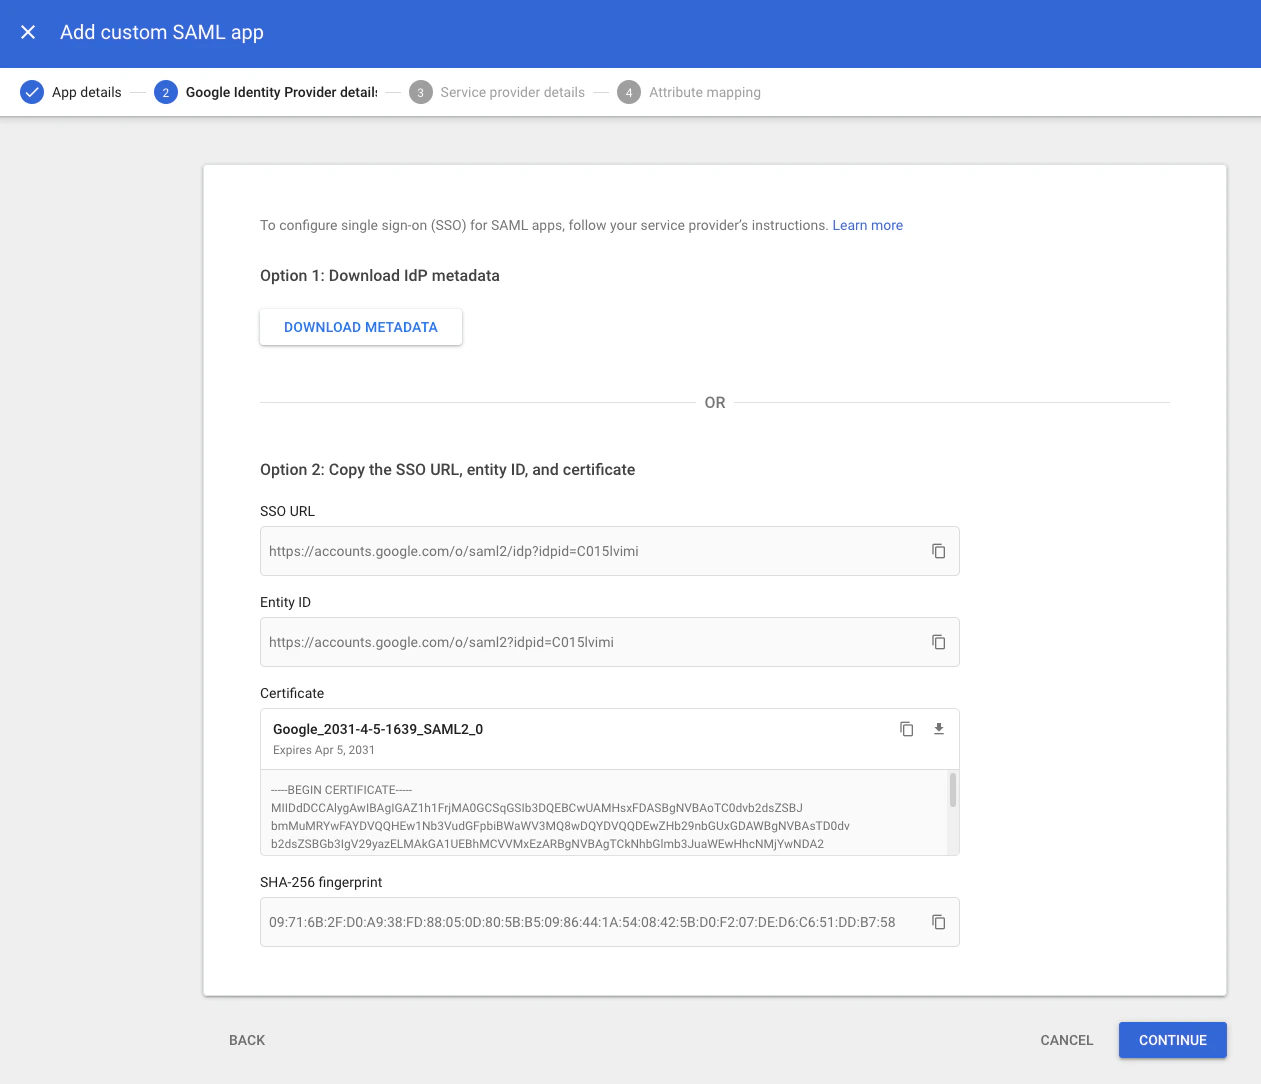
Step 3: Download the IdP Metadata
On the Google Identity Provider details screen:- Google displays two options:
- Option 1: Click “Download Metadata” to save the XML file directly. This is the recommended approach.
- Option 2: Manually copy the SSO URL, Entity ID, and Certificate.
- Download the metadata. This file is required to complete the configuration in Prowler Cloud (Part B).
- Click “Continue”.
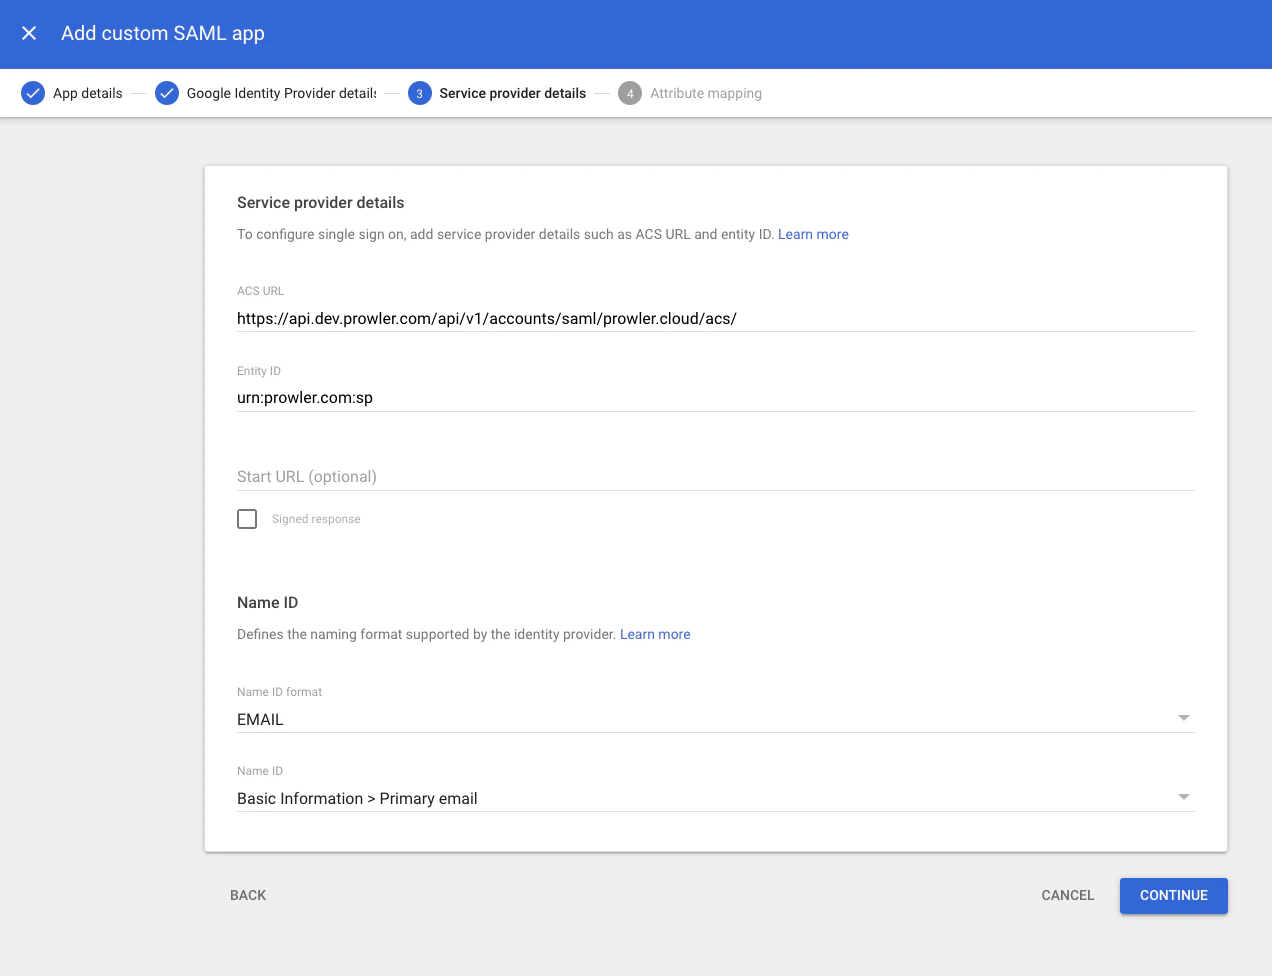
Step 4: Configure the Service Provider Details
Enter the following values obtained from the SAML SSO configuration dialog in Prowler Cloud (see Part B, Step 1 for details on where to find them):
Click “Continue”.
Step 5: Configure Attribute Mapping
To correctly provision users, configure the IdP to send the following attributes in the SAML assertion. The App Attribute (SAML) column lists the attribute names that Prowler expects. The Google Directory Attribute column shows a recommended source field, but any Google directory attribute can be used as long as it is mapped to the correct Prowler attribute name. Click “Add mapping” for each entry:Remember the Mapped FieldsTake note of which Google directory attributes are mapped to each Prowler attribute. To update a user’s role or organization in Prowler, modify the corresponding field in the user’s Google Workspace profile (e.g., Department if mapped to
userType). Changes propagate to Prowler on the next SAML login.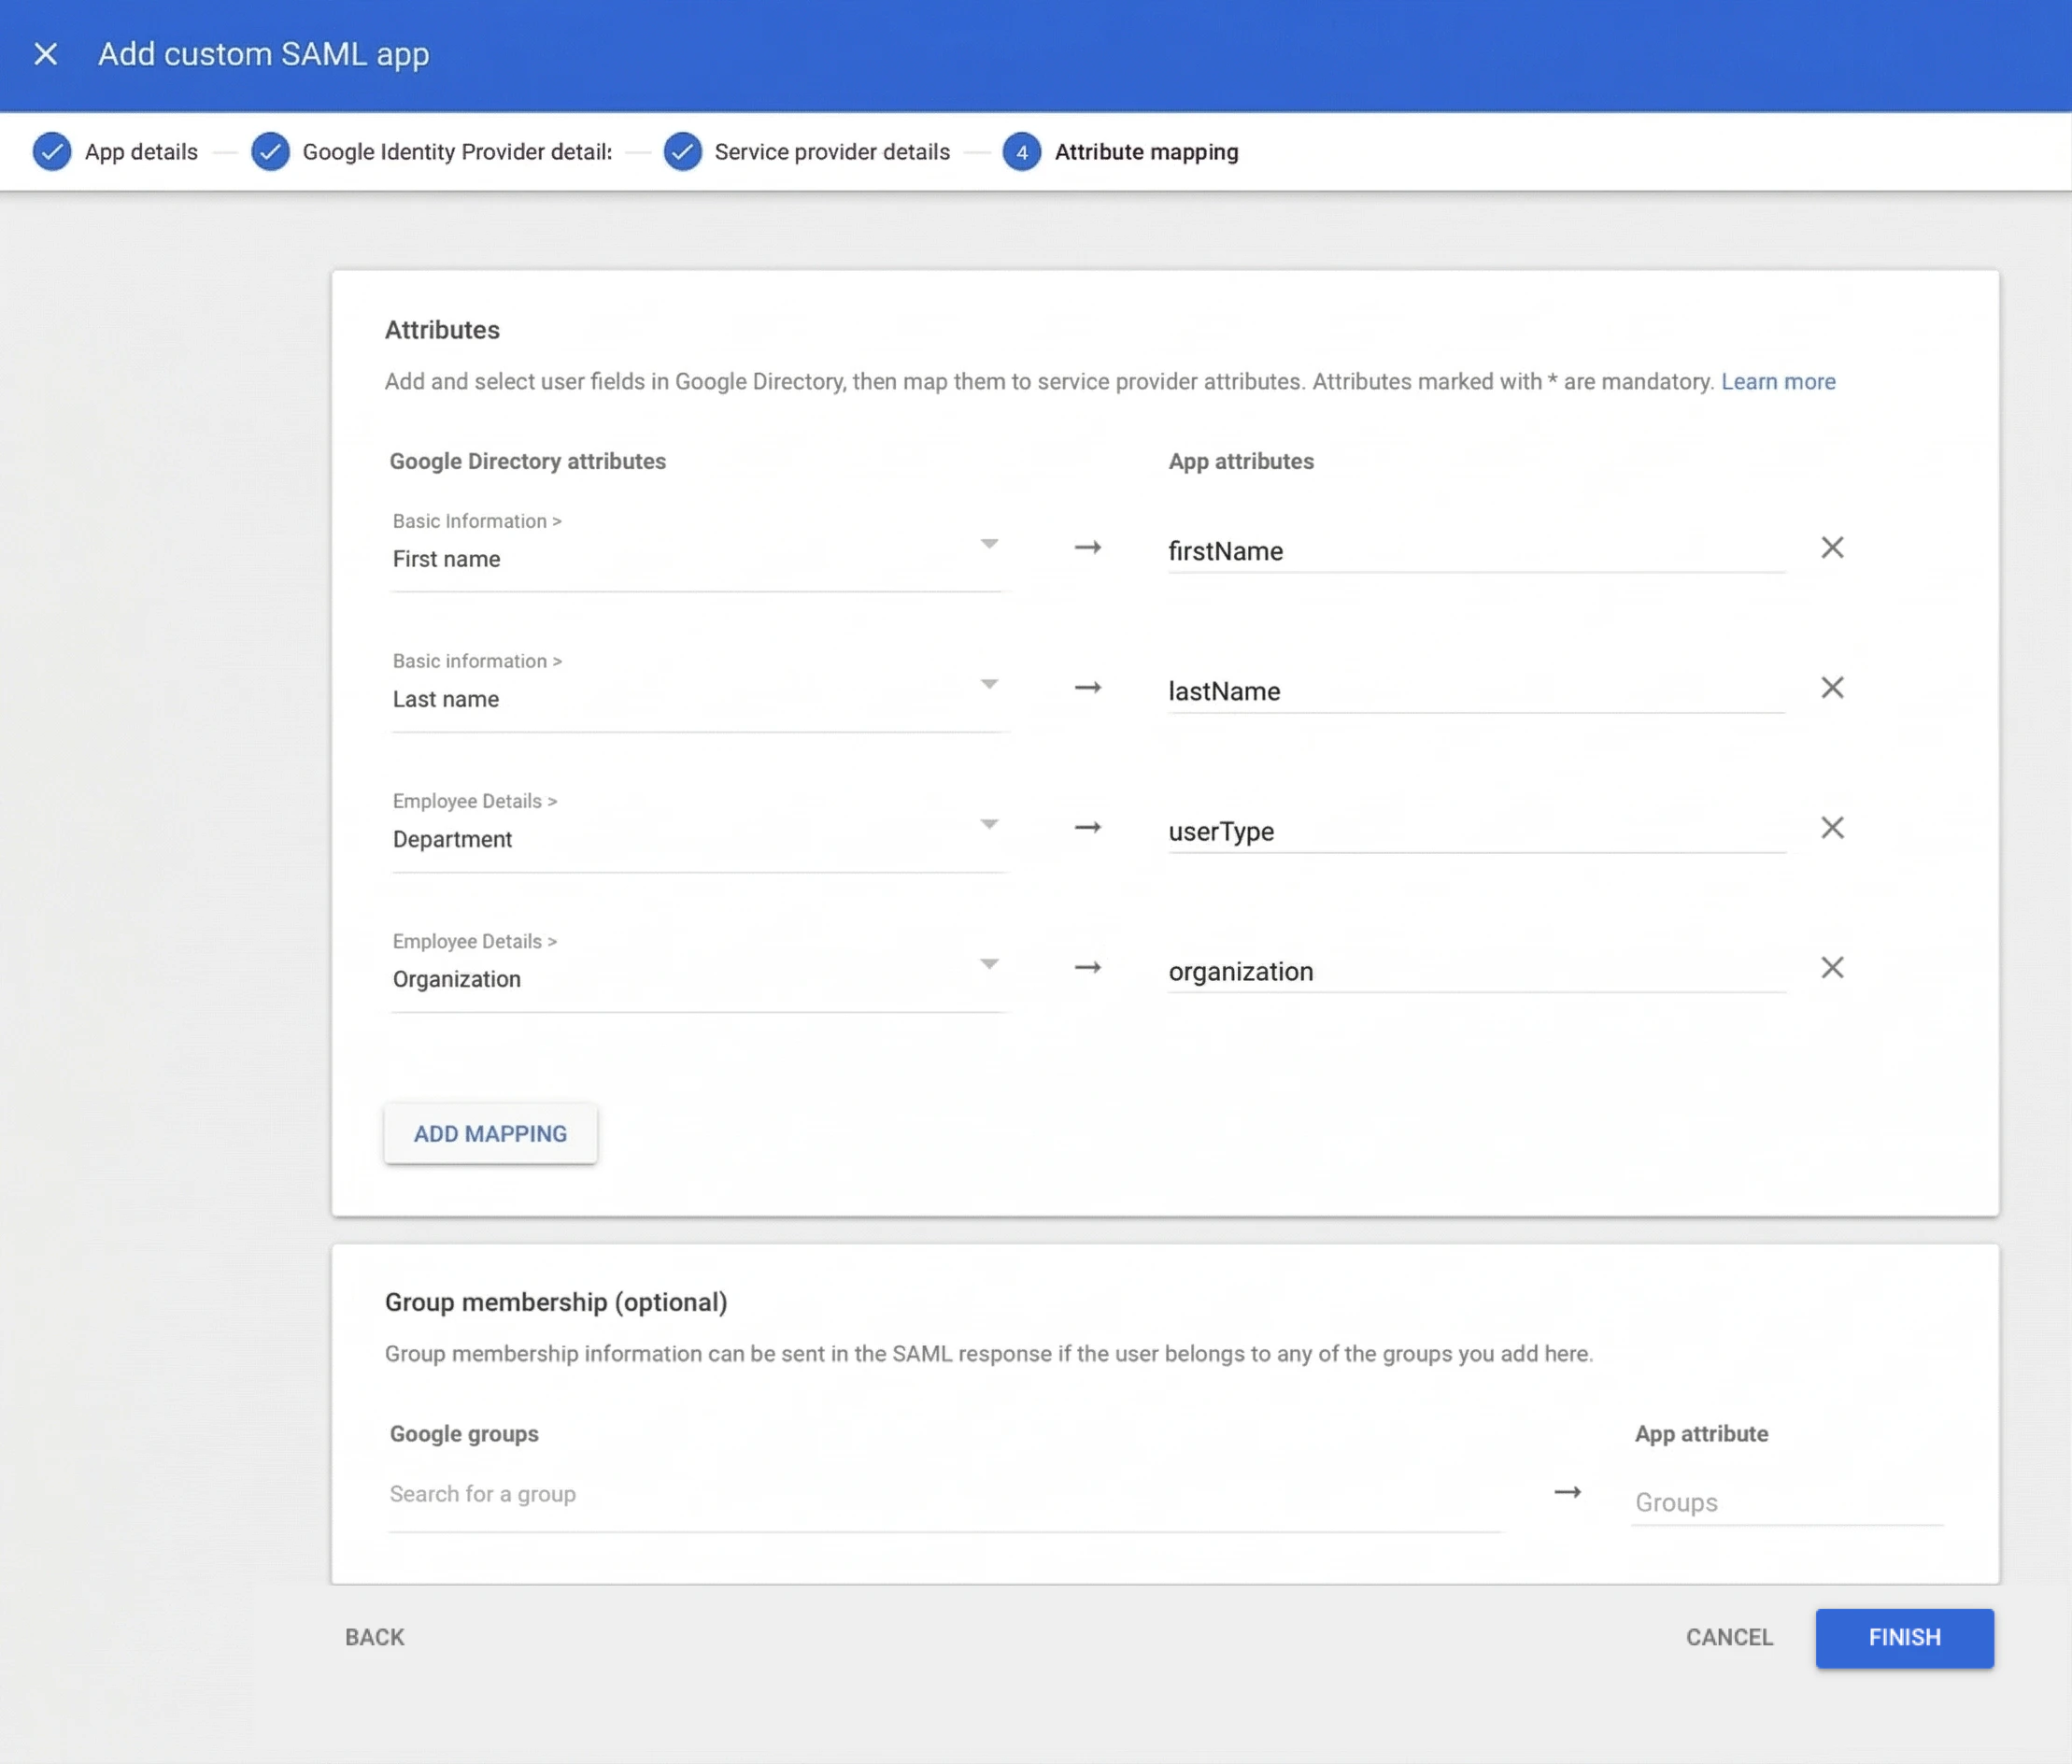
Dynamic UpdatesProwler Cloud updates user attributes each time a user logs in. Any changes made in Google Workspace are reflected on the next login.
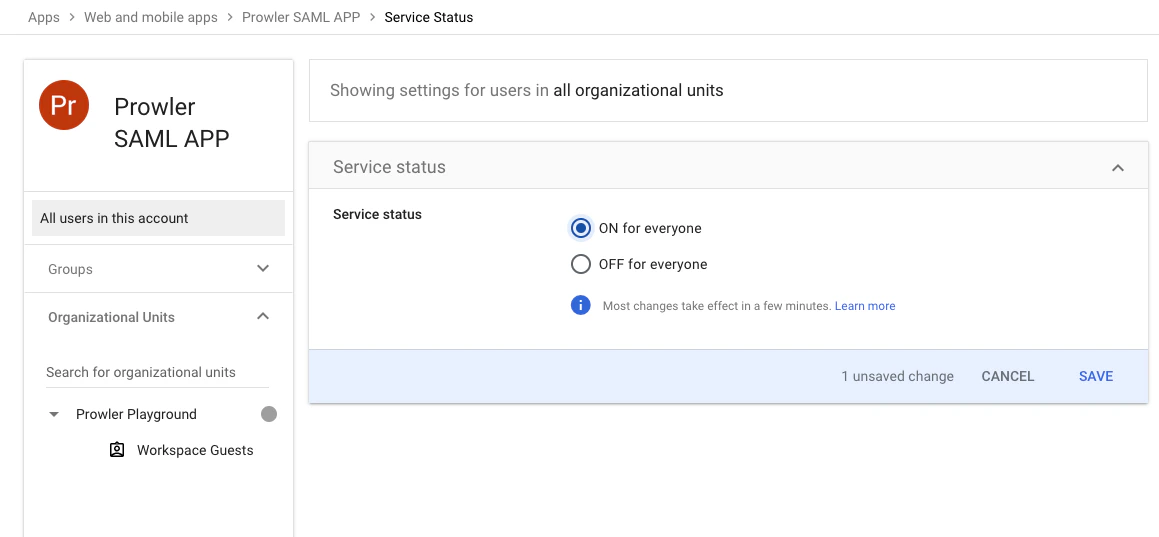
Step 6: Enable the App for Users
By default, newly created SAML apps have user access set to OFF. To enable access:- Return to Apps > Web and mobile apps and select the Prowler SAML app.
- Click “User access” (or “View details” under the “User access” section).
- Set the service status to ON for everyone, or enable it for specific organizational units or groups.
-
Click “Save”.
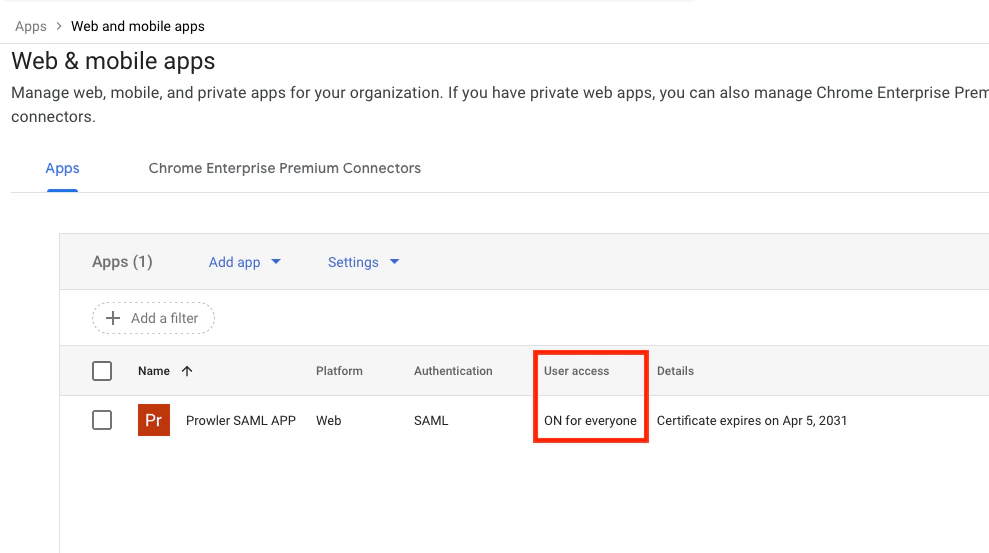
-
Verify in the apps list that the “User access” column displays “ON for everyone”.
Propagation DelayChanges to the app status can take up to 24 hours to propagate across Google Workspace, although they typically take effect within a few minutes.
“Can’t Test SAML Login” ErrorIf attempting to use the “Test SAML login” option in Google Admin Console and receiving a “Can’t test SAML login” message, click “Allow Access” to enable the app for the organizational unit that includes the admin account. This is the same as setting the service status to ON as described above.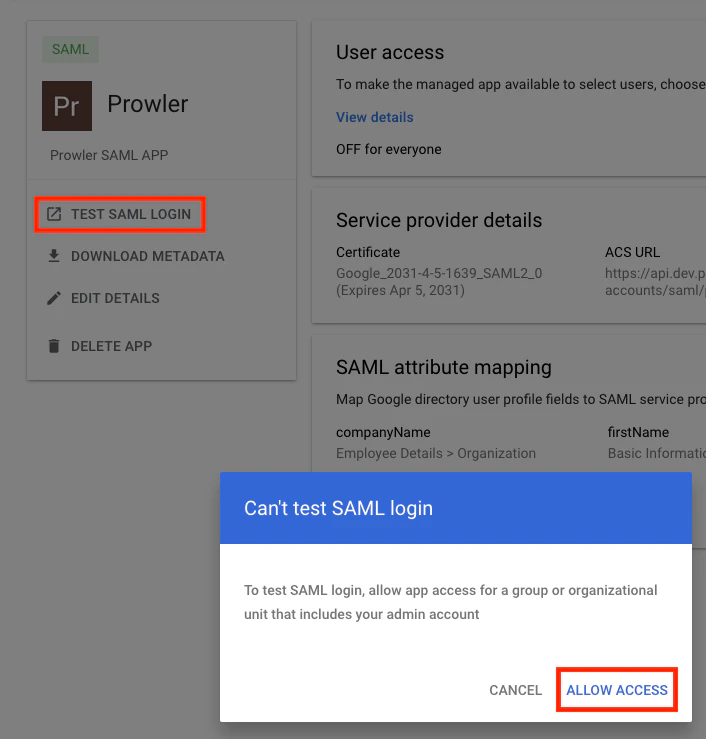
Part B - Prowler Cloud Configuration
Step 1: Open the SAML Configuration Dialog
- Navigate to the profile settings page:
- Prowler Cloud:
https://cloud.prowler.com/profile - Prowler Local Server:
http://{your-domain}/profile
- Prowler Cloud:
- Find the “SAML SSO Integration” card and click “Enable” (or “Update” if already configured).
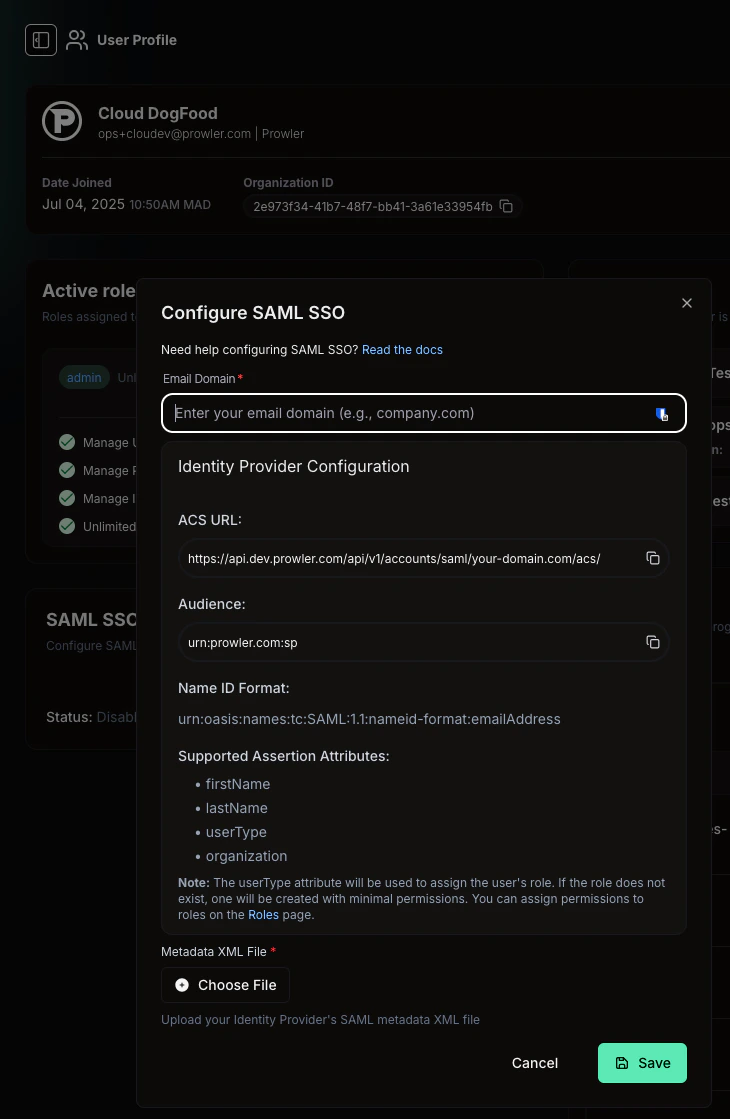
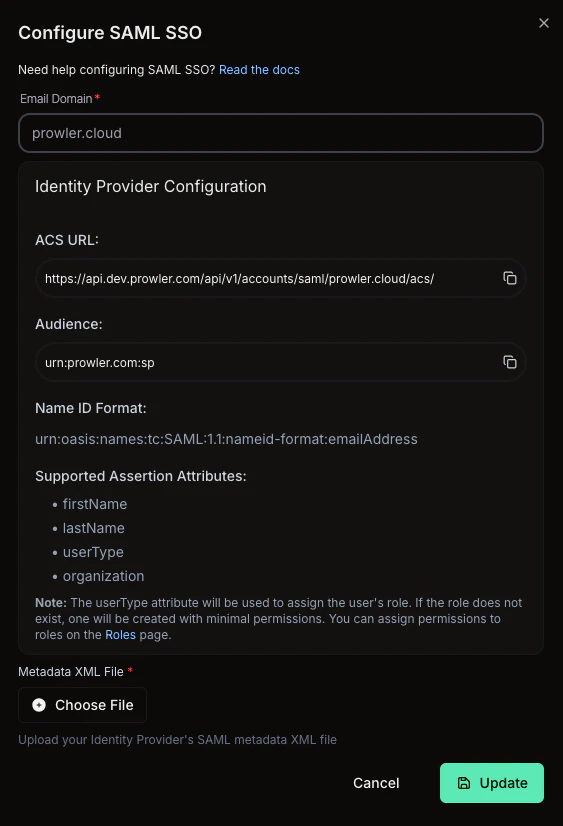
- The “Configure SAML SSO” dialog opens, displaying:
- ACS URL: The Assertion Consumer Service URL (copy this value for Part A, Step 4). This URL updates dynamically when the email domain is entered.
- Audience: The Entity ID (copy this value for Part A, Step 4).
- Name ID Format: The expected format (
urn:oasis:names:tc:SAML:1.1:nameid-format:emailAddress). - Supported Assertion Attributes: The list of accepted attributes (
firstName,lastName,userType,organization).
Step 2: Enter the Email Domain and Upload Metadata
- Enter the email domain for the organization (e.g.,
prowler.cloud). Prowler Cloud uses this domain to identify users who should authenticate via SAML. The ACS URL updates automatically to reflect the configured domain. - Upload the metadata XML file downloaded in Part A, Step 3.
- Click “Save”.
Step 3: Verify the Enabled Status
The “SAML SSO Integration” card should now display a “Status: Enabled” indicator with a checkmark, confirming that the configuration is complete.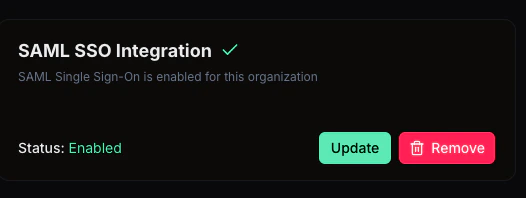
Testing the Integration
Optional: Create a Test User in Google Workspace
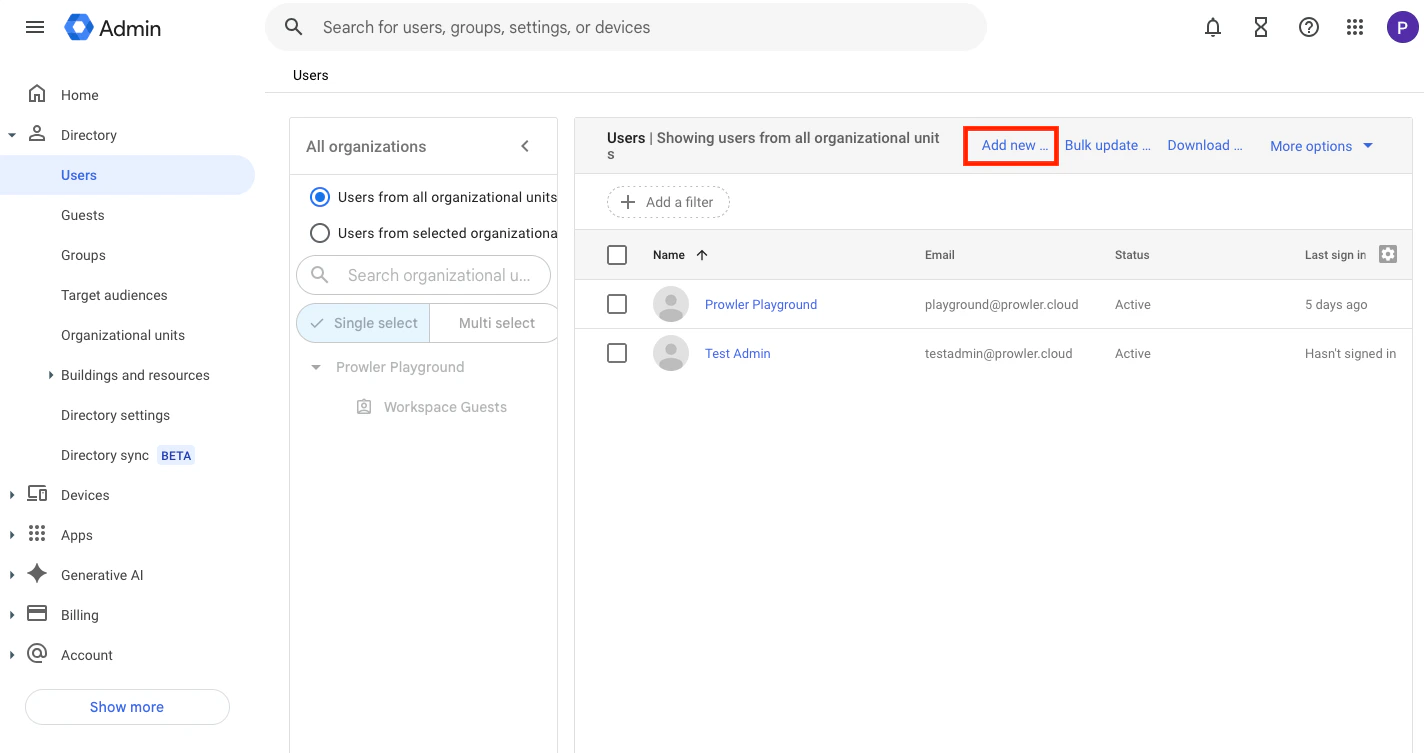
To verify the integration without affecting existing users, create a dedicated test user in Google Admin Console:- Navigate to Directory > Users in Google Admin Console.
-
Click “Add new user”.
-
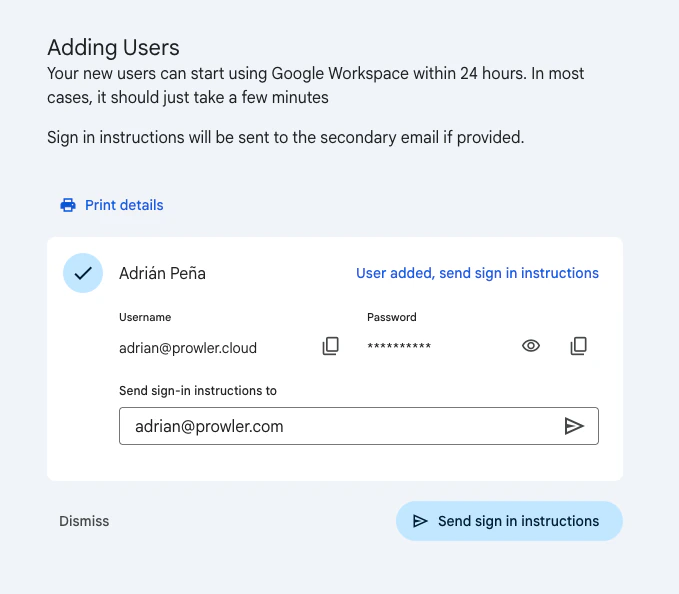
Fill in the user details (first name, last name, and primary email address in the configured domain).

-
Complete the user creation. Google Workspace generates temporary credentials for the new account.
Optional: Configure User Attributes for Role Mapping
To test theuserType → role mapping, set the Department attribute in the test user’s profile. This value is sent as the userType SAML attribute based on the mapping configured in Part A, Step 5.
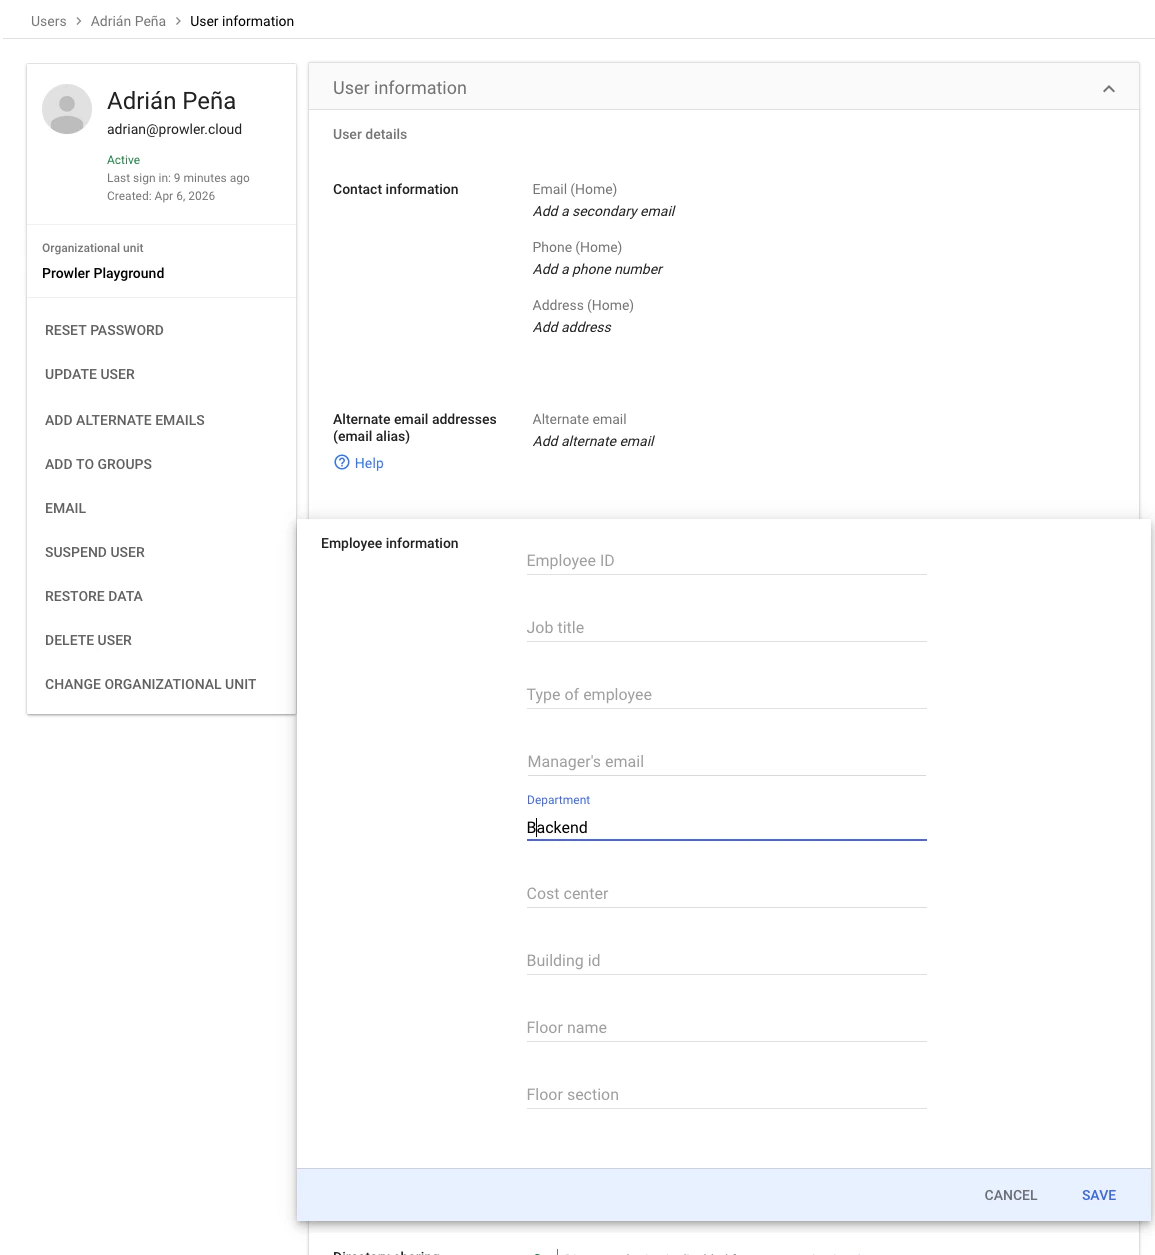
- In Directory > Users, click the test user’s name to open the profile.
-
Click “User details”, scroll to Employee information, and enter a value in the Department field (e.g.,
Backend). This value determines the Prowler role assigned to the user. -
Click “Save”.
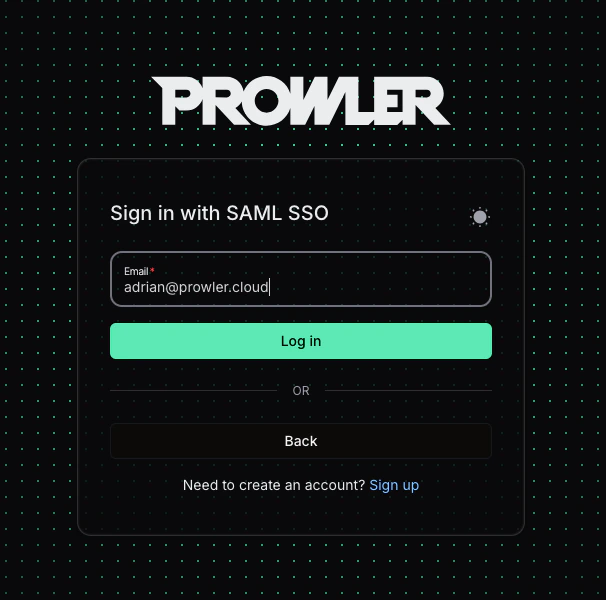
SP-Initiated SSO (from Prowler)
- Navigate to the Prowler login page.
- Click “Continue with SAML SSO”.
- Enter an email from the configured domain (e.g.,
adrian@prowler.cloud). - Click “Log in”. The browser redirects to Google for authentication and returns to Prowler Cloud upon success.
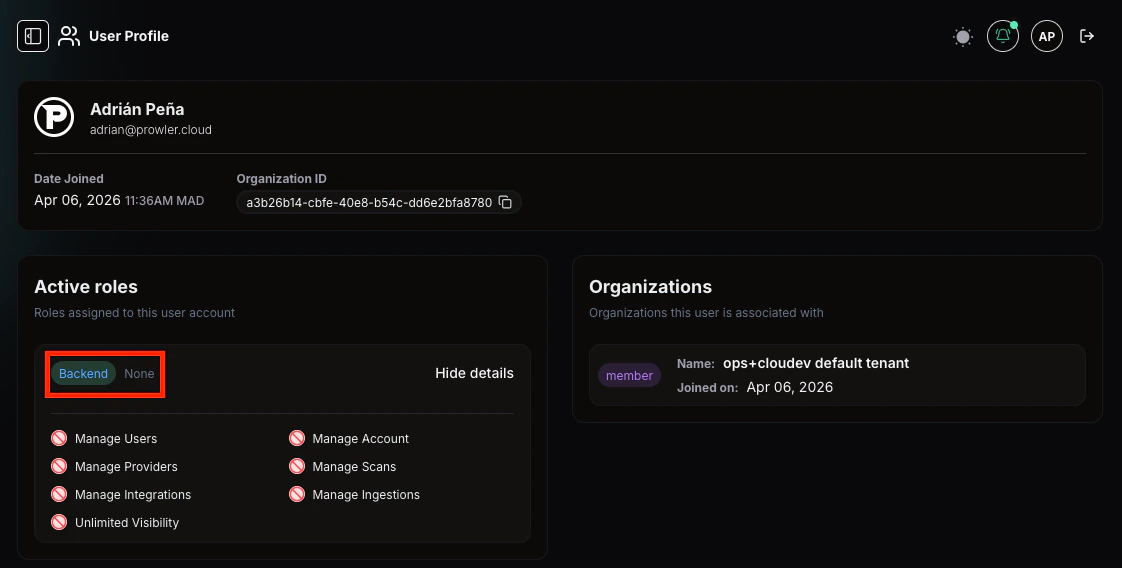
Verify User Profile and Role Mapping
After a successful SSO login, the user profile in Prowler Cloud reflects the attributes sent by Google Workspace:- Name: Populated from the
firstNameandlastNameattributes. - Role: Created automatically from the
userTypeattribute (e.g.,Backend). If the role did not exist previously, it is created with read-only access by default. - Permissions: If the assigned permissions need to be adjusted, a Prowler administrator can either:
- Edit the permissions of the new role via the RBAC Management tab.
- Set the
userTypeattribute in the IdP to match an existing Prowler role that already has the desired permissions. The updated role is applied on the next SAML login.
IdP-Initiated SSO (from Google)
- Sign in to Google Workspace with an account that has access to the Prowler SAML app.
- Open the Google Workspace app launcher (the grid icon in the top-right corner of any Google page).
- Click the Prowler tile.
- The browser redirects directly to Prowler Cloud, authenticated.
Troubleshooting
Email Domain UniquenessProwler does not allow two tenants to share the same email domain. If the domain is already associated with another tenant, the configuration will fail. This is by design to prevent authentication ambiguity.
Just-in-Time ProvisioningUsers who authenticate via SAML for the first time are automatically created in Prowler Cloud. No prior invitation is needed. User attributes (
firstName, lastName, userType) are updated on every login from the Google directory.Quick Summary
- In Google Admin Console, create a custom SAML app using the ACS URL and Entity ID from Prowler Cloud.
- Configure attribute mapping:
firstName,lastName, and optionallyuserTypeandorganization. - Download the metadata XML from Google.
- Enable the app in Google Workspace for the relevant users or groups.
- In Prowler Cloud, enter the email domain, upload the metadata XML, and save.
- Verify the SAML SSO Integration shows “Status: Enabled”.
- Test login via “Continue with SAML SSO” on the Prowler login page.