Managing Users and Roles
The Prowler App supports multiple users within a single tenant, enabling seamless collaboration by allowing team members to easily share insights and manage security findings.
Roles help you control user permissions, determining what actions each user can perform and the data they can access within Prowler. By default, each account includes an immutable admin role, ensuring that your account always retains administrative access.
Note
If the account is created without an invitation, a new tenant will be provisioned for it. However, if the account is created through an invitation, the user will join the inviter’s tenant.
Membership
To get to User-Invitation Management we will focus on the Membership section.
Note
Only users that have the Invite and Manage Users or admin permission can access this section.

Users
Editing a User
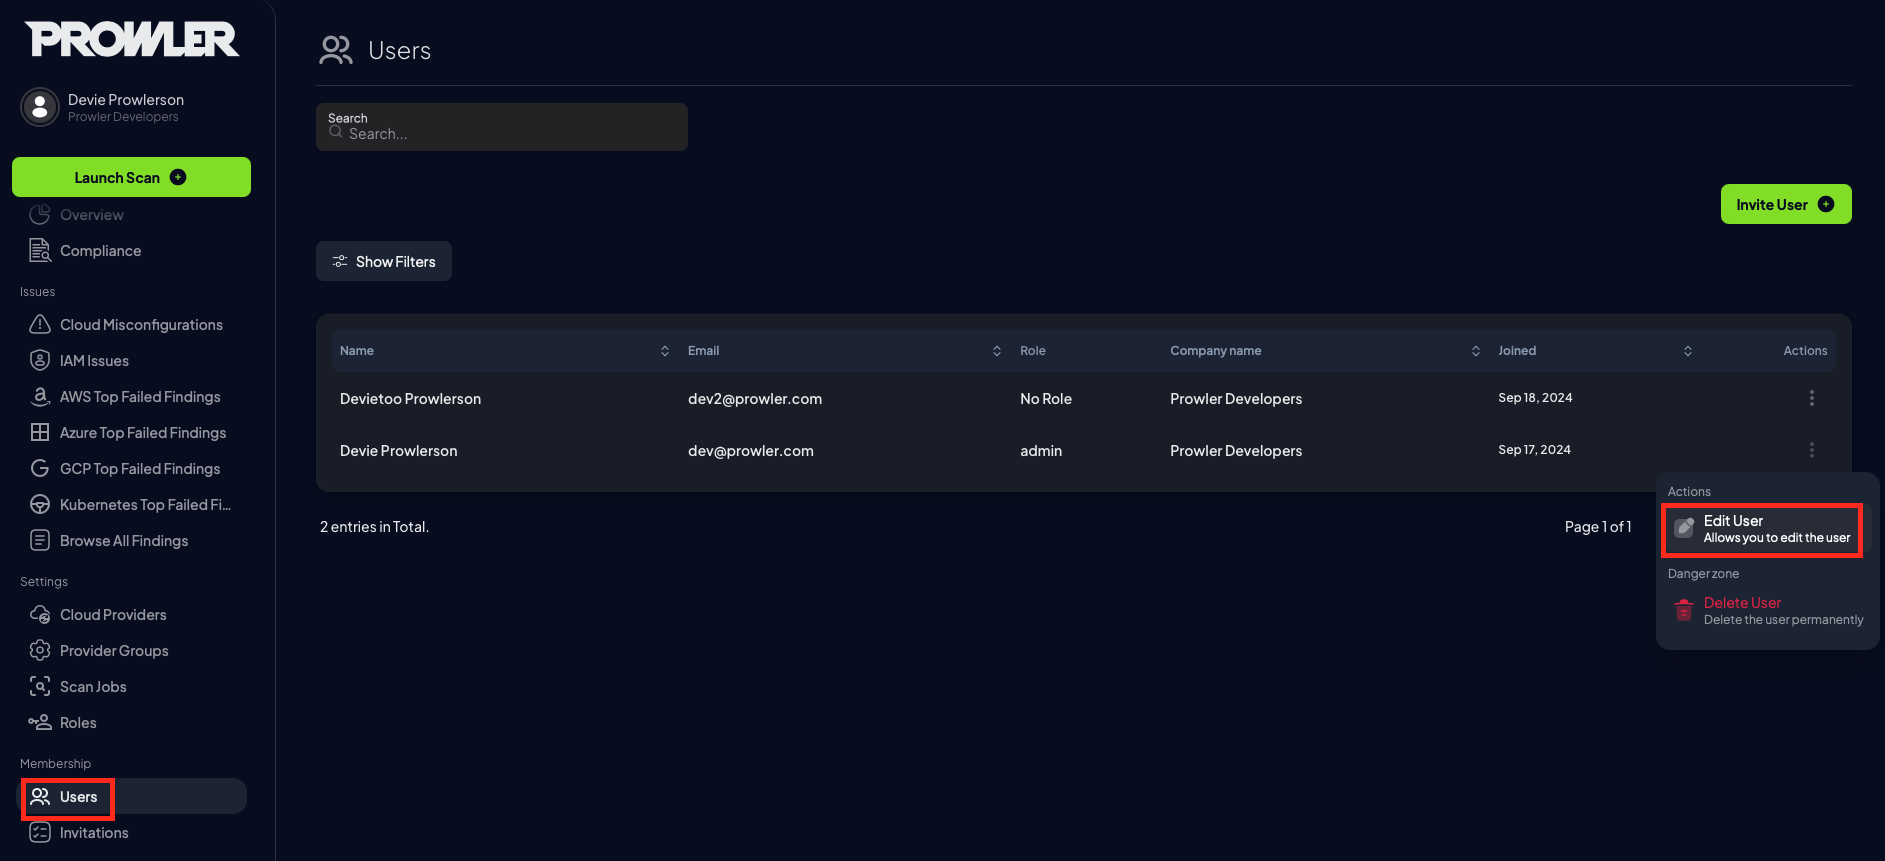
Follow these steps to edit a user of your account:
- Navigate to Users from the side menu.
-
Click on the edit button of the user you want to modify.
-
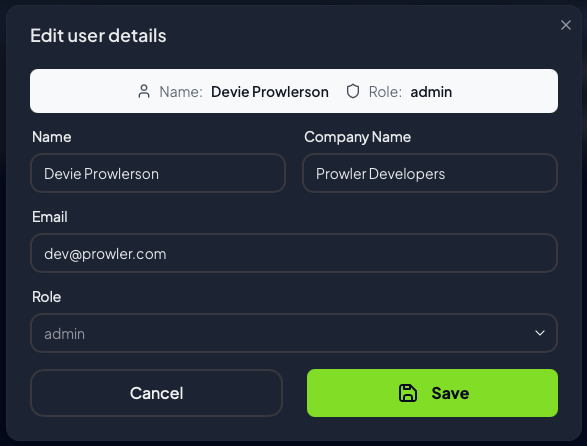
Edit the user fields you need and save your changes.
Removing a User
Follow these steps to remove a user of your account:
- Navigate to Users from the side menu.
-
Click on the delete button of your current user.
Note: Each user will be able to delete himself and not others, regardless of his permissions.

Invitations
Inviting Users
Note
Please be aware that at this time, an email address can only be associated with a single Prowler account.
Follow these steps to invite a user to your account:
- Navigate to Users from the side menu.
-
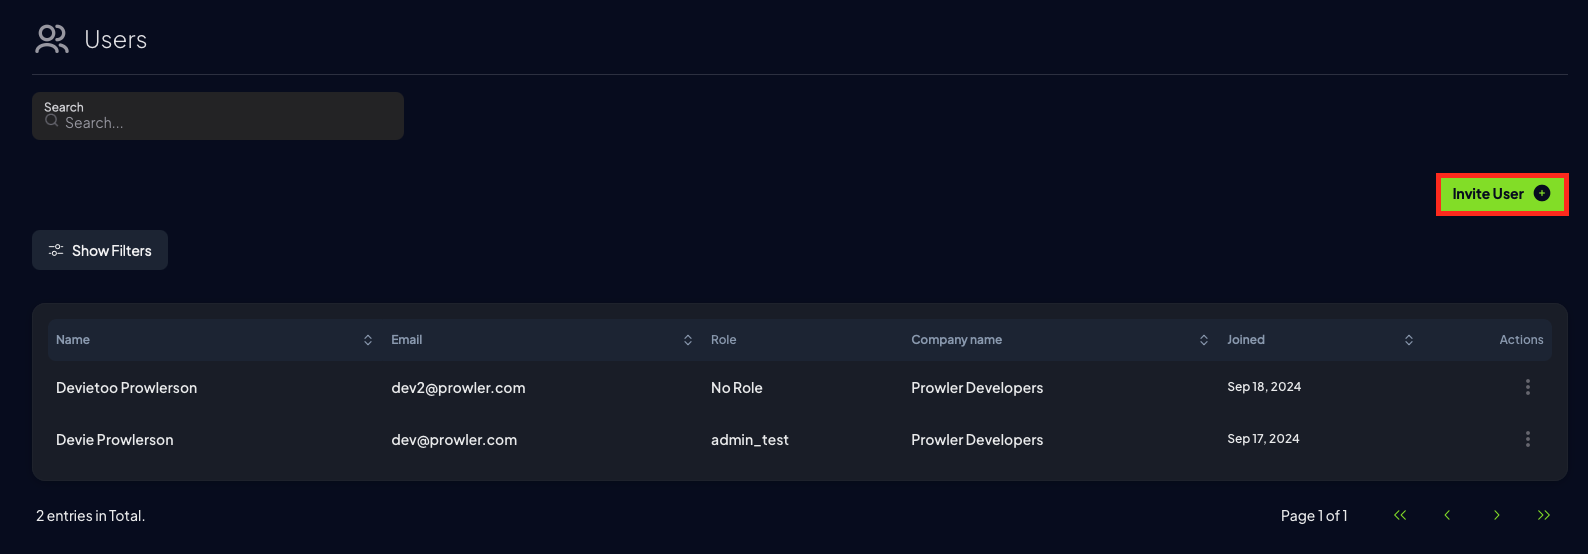
Click on the Invite User button on the top right-hand corner of the screen.
-
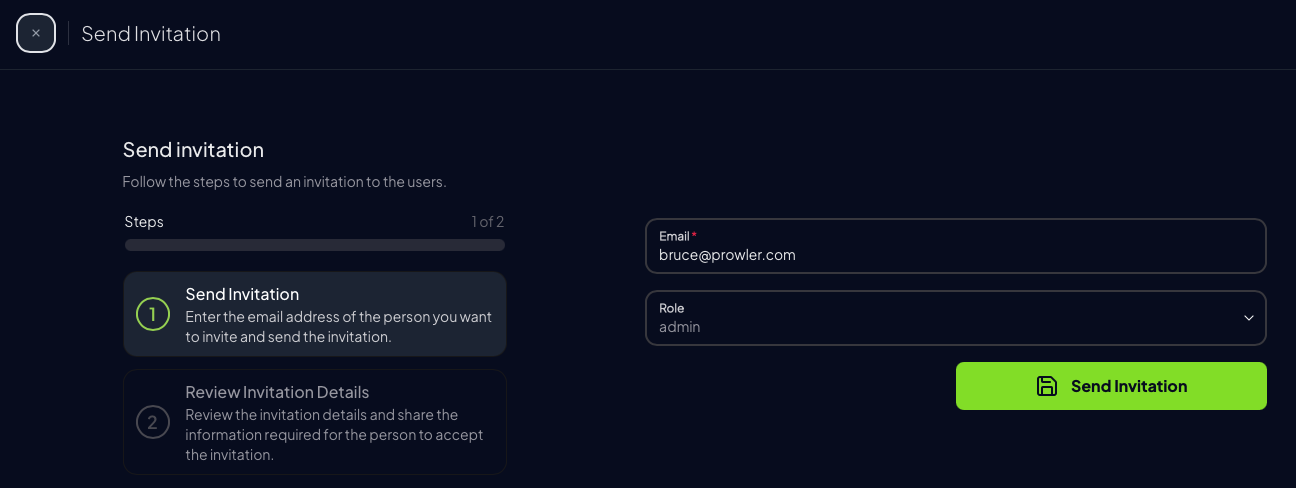
In the Invite User screen, enter the email address of the user you want to invite.
-
Pick a Role for the user. You can also change the roles for users and pending invites later. To learn more about the roles and what they can do, see Roles.
-
Click on the Send Invitation button to send the invitation to the user.
-
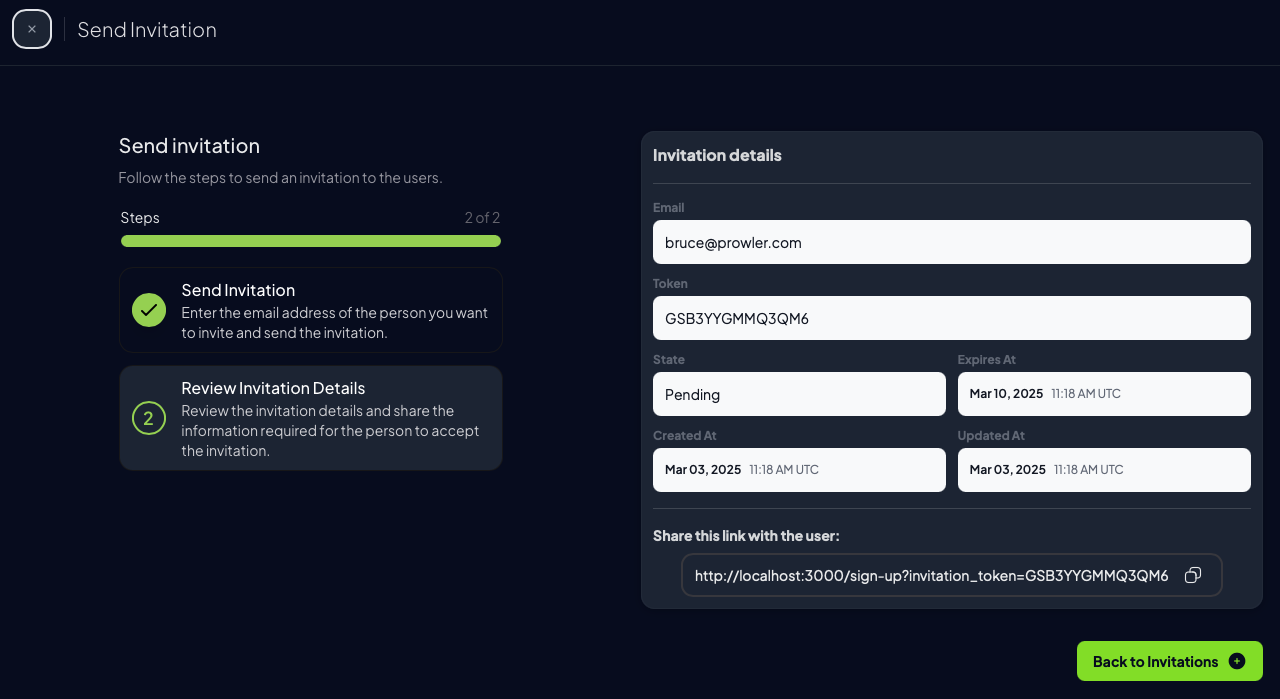
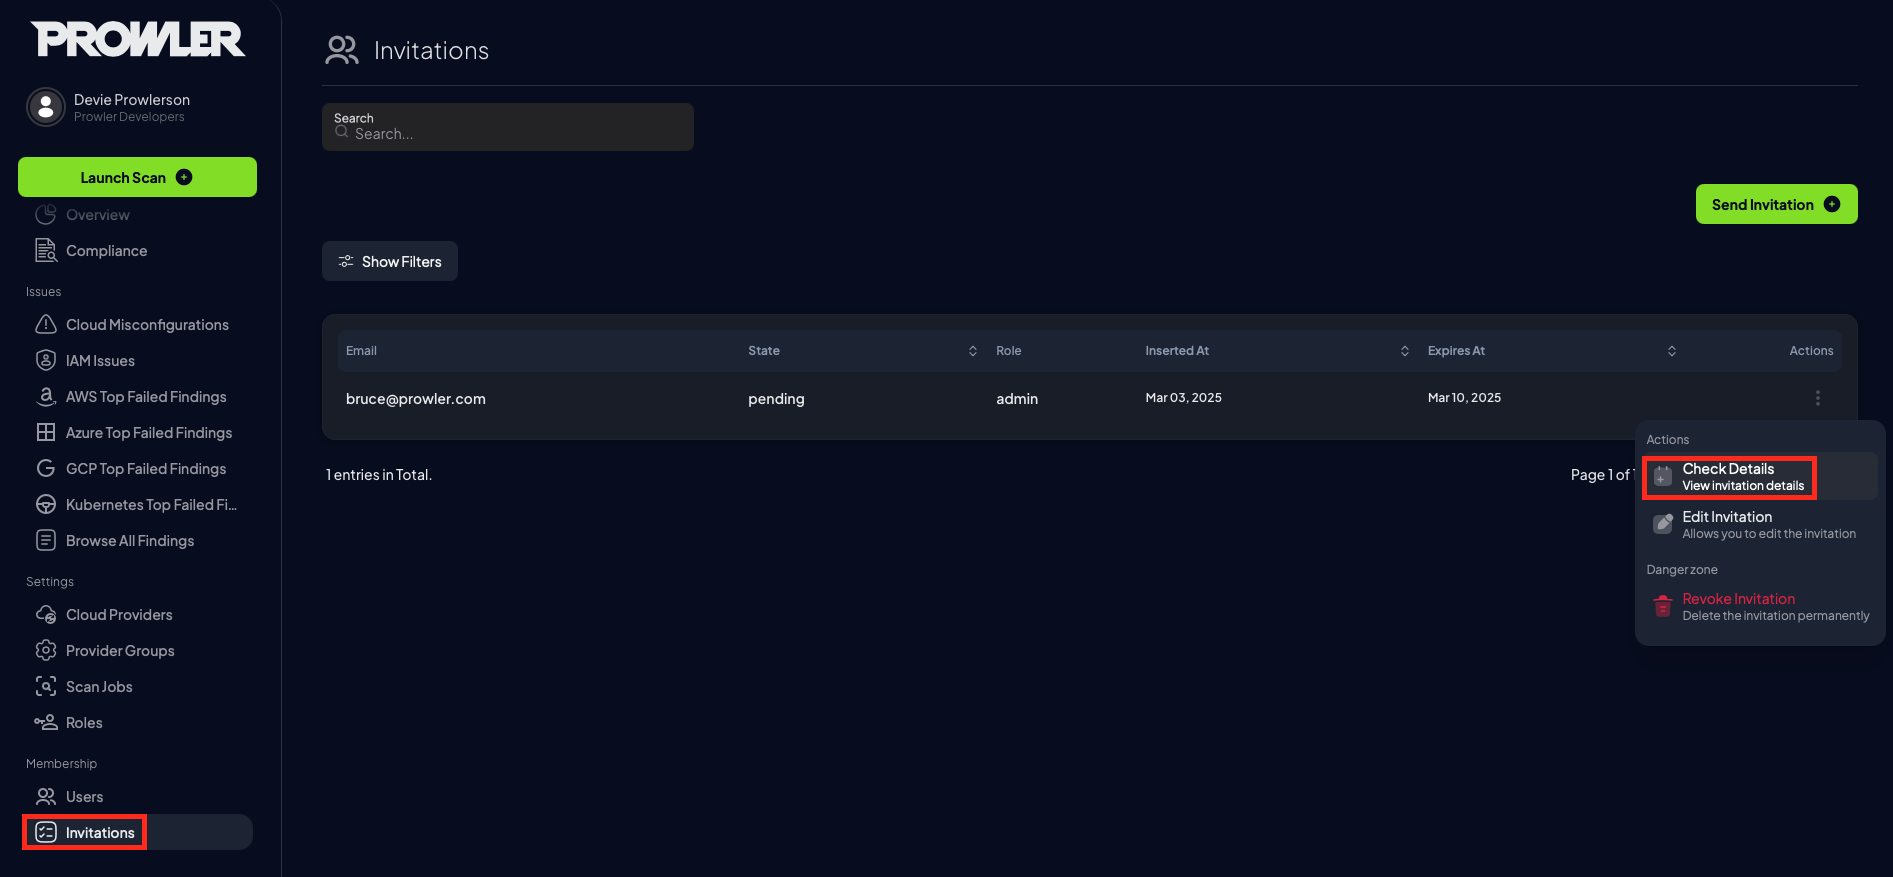
After clicking you will see a summary of the status of the invitation. You could access this view again from the invitation menu.
-
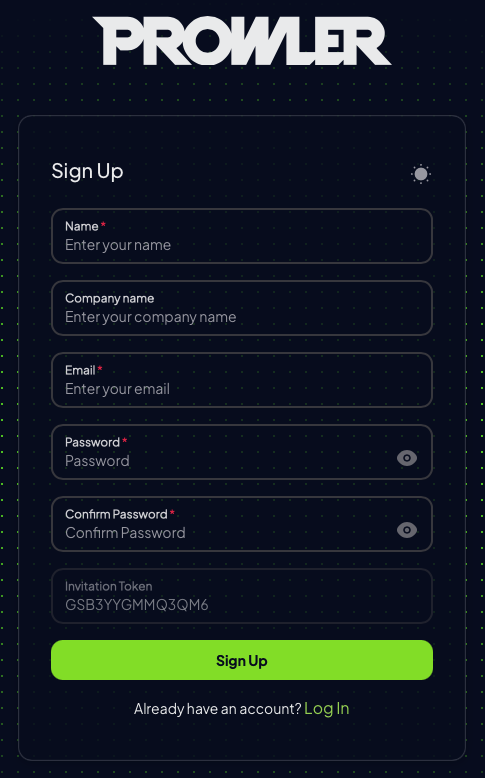
To allow the user to join your Prowler account you will need to share the link with the user. They will only need to access this URL and follow the steps to create a user and complete their registration. Note: Invitations will expire after 7 days.
Note
If you are a Prowler Cloud user, the invited user will receive an email with the link to accept the invitation.
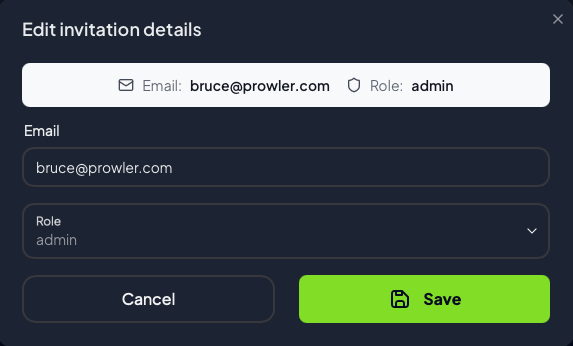
Editing Invitation
Follow these steps to edit an invitation:
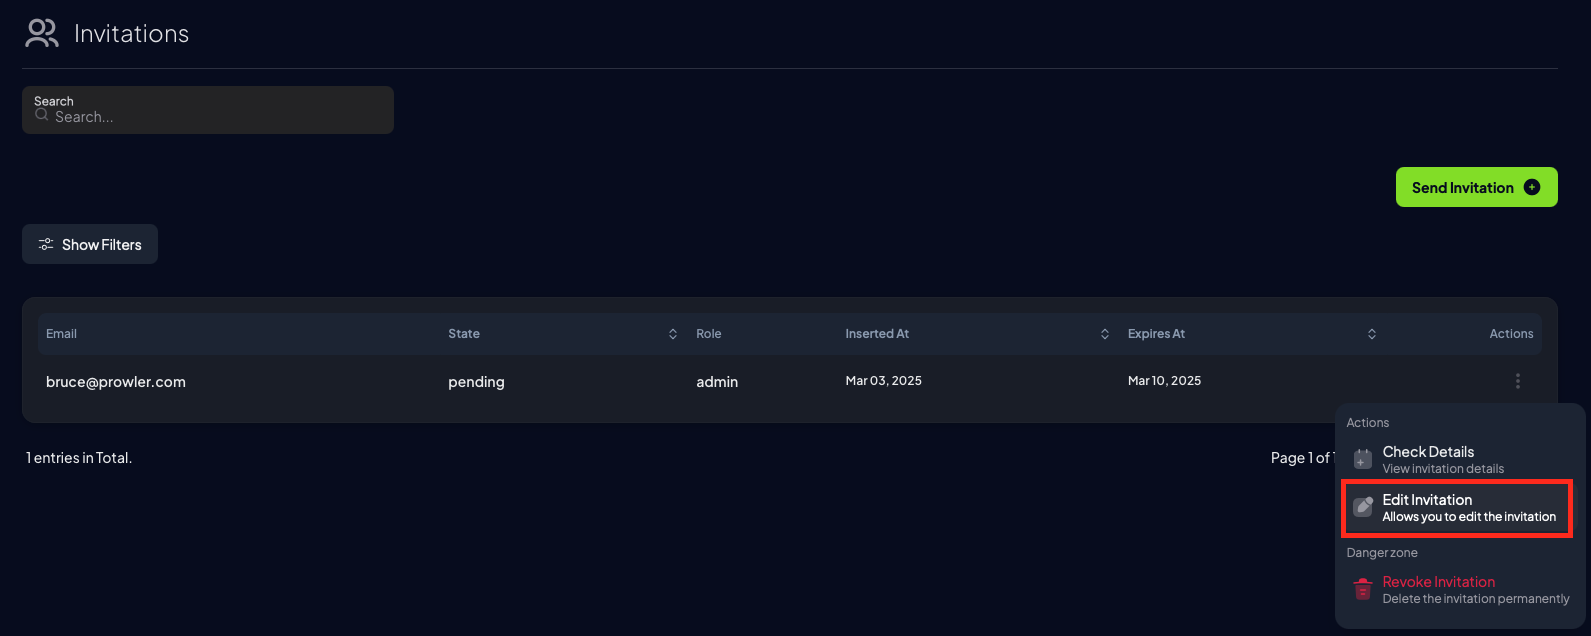
- Navigate to Invitations from the side menu.
-
Click on the edit button of the invitation and modify the email, the role or both. Note: Editing an invitation will not reset its expiration time.
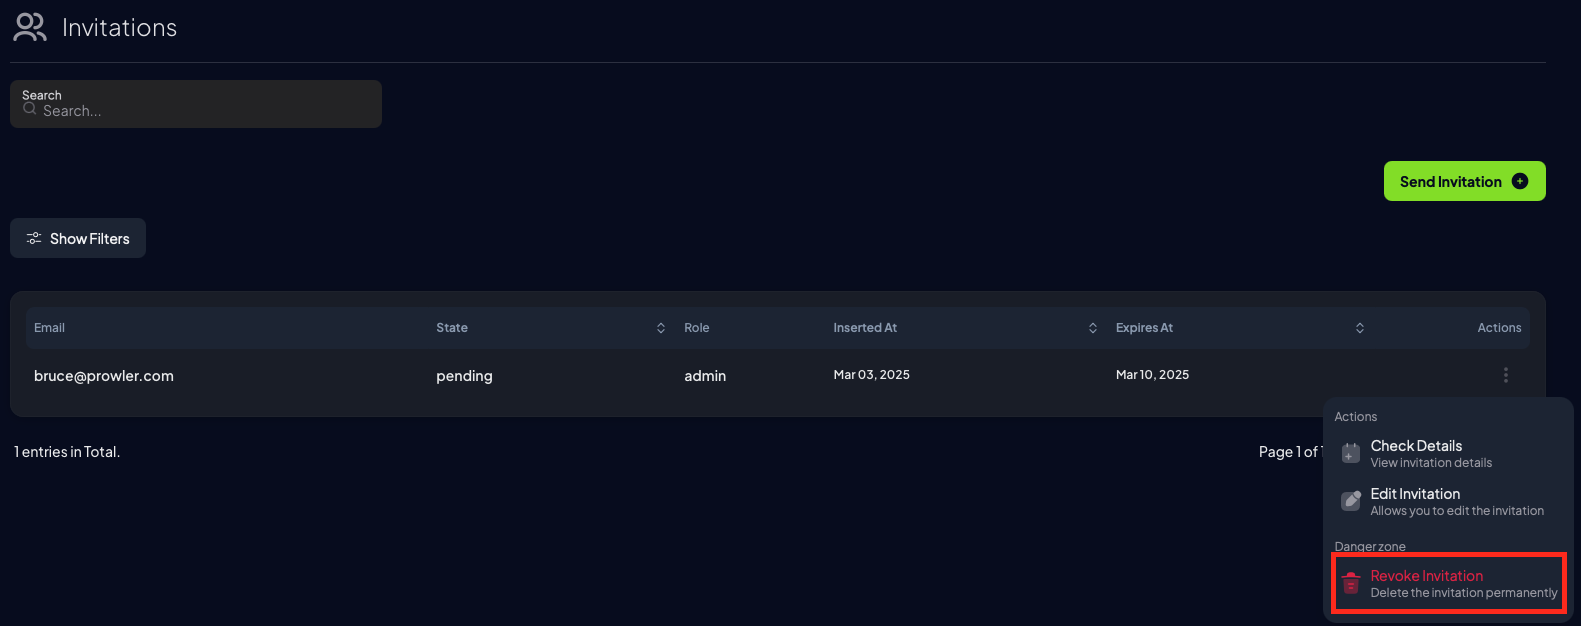
Cancelling Invitation
Follow these steps to cancel an invitation:
- Navigate to Invitations from the side menu.
-
Click on the revoke button of the invitation.
Sending Invitation Again
To resend the invitation to the user it is necessary to explicitly delete the previous invitation and create a new invitation.
Managing Groups and Roles
The Roles section in Prowler is designed to facilitate the assignment of custom user privileges. This section allows administrators to define roles with specific permissions for Prowler administrative tasks and Account visibility.
Note
Only users that have the Manage Account or admin permission can access this section.
Provider Groups
Provider Groups control visibility across specific providers. When creating a new role, you can assign specific groups to define their Cloud Provider visibility. This ensures that users with that role have access only to the Cloud Providers that are required.
By default, a new user role does not have visibility into any group.
Alternatively, to grant the role unlimited visibility across all providers, check the Grant Unlimited Visibility checkbox.
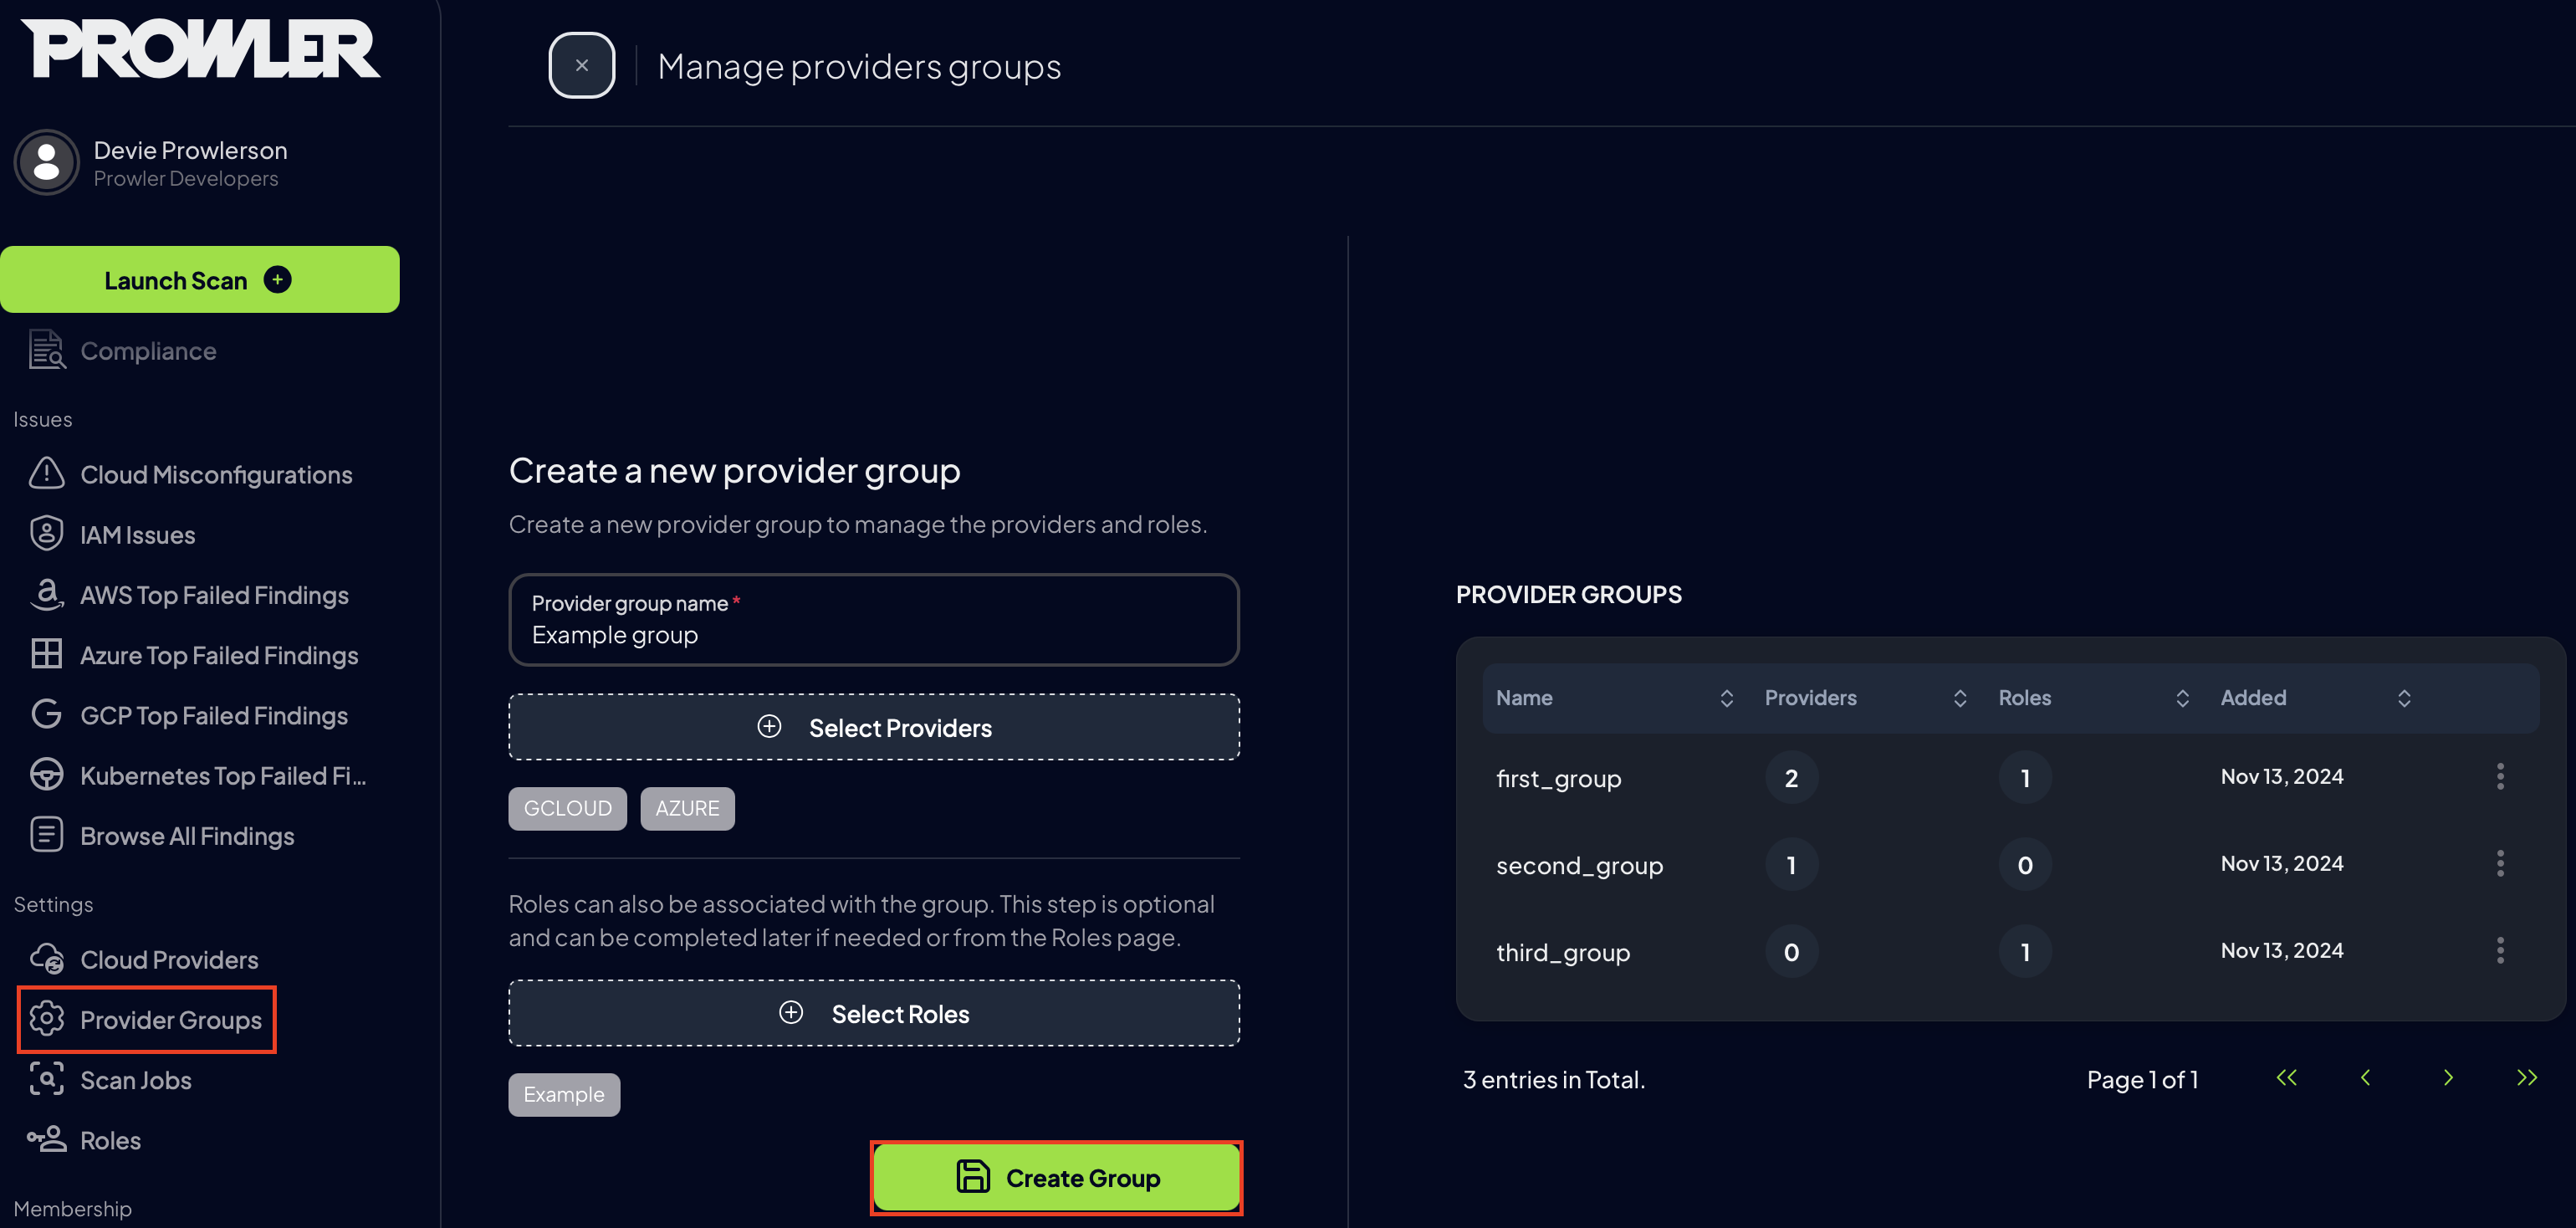
Creating a Provider Group
Follow these steps to create a provider group in your account:
-
- Navigate to Provider Groups from the side menu..
- In this view you can select the provider groups you want to assign to one or more roles.
-
Click on the Create Group button on the center of the screen.
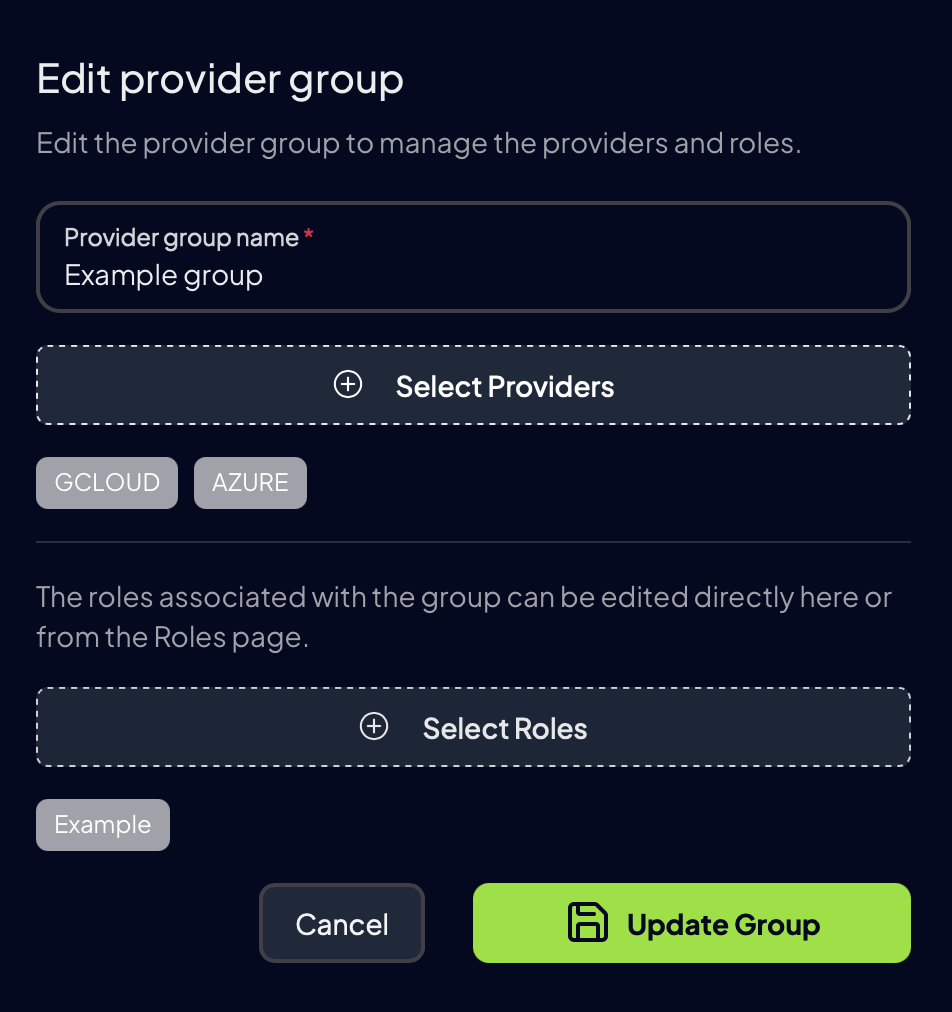
Editing a Provider Group
Follow these steps to edit a provider group on your account:
-
- Navigate to Provider Groups from the side menu..
-
Click on the edit button of the provider group you want to modify.
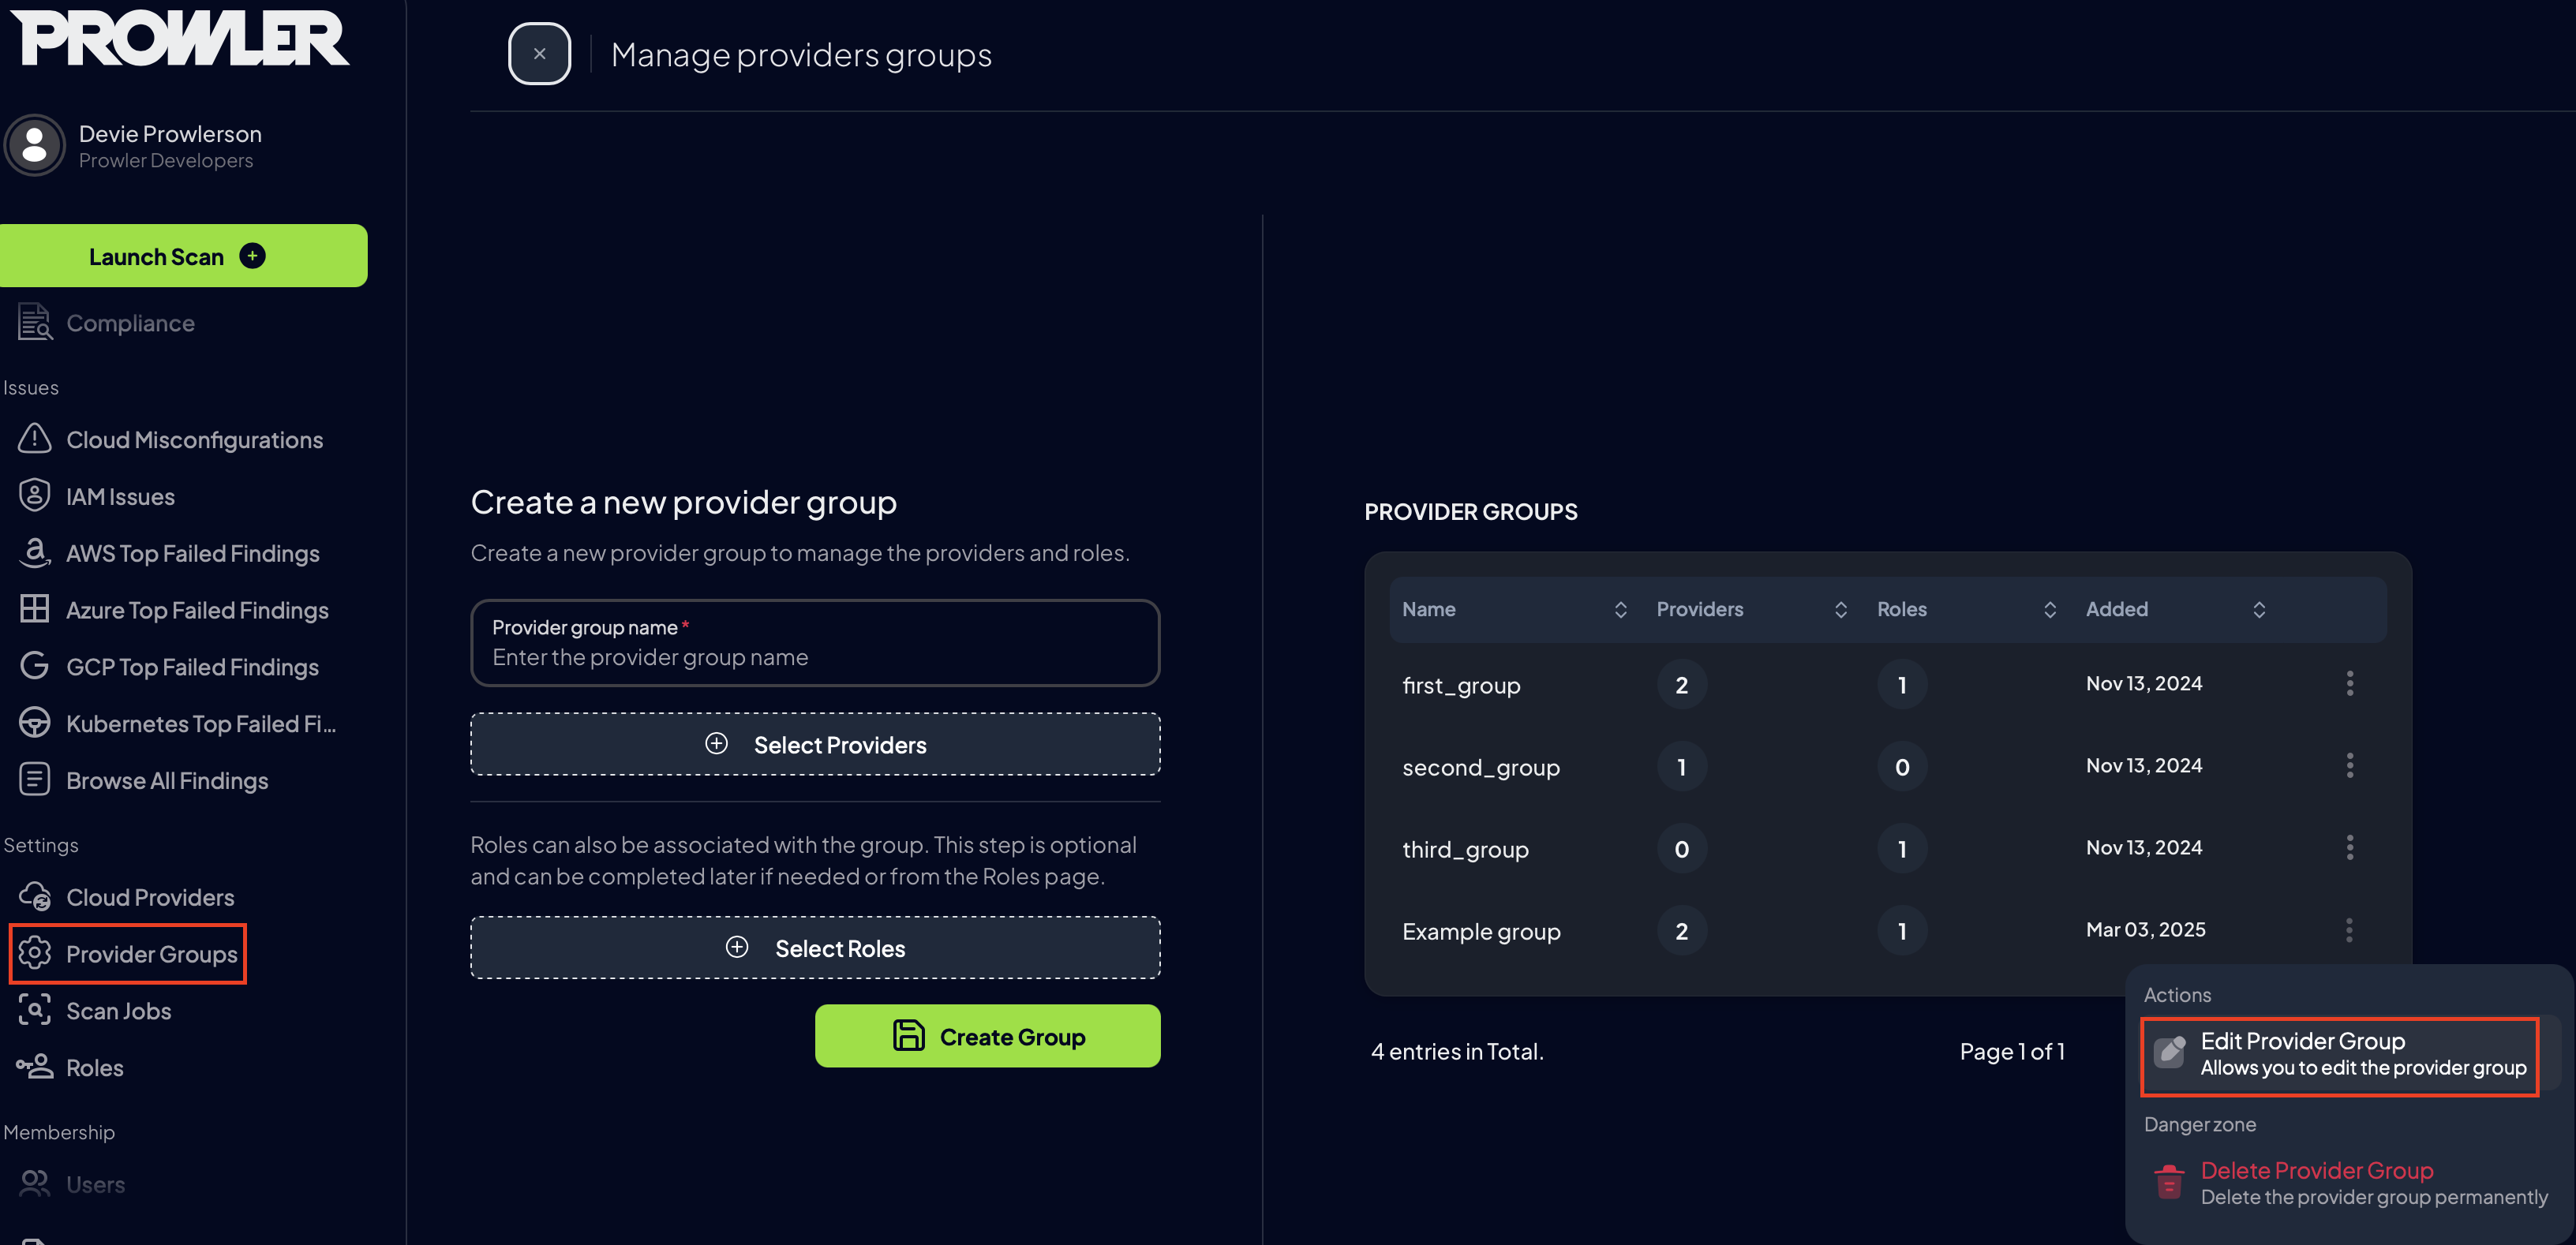
-
Change the provider group parameters you need and save the changes.
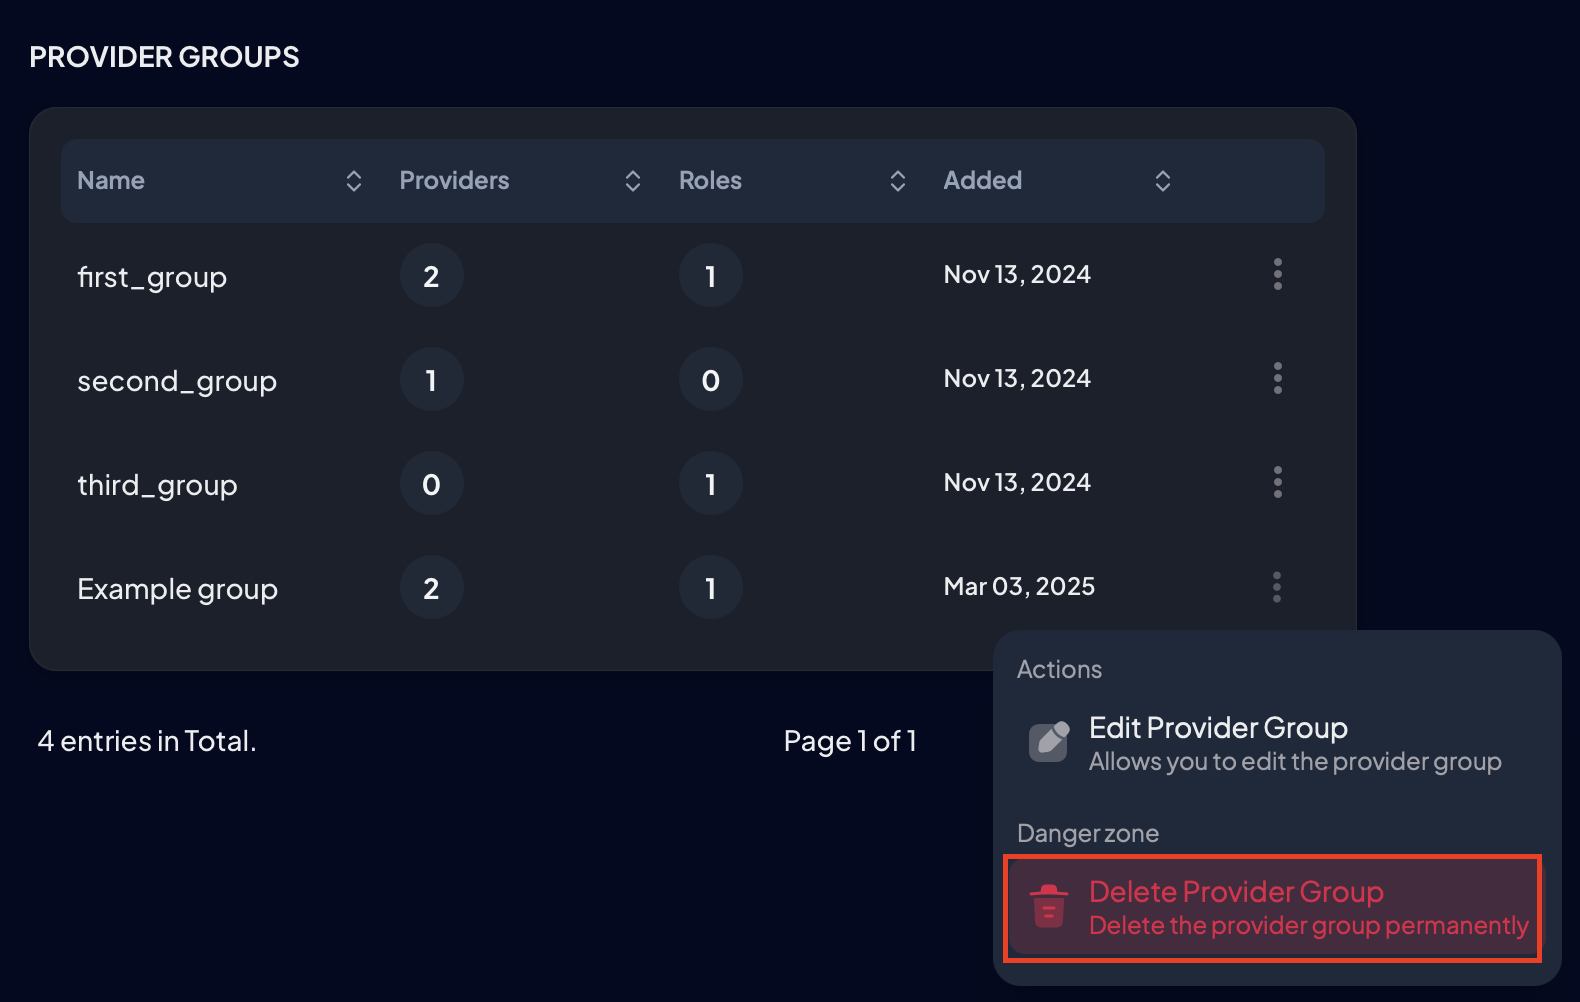
Removing a Provider Group
Follow these steps to remove a provider group of your account:
-
- Navigate to Provider Groups from the side menu..
-
Click on the delete button of the provider group you want to remove.
Roles
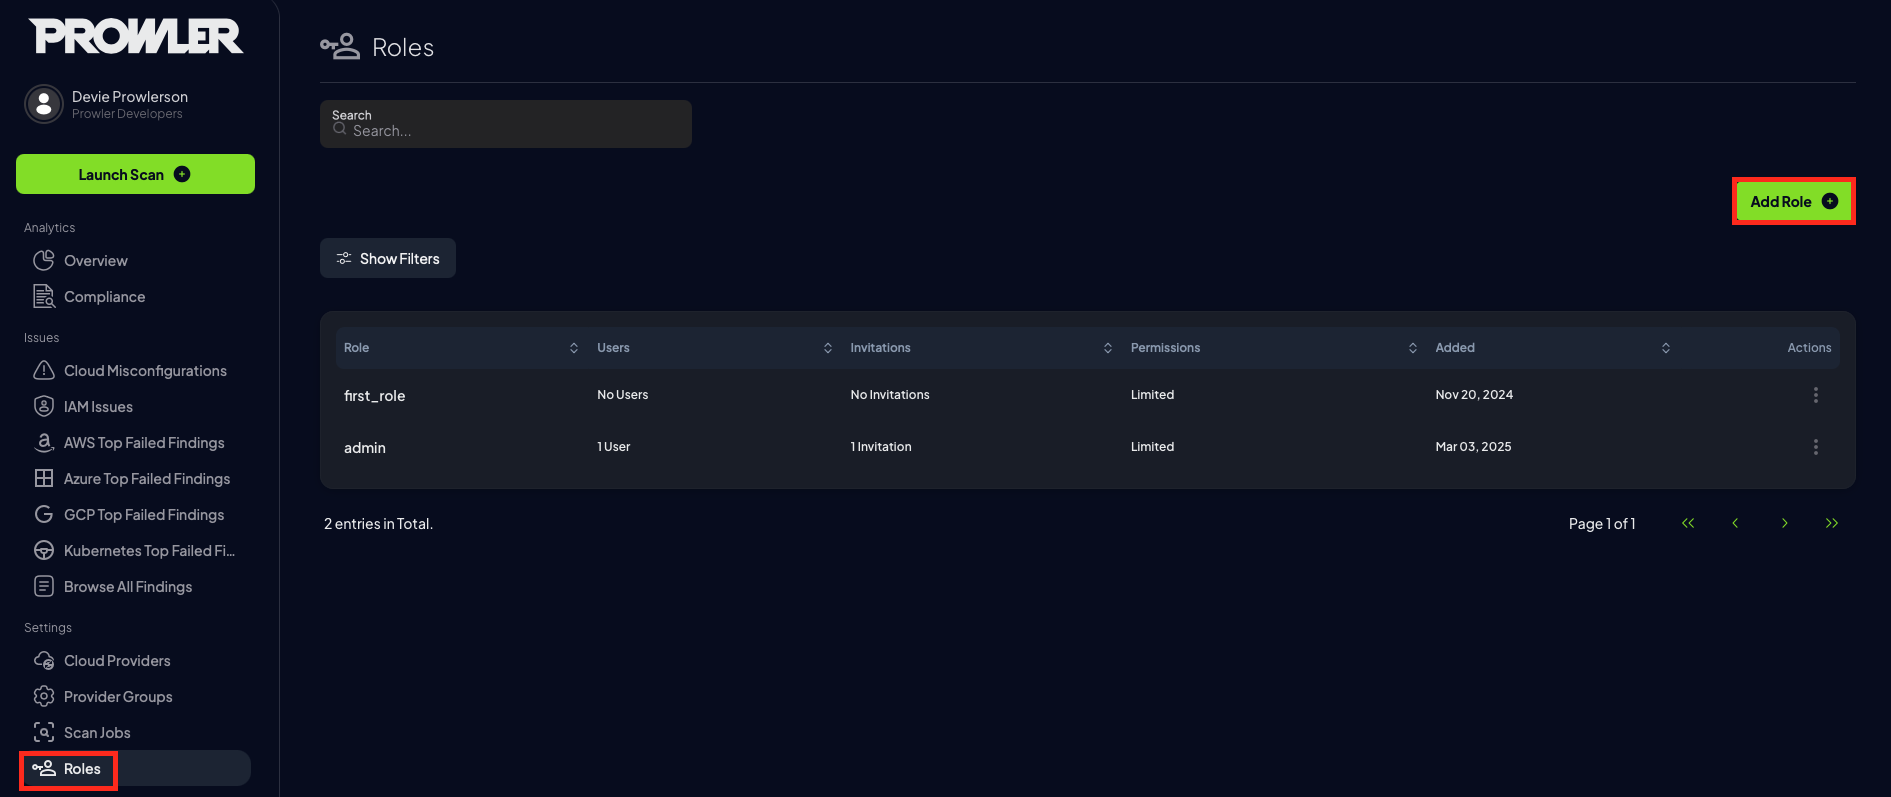
Creating a Role
Follow these steps to create a role for your account:
- Navigate to Roles from the side menu.
-
Click on the Add Role button on the top right-hand corner of the screen.
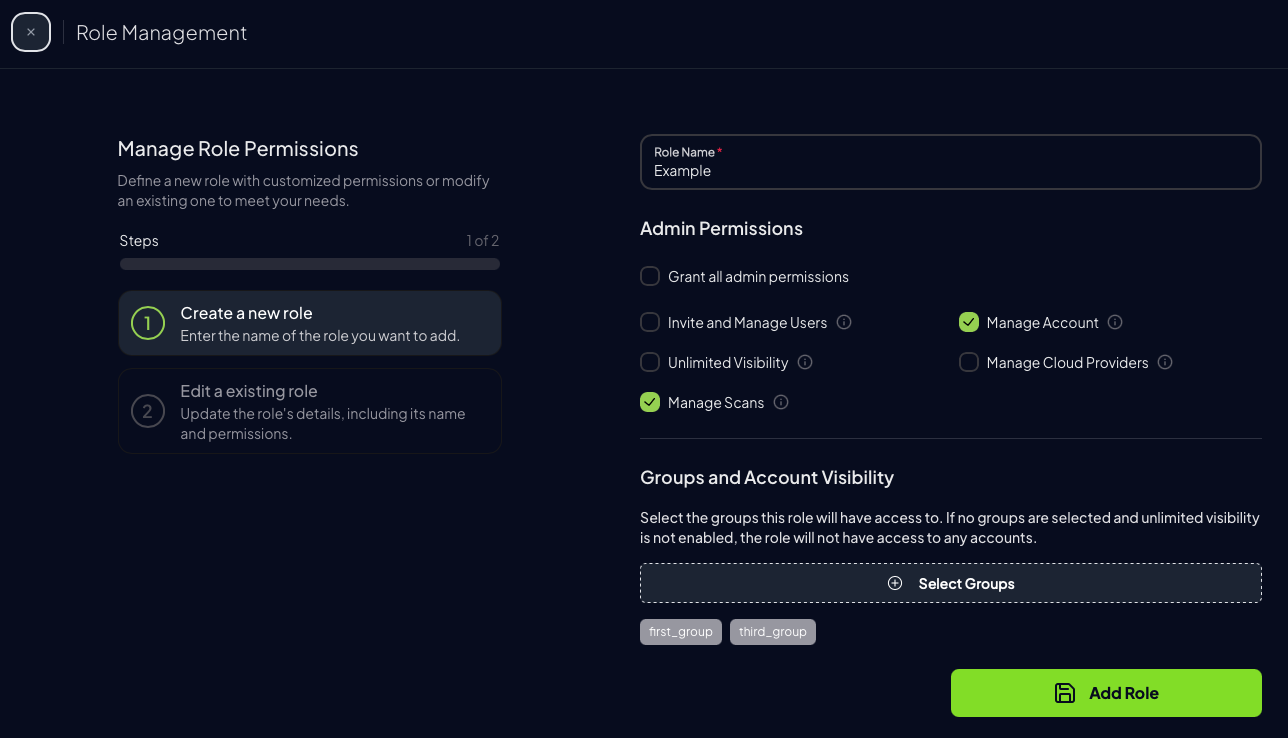
-
In the Add Role screen, enter the role name, the administration permissions and the groups of providers to which the Role will have access to.
-
In the Groups and Account Visibility section, you will see a list of available groups with checkboxes next to them. To assign a group to the user role, simply click the checkbox next to the group name. If you need to assign multiple groups, repeat the process for each group you wish to add.
Note
To assign read-only access, select only the Unlimited Visibility permission when creating the role. Then, go to the Users page and assign this role to the appropriate user.
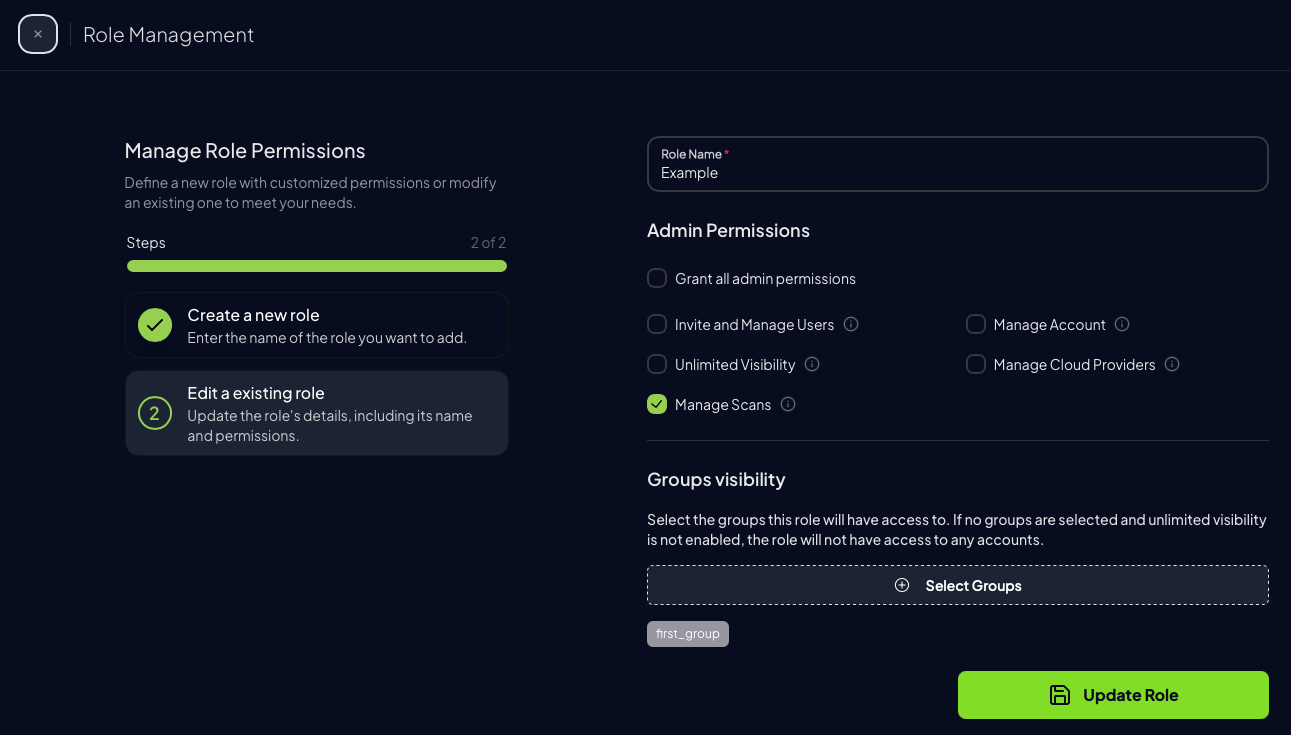
Editing a Role
Follow these steps to edit a role on your account:
- Navigate to Roles from the side menu.
-
Click on the edit button of the role you want to modify.
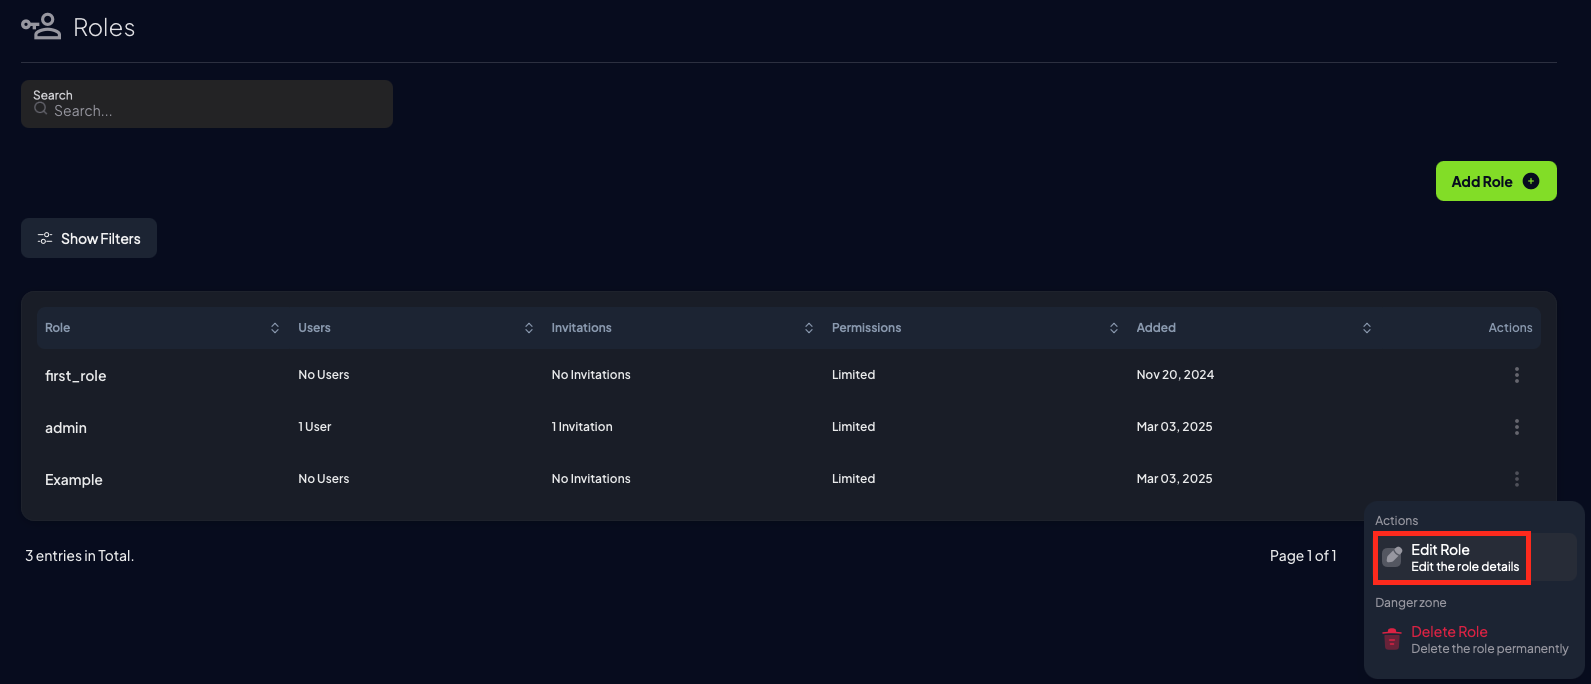
-
Adjust the settings as needed and save the changes.
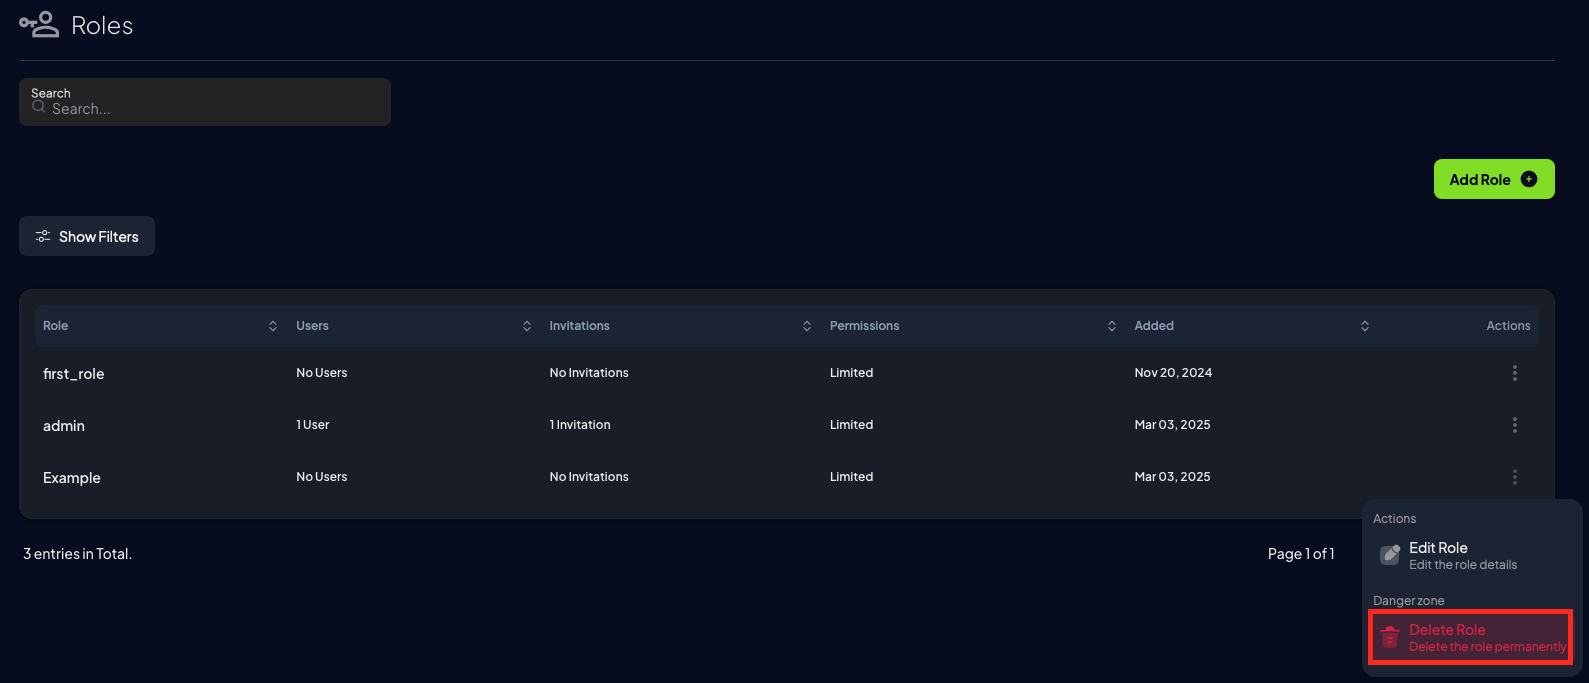
Removing a Role
Follow these steps to remove a role of your account:
- Navigate to Roles from the side menu.
-
Click on the delete button of the role you want to remove.
RBAC Administrative Permissions
Assign administrative permissions by selecting from the following options:
Invite and Manage Users: Invite new users and manage existing ones.
Manage Account: Adjust account settings and delete users.
Manage Scans: Run and review scans.
Manage Cloud Providers: Add or modify connected cloud providers.
Manage Integrations: Add or modify the Prowler Integrations.
To grant all administrative permissions, select the Grant all admin permissions option.